Learn how to replace a thermostat and test the air conditioner to make sure the thermostat is broken.
OUR SUPPLIES TO REPLACE A THERMOSTAT
screwdriver
wire strippers
18 gauge wire
wire nut
Honeywell RTH6580WF Wi-Fi Thermostat
*This post contains an affiliate link. You can read our disclosure policy here.
When you live somewhere for several years your home becomes the setting of many stories and memories. If you are like us, sometimes a house even gets a few stories of its own. There are many running jokes between Courtney and I referring to peculiar things about our home.
First there is Walter the friendly ghost who receives AARP magazines and is always leaving the garage door open and the toilet seat up. Then there was Henry, the friendly red bird that peacefully eats bird food outside while telepathically communicating with our cat Jake. And, we must not forget the monster that lives in our laundry room that eats socks. It is still up in the air if the sock monster prefers clean or dirty socks.
We are well aware that each of the previously mentioned stories are mostly fictional but one thing we are sure of is that inevitably the hamsters that turn the big wheel in the air-conditioner always go on strike when the weather turns hot.
Last year, the first week the weather got above 90 degrees we caved and called the repair man when the inside of our house finally reach 85 degrees. After spending a small fortune to replace all the A/C components in the attic, we slept easy all summer in our cool house. But, wouldn’t you know the first weekend it heated up this year the temperature slowly climbed in our house but our A/C would not kick on.
Determined to not spend a fortune again this year, I set out to figure out how to fix it myself. (spoiler alert) After a late night we were able to fix the A/C problem ourselves because luckily it was due to the thermostat and not the air conditioner itself. Below is how we tested our thermostat and compressor to determine which one was causing the air conditioning system to fail.
How to Replace a Thermostat Video
In the video below I will show how to test to see if it is in fact the thermostat that is not working and then the steps to replacing a thermostat.
To see a new DIY tutorial video every Thursday, subscribe to our channel ⇾
We chose to replace our thermostat with a Honeywell WiFi thermostat because this will allow us to control the thermostat from anywhere and eventually incorporate it into a smart home system. Plus, this is the least expensive smart thermostat costing only $87.99.
1. Test the Thermostat
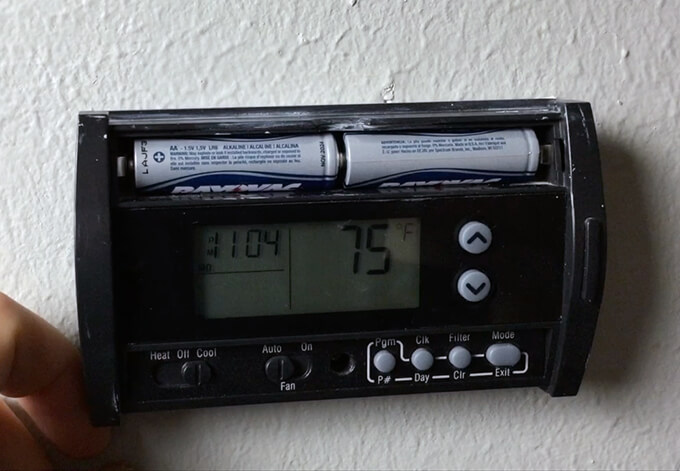
The first thing we did was change the batteries to double check that the batteries weren’t the issue. After changing the batteries we turned the temperature down to see if the compressor would turn on but nothing happened.
Once we tried the cool mode, we flipped the switch on the thermostat to heat and turned the temperature up. Once on heat mode, the heat kicked on. Because the thermostat was able to turn on the heat, we couldn’t be confident that the thermostat was broken. There was a chance that something was wrong with the compressor.
The next step was to check if the A/C could be hardwired on, bypassing the thermostat. If hard-wiring the A/C on worked we would know the thermostat needs to be replaced.
2. Test the Compressor
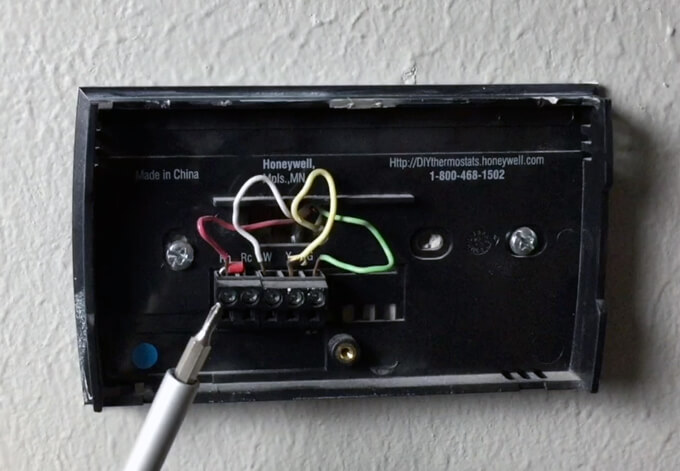
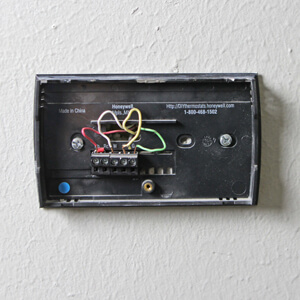
Once the thermostat is removed from the wall there should be several colored wires exposed.
Red Wire: Power (24 volt)
White Wire: Heater
Yellow Wire: Compressor
Green Wire: Fan
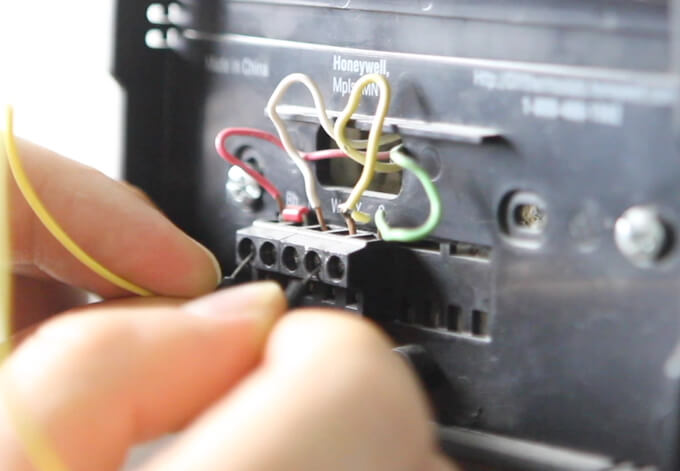
By using a wire to connect the red wire to the yellow wire the compressor should turn on. If the compressor does not turn on than the problem is the compressor not the thermostat. In our case the compressor did turn on, indicating that the thermostat was not working.
(The red wire should only be 24 volts but it can still create a small shock)
3. Turn Off Breaker
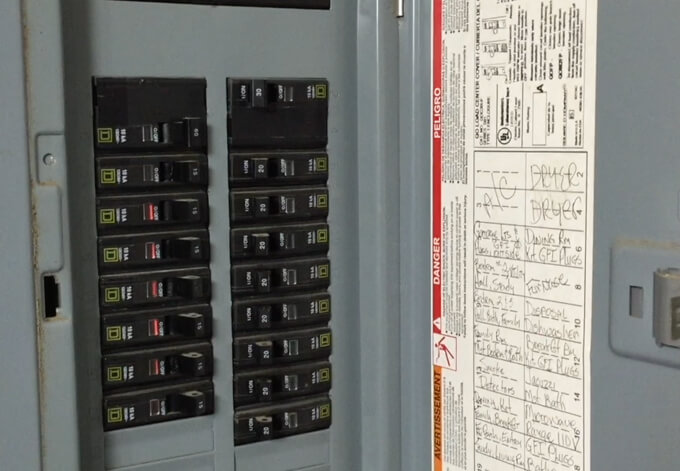
Although the 24 volt power line doesn’t pose any huge safety concerns, it is good practice to always turn the breaker off before disconnecting any wires. The two breakers to turn off are labeled A/C and furnace in our house.
4. Check the Wires
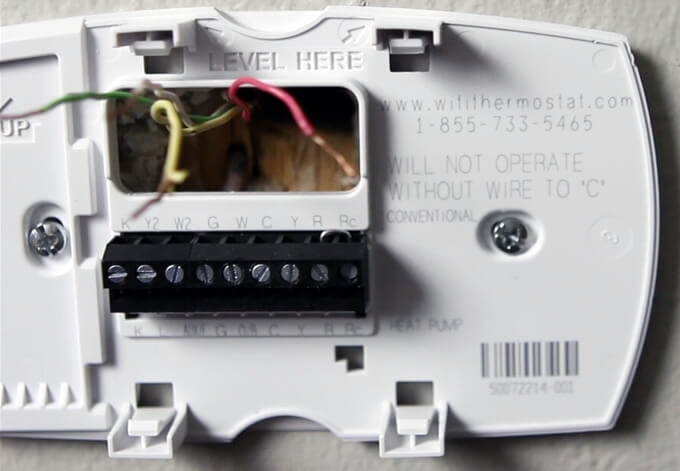
After installing the new thermostat back plate we realized the new Honeywell WiFi thermostat needs a 5th wire, the “C” wire. In hindsight this is a good thing to check when purchasing a new thermostat although it is getting harder to find thermostats that don’t need a “C” wire.
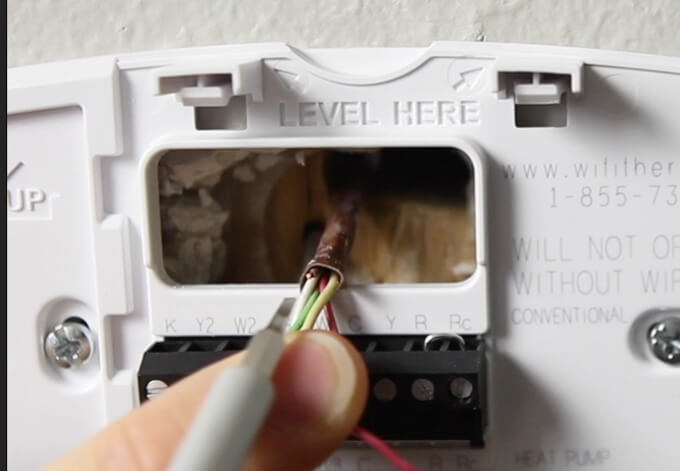
Luckily, we were able to locate the 5th wire. It was snipped off because it was not needed for the old thermostat. We were able to pull the the wire out from inside the wall and strip the wire making it usable.
5. Hook Up the Thermostat
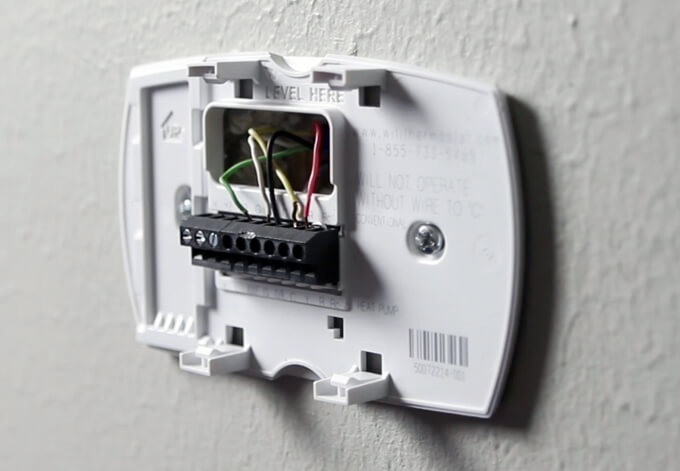
Each color wire connects to the screw terminal with the matching initial.
Green Wire to G
White wire to W
Red Wire to R
Yellow Wire to Y
With all the wires connected, we popped on the front of the thermostat and turned the breakers back on. The nice thing about replacing the thermostat with a “C” wire thermostat is there are no batteries required.
We have our fingers crossed that this is the extent of our Spring air conditioner problems. At least next year the troubleshooting will be easier because there is only one component left in our air conditioning system that has not been replaced.