
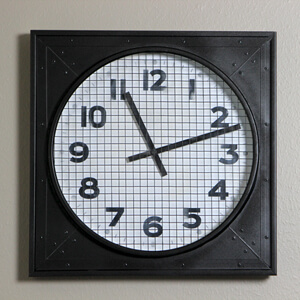
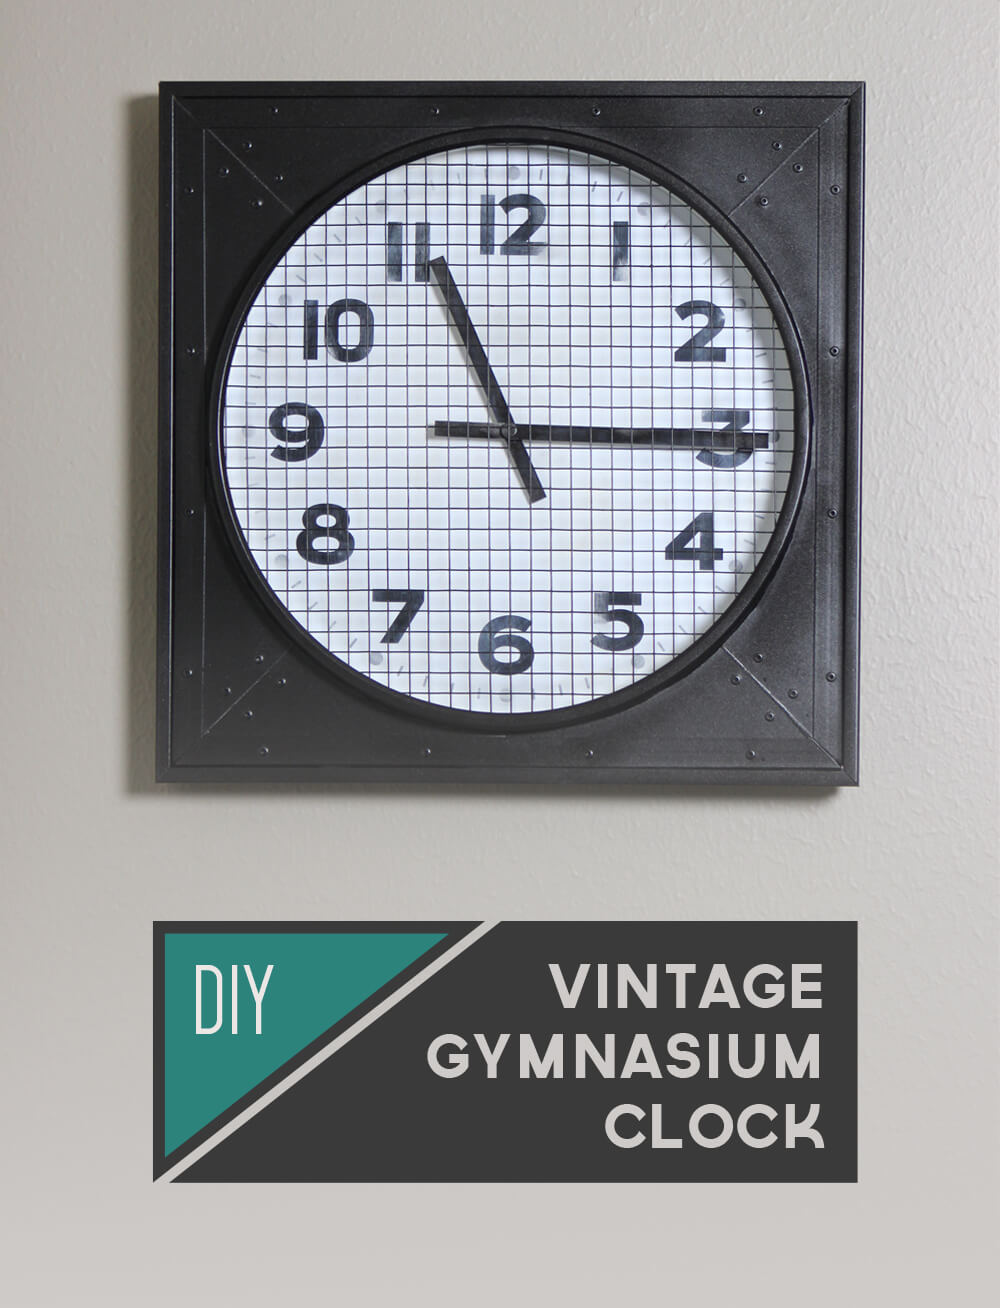
For this knockoff project we created our own DIY vintage gymnasium clock based on the Restoration Hardware 1940s Gymnasium Clock for our home gym.
This weekend we completed another DIY project for our home gym makeover and it turned out awesome. We wanted to see if we could turn back time and if we could find a way… to make a brand new modern clock look like a vintage gymnasium clock. The style we are going for in our home gym is vintage & industrial so it just made sense to incorporate an old-fashioned gym clock with the metal grill.
DIY KNOCKOFF
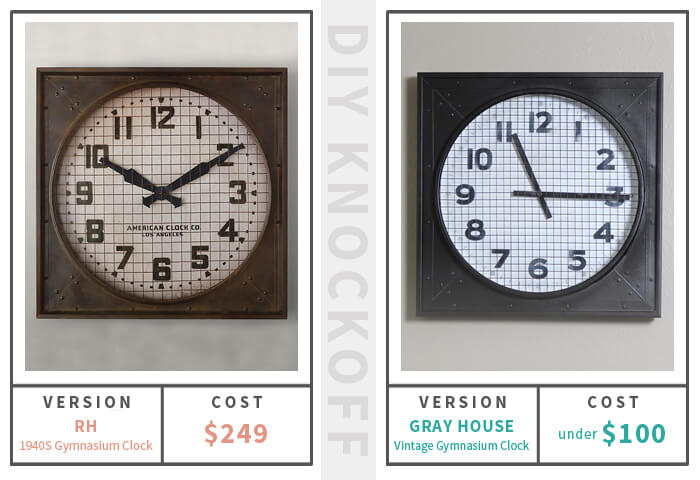
I found some great examples for inspiration but the Restoration Hardware 1940s Gymnasium Clock really hit both the vintage AND industrial look I was looking for perfectly. Brent took one look at it and was very confident we could make our own that looked just like it so I was extremely happy because we are on a budget with this room makeover and I couldn’t bare to hand over $200 for a clock, even if it is a really big, really cool clock.
So we made our own slightly smaller version of theirs using a basic clock. The whole project should have cost us around $80 but we actually got the clock with a gift card we won in a contest. Score! So our whole DIY vintage gymnasium clock project took about a day and cost us around $20. Ah, one less zero sounds so much nicer.
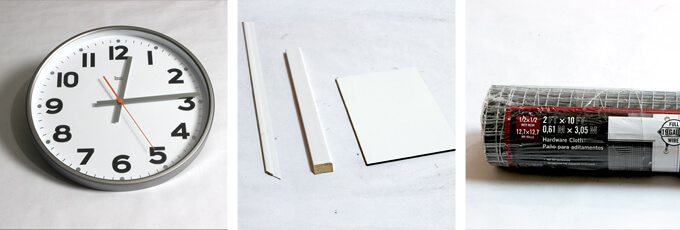
SUPPLIES
- A Plain Wall Clock
- Metallic Satin Oil Rubbed Bronze Spray Paint
- 1/8 x 32-in x 48-in Markerboard Hardboard
- 3/4-in Sequentia Wall Panel Moulding
- 1.125-in x 7-ft Baseboard Moulding
- Silver Galvanized Steel Hardware Cloth
- 1/8-in Aluminum Rivets
- White paint
- Table saw
- Router
- Drill
- Box cutter
- Snips
- 220-Grit Sandpaper
- #0 Steel Wool Pad
- Nail gun and finishing nails
How We Made Our DIY Vintage Gymnasium Clock
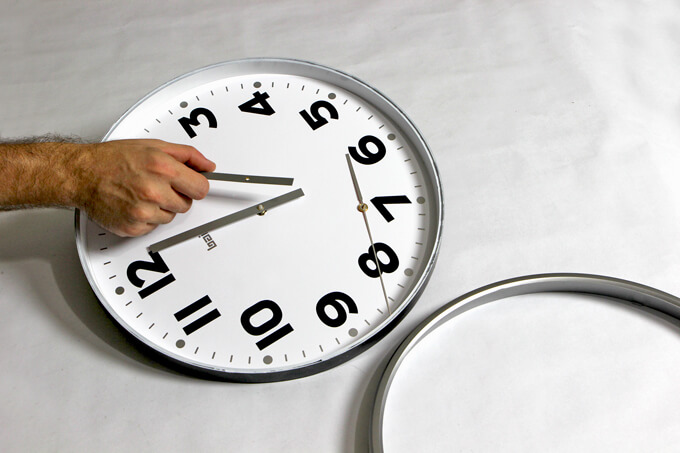
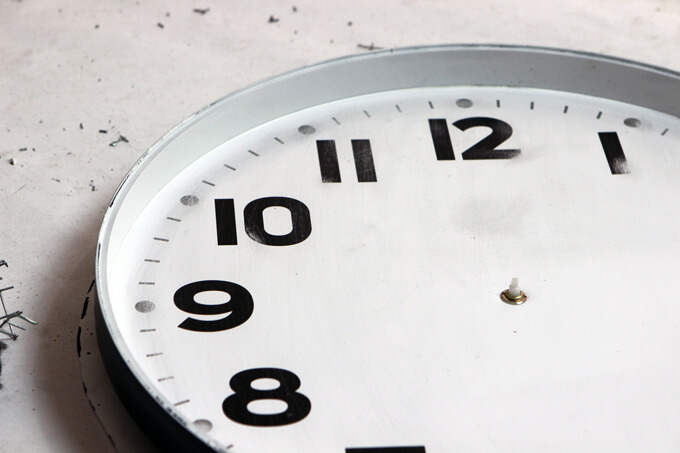
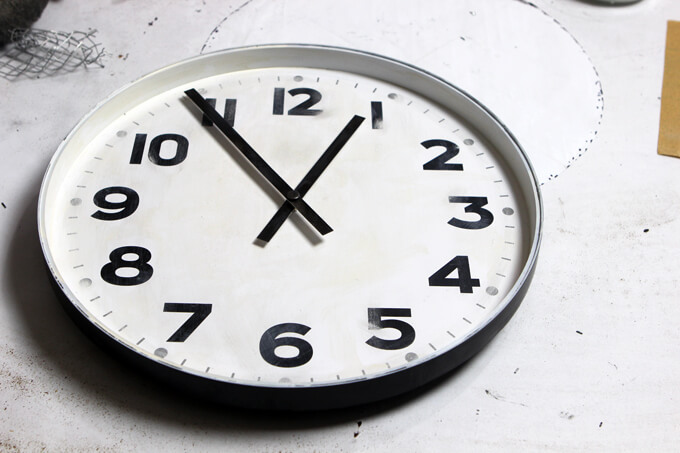
1. The first thing we did was to disassemble the clock. We pulled off the outer rim and piece of glass so we could we remove the hands off the clock by pulling them straight up from where they were connected to the center of the clock. We started with the hand on the top and then moved down one hand at a time.

2. We traced the outer rim of the clock onto a large piece of paper and cut it out to use as a template. We set it aside for when we were ready to use it.
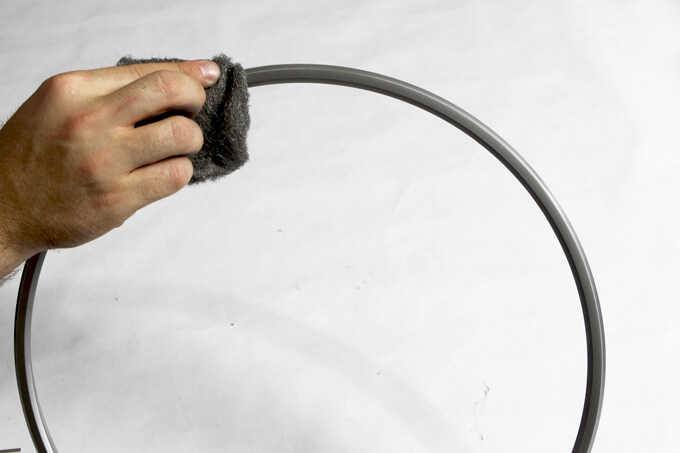
3. Next, we sanded the rim and the hands of the clock with a #0 steel wool pad to provide a rough texture for the spray paint to adhere to. We used steel wool because it leaves small enough scratches that the paint finish will still be smooth. The scratches left by sandpaper can be seen through the paint.
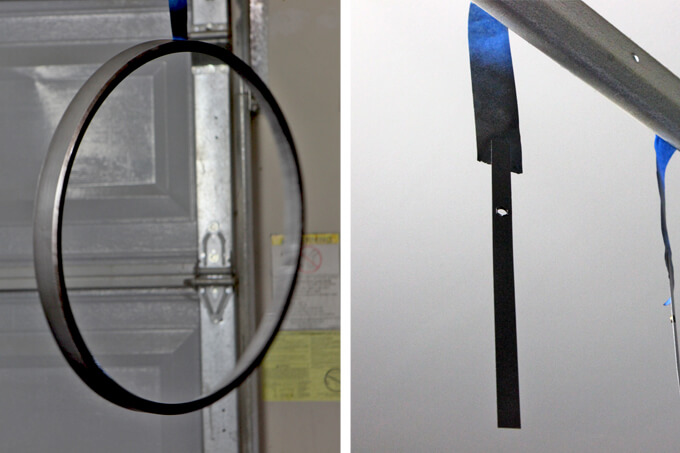
4. We spray painted the pieces we removed from the clock (the outer rim and the hands) with metallic satin oil rubbed bronze spray paint and hung them to dry so they would be out of our way.
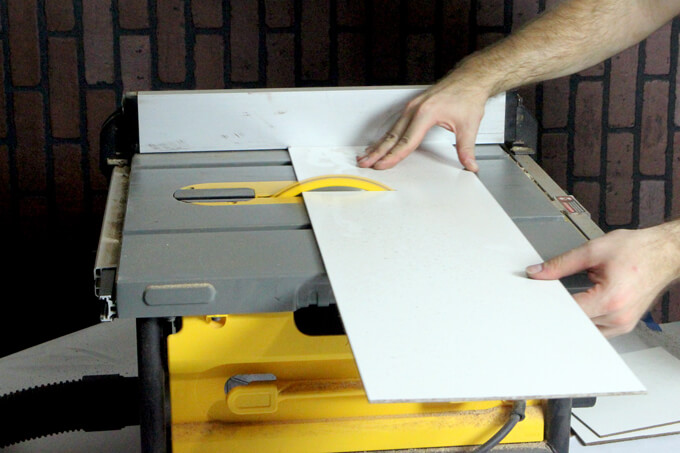
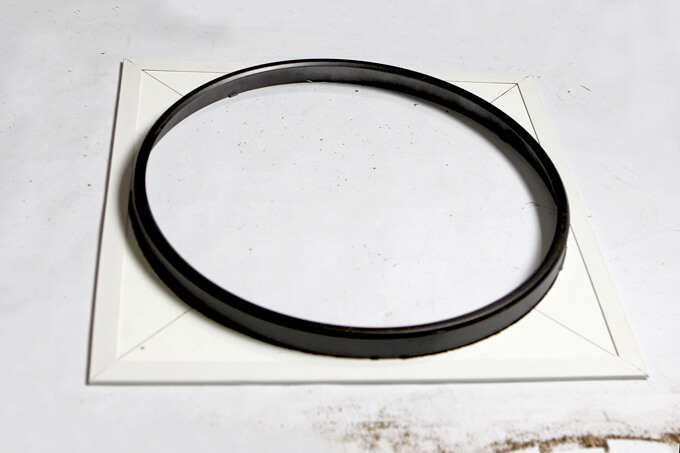
5 Then we cut the piece of hardboard down to the size of the square we needed to fit our clock. The square we cut was an inch and a half wider than the diameter of the clock. That gave us a 3/4 inch border around the clock, which is the same size as the moulding we were going to use.
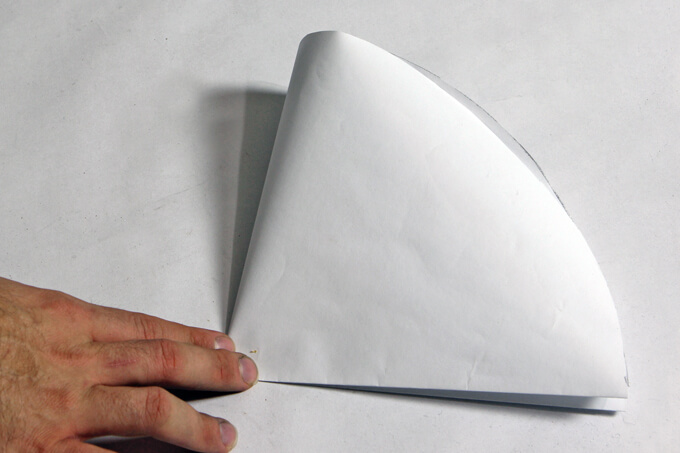
6. We took our paper template of the clock and folded it in quarters to get the radius of the circle, which was the length we needed to set up our router jig.
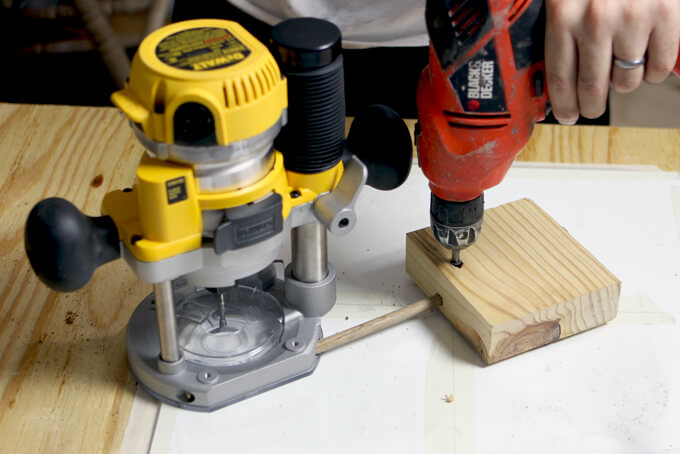
7. We cut a circle out of the square piece of hardboard with a router by attaching a scrap block of wood to the router base so it could rotate around a central point. We used the paper template to measure from the center point where we screwed into the board to the outside of the router bit.
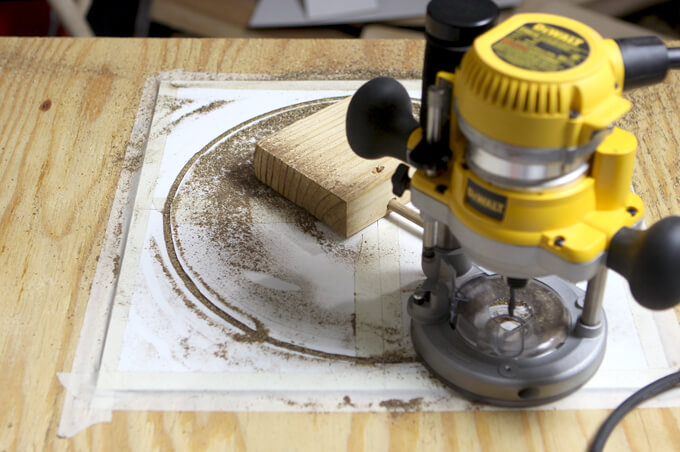
8. Once we had it set up, we turned the router on and plunged it into the board and rotated it until we completed our circle. We made sure we had a scrap board under the actual board we were cutting to protect our work surface and provide thicker material to secure the central screw.
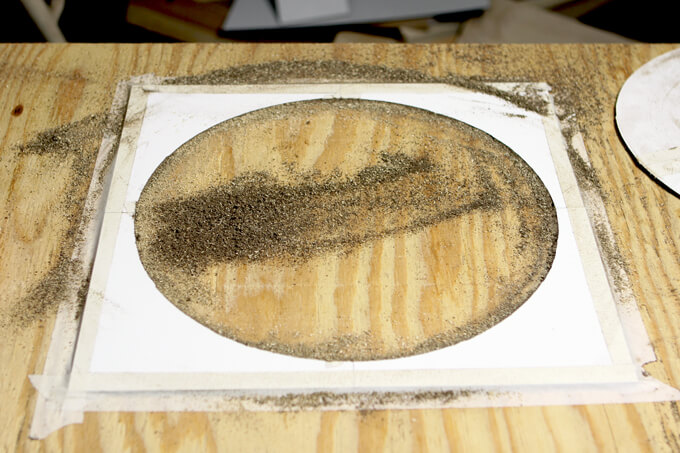
9. Once we were done with our circle we had a nice cutout where our clock would fit.
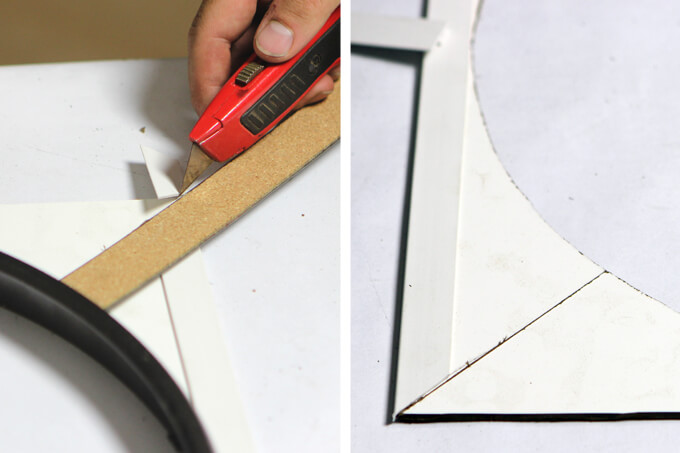
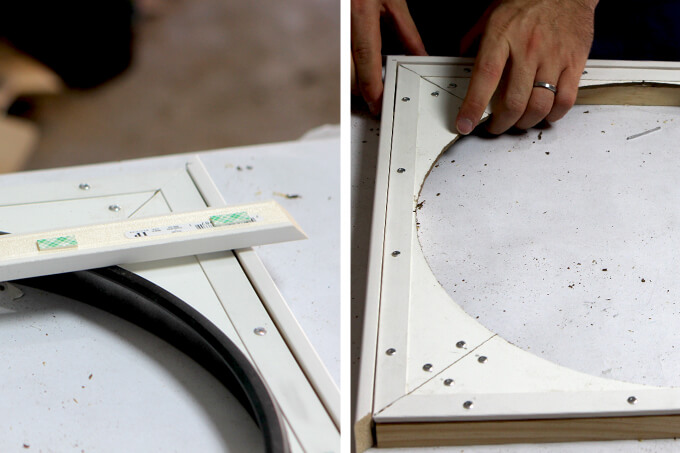
10. After attaching the 3/4 inch wall panel moulding over the rim of the hardboard, we took a straight edge and a box cutter and scored the board and the moulding at a 45-degree angle. We did this for each corner.
11. Once all the moulding was attached and each corner was scored, it looked like this.
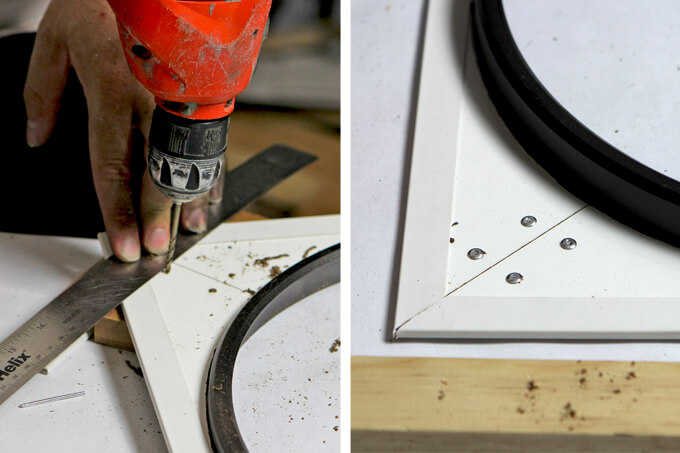
12. We drilled holes where all the rivets would go with a drill bit that matched the size of the rivets. We used 1/8th rivets so we used a 1/8-drill bit. Once we had the holes drilled, we added four rivets to each corner.
13. Then we attached four rivets on each side through our top board into a thicker board behind it to support the outer frame.
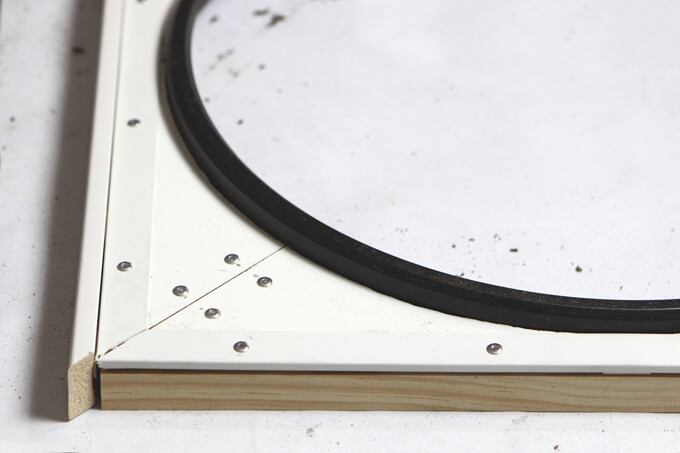
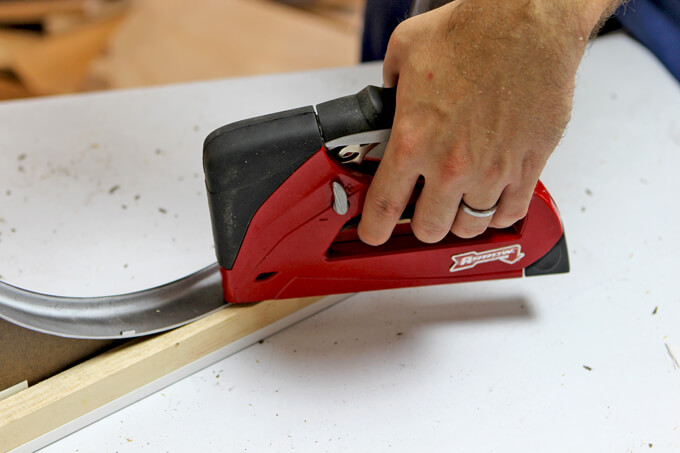
14. We cut the baseboard moulding to frame the outside of the square at 45-degree angles using our miter saw. Then we attached it to the clock frame using mounting tape to hold it in place making it easer to secure it with finishing nails.
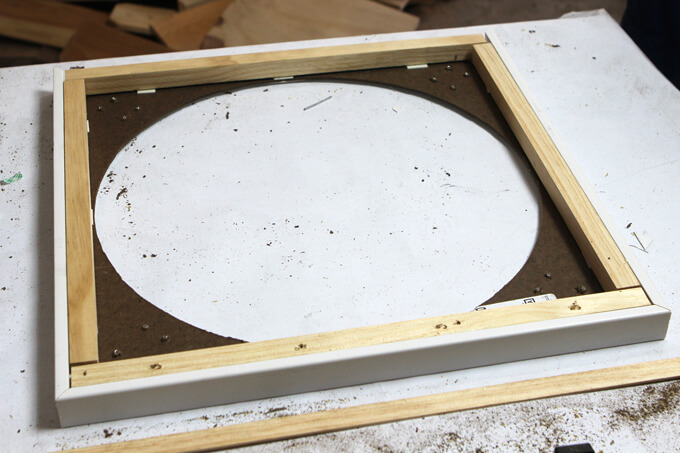
15. This is what the back of our clock frame looked like once we had all the pieces attached.
16. We secured the clock rim that we painted to the new frame we built with finishing nails.
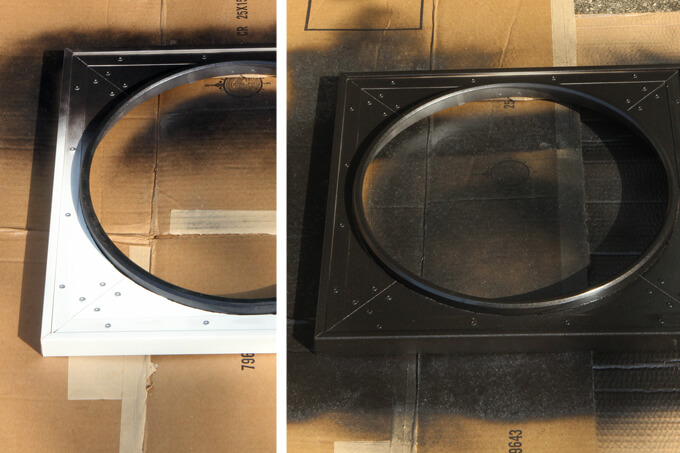
17. After our frame was complete, we spray painted the entire thing with the metallic oil rubbed bronze spray paint. We were pleasantly surprised with how convincing the spray paint made the plastic look like metal.
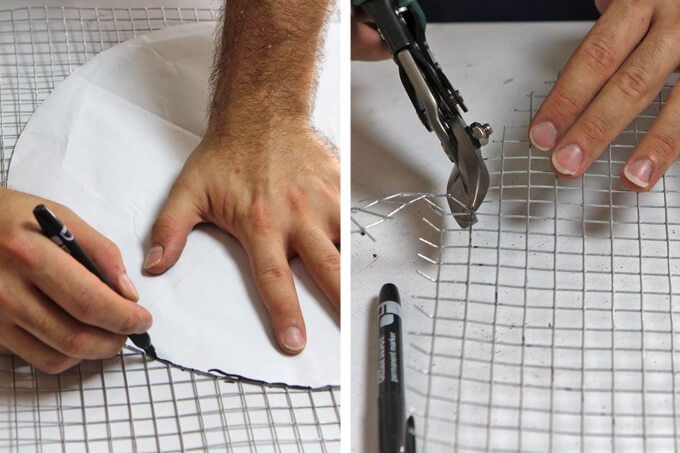
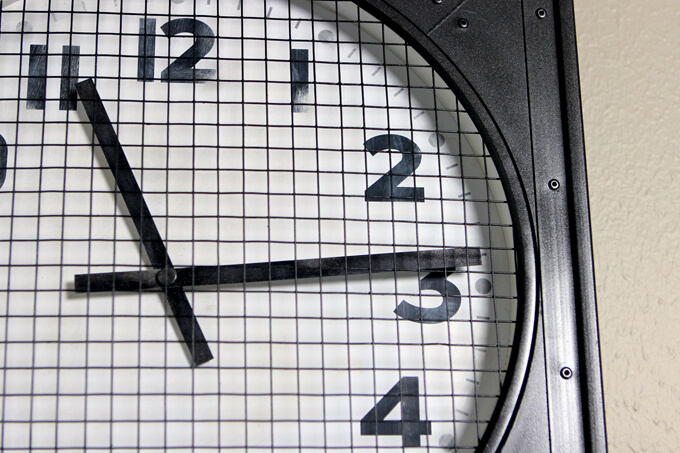
18. We took a piece of galvanized steel hardware cloth and traced an outline of our clock using our paper template and a permanent marker. We used tin snips to cut out the circle.
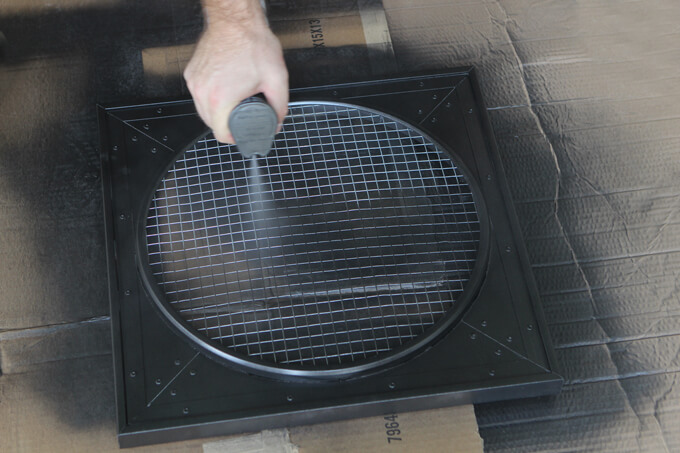
19 We inserted the metal mesh into the clock and spray painted it to match the rest of the frame.
20. We used 220-grit sandpaper to distress areas on the face of the new clock to give it a more vintage aesthetic to match our new frame.
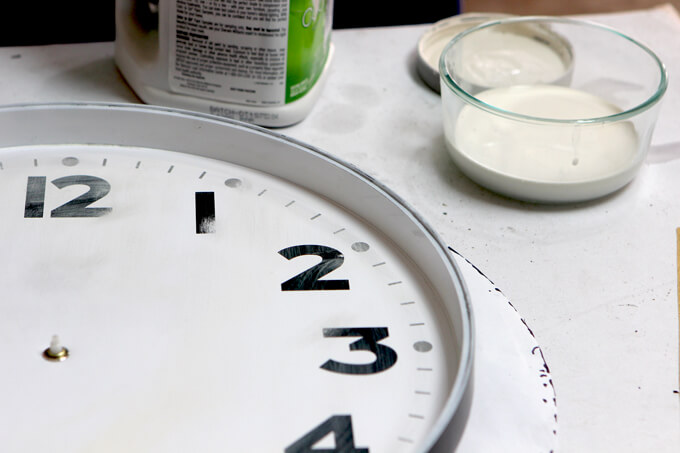
21. We also did a light wash with an off-white paint color to make it look less bright and white and more worn and aged.
22. Then we reassembled the hands on the clock.
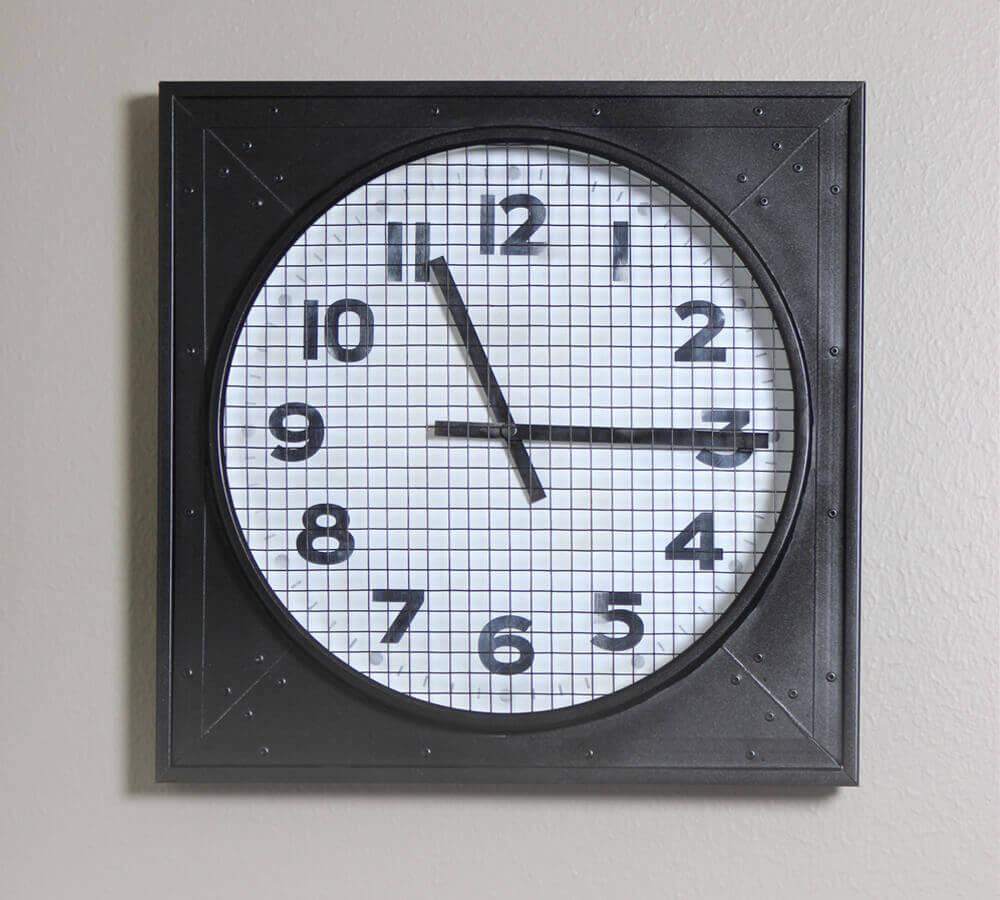
23. Finally we snapped the clock back into the rim. We did not put back the glass because we replaced it with the hardware cloth. Then hung our DIY vintage gymnasium clock up in our gym!
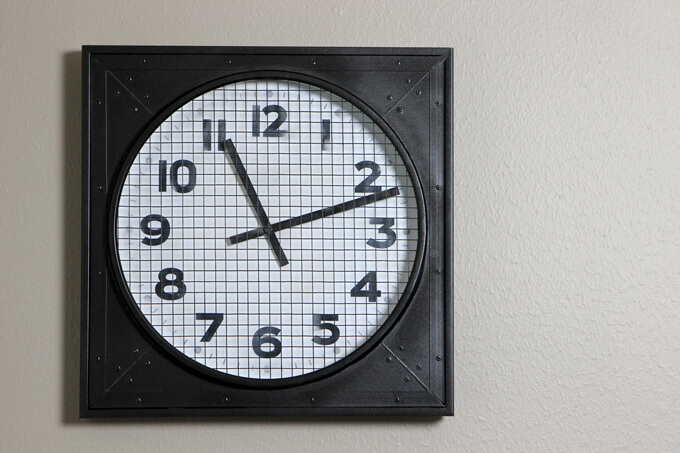
As I am sure you can tell we decided not to go full rust on the outer appearance of the frame of the DIY vintage gymnasium clock. We had intended on adding more colors to make it have a similar color but we ended up being happy with how the spray paint made the plastic look like metal and how it matched everything else in the room by being the darker oil rubbed bronze color.
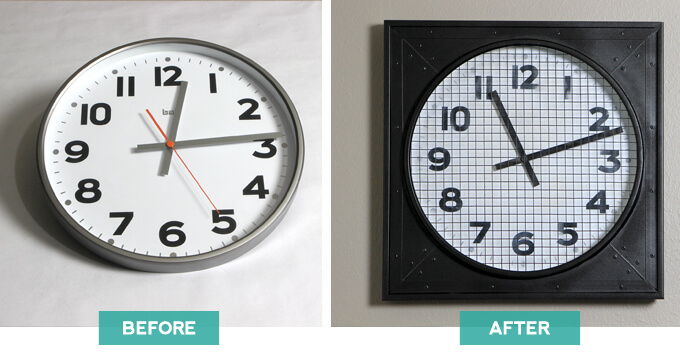
What a difference, right? It was so much fun to take this modern clock back in time. Pun intended.
I feel like every project we complete for this room transforms the space into an old warehouse just a little more. It is so much fun to work on this room because it is different. The DIY vintage gymnasium clock adds a special touch and has easily become one of my favorite decor projects we have done.
I know I have said it a million times but Brent really does rock at being able to figure out how to make things look exactly like I want just by looking at them AND he can figure out all the supplies we need in one trip to the hardware store just off the top of his head. We always end up with just the right amount of materials and stay on budget. He’s got skills.
PIN THIS PROJECT

Can I purchase that Vintage gym clock?
We are glad you like it but unfortunately we aren’t currently selling any projects.