Organization

Pantry Makeover

Pantry Makeover

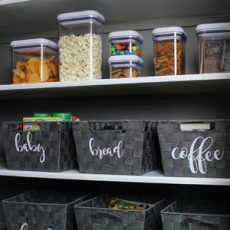
Check out the before and after of our pantry makeover. We cleaned, organized, and gave our pantry a fresh coat of paint to spruce up the space.

Continue Reading “Pantry Makeover”

Wall-Mounted Bike Rack

Wall-Mounted Bike Rack with Bench

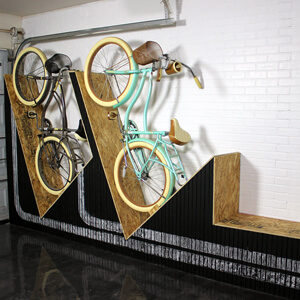
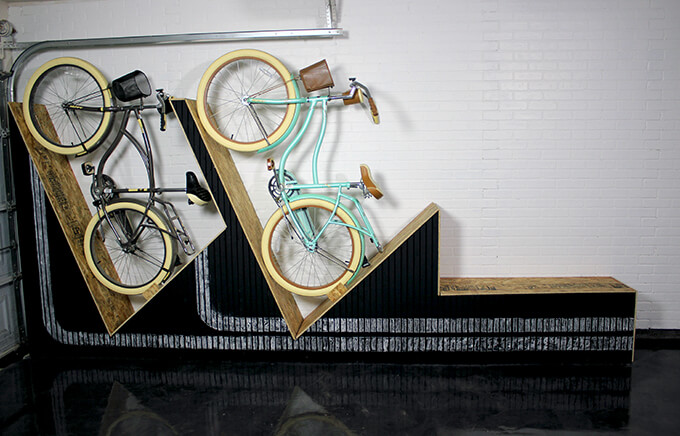
Our latest DIY storage project was to build a wall-mounted bike rack with a bench in our garage to store our bikes.
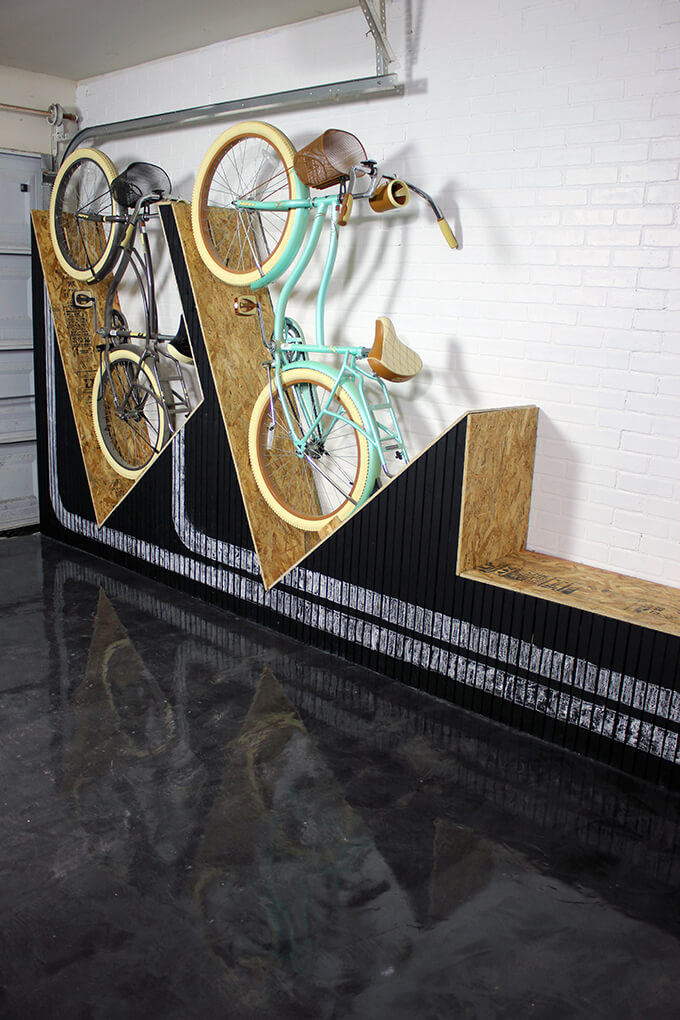
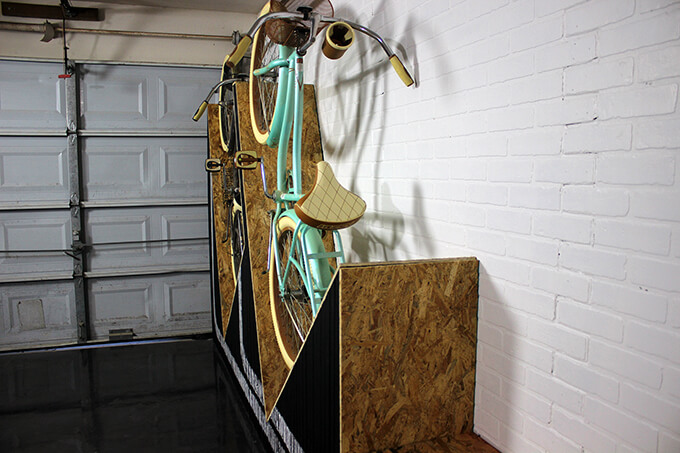
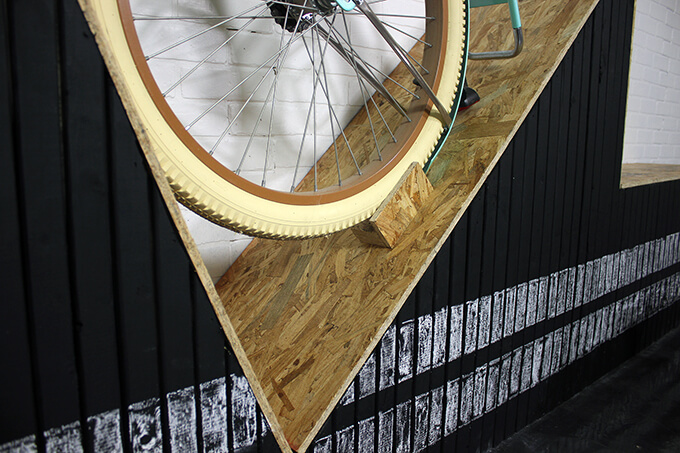
A unique way to store your bikes in the garage - a DIY wall-mounted bike rack with a bench. It takes up little space depth wise, you can store two bikes, it gives you a place to sit down AND the front is painted with chalkboard paint so the front design can always change.

Operation organize garage/shop is currently underway. We completed making over one wall in the garage with a large DIY storage project so we are making progress.

We covered one of the large walls in the garage with more of the faux brick panels. (Like we did in our home gym)

This time we painted the faux brick panels white. We are painting the other walls with Sherwin-Williams Gauntlet Gray.

We also finished our wall-mounted bike rack DIY project! We are excited to give you the scoop on how this project came together.
Wall-Mounted Bike Rack

Last year we got bikes for Christmas which have been really fun to ride around our neighborhood and to the park but we didn’t have a great place to store them in the garage.

When planning the design of our bike rack storage project we had the following criteria:

1. The bikes needed to be easy to access
2. The bike rack needed to accommodate two bikes
3. The bike rack needed to take up as little space as possible depth wise
4. The bike rack needed to have a fun design and match the rest of the garage
5. BONUS: The bike rack could have additional functionality of an attached bench
Wall-Mounted Bike Rack

Wall-Mounted Bike Rack

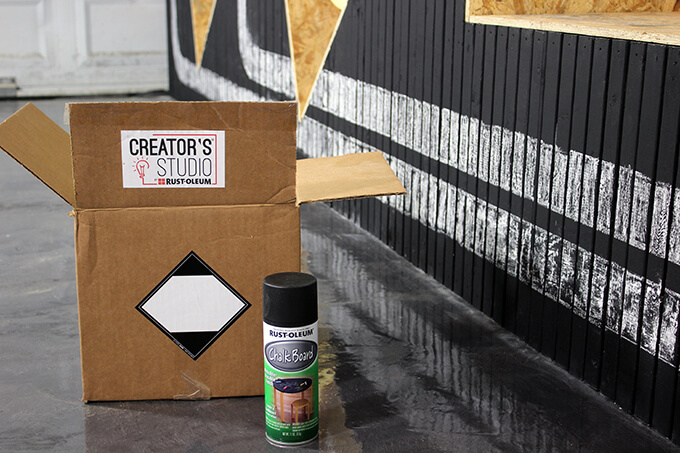
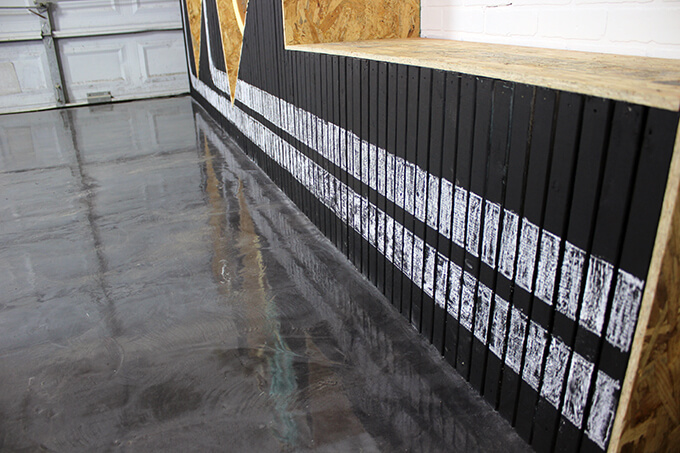
We entered our DIY bike rack project in the Rust-Oleum Creator’s Studio Blogger Challenge. They sent us a box of different types of spray paint and stains and we choose this chalk board paint to use on our project.
Wall-Mounted Bike Rack

Since this was one our “make it up as we go because we don’t have anything to reference” projects, it took a little while to find our groove and some trial and error experimenting.

These types of projects are always frustrating when you are in the middle of problem solving but are always the most rewarding when you see it completed.
Wall-Mounted Bike Rack

Below is our process for building our wall-mounted bike rack with a bench.

2022 Personalized Christmas Ornaments
*** Thanks so much for supporting our small shop – Moon Rock Prints – this holiday season! ***

How To Build a Wall-Mounted Bike Rack

SUPPLIES

FYI: This post contains a few affiliate links to products we used to make this project. Gray House Studio does receive commissions for sales from these links but at no extra cost to you. We appreciate you supporting this site. Read our privacy and disclosure policy. You can also easily shop our recommended products here.

TUTORIAL VIDEO

[yotuwp type=”videos” id=”pFlQ-8jqajQ” title=”off” description=”off” player=”width=590&modestbranding=0&showinfo=0″]

Subscribe to our YouTube Channel

Like our video? Subscribe and help us reach our goal of 100k subscribers.

STEPS
Wall-Mounted Bike Rack

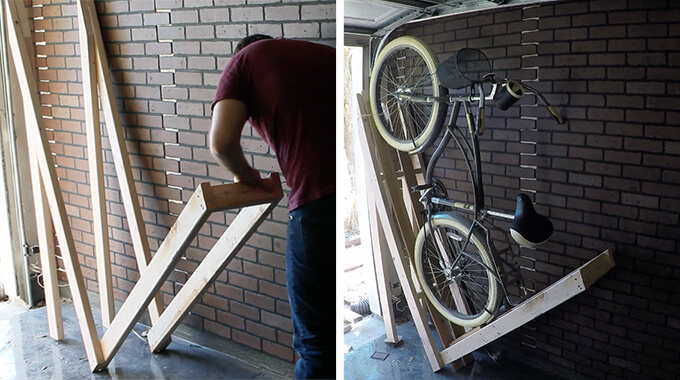
1. To build the bike rack we started by cutting our boards on our miter saw and making two V shapes at a 70 degree angle with 2″x4’s.

Then we connected the V shapes with horizontal braces. This made the structure 16″ wide. After adding vertical 2×4’s to stabilize the V structure, we loaded a bike to check the fit.
Wall-Mounted Bike Rack

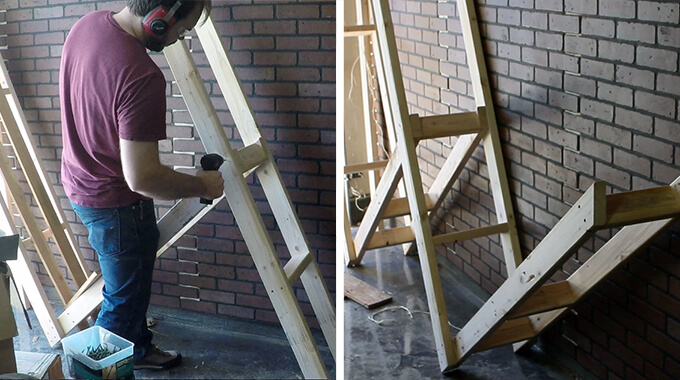
2. Once the bike fit, we created another V shaped structure and used our drill and screws to screw it into the end making a large W shape.
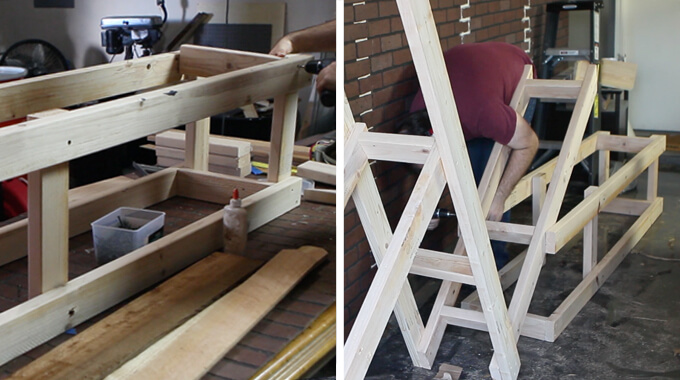
Wall-Mounted Bike Rack

3. We wanted to incorporate a bench on the end of the bike rack so we built a box out of 2″x4″s.

We built the box to be 18″ high and attached it to the end of the W shape with screws.
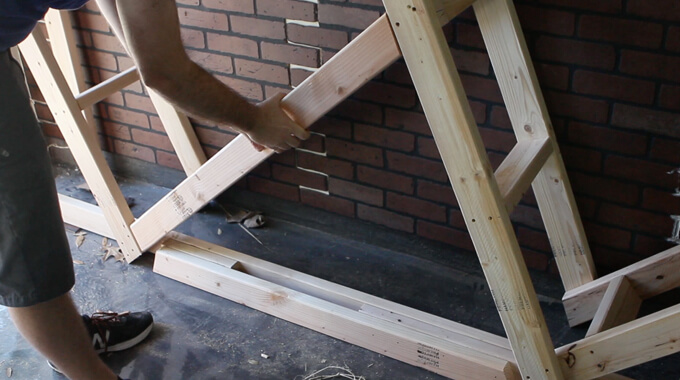
Wall-Mounted Bike Rack

4. Before lining the outside of the bike rack with wooden slats, we attached 2″x4″s to any of the recessed sections of the braces to make one consistent and level surface.
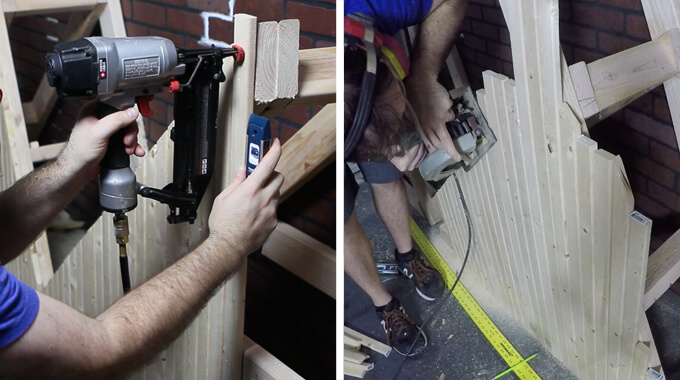
Wall-Mounted Bike Rack

5. We used cheap 1″x2″ pine boards for the slats and cut them to be just longer than the bike rack is tall.

After leveling and attaching each slat with our brad nailer and brad nails, all the boards were cut to the correct height with a circular saw.
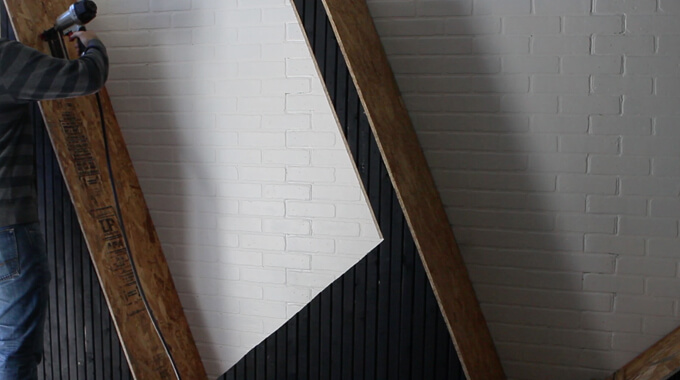
Wall-Mounted Bike Rack

6. We lined the top of the bike rack with OSB sheets. It took three sheets to cover the entire rack and provided a significant cost savings over plywood.

Plus, it creates a unique industrial aesthetic that we were going for with the design.
Wall-Mounted Bike Rack

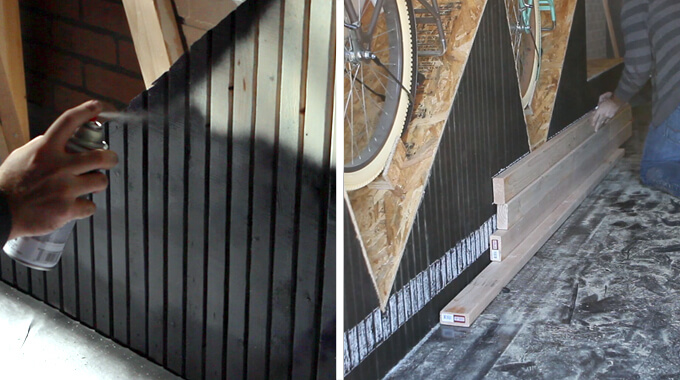
7. Finally, we painted the slats with chalkboard spray paint.

Typically we would roll large surfaces with paint but due to all the gaps between the slats we opted for spray paint and were impressed that it only took two cans.

To complete the design, we added two decorative stripes with chalk. Extra 2x4s made for a great straight edge for the lines.
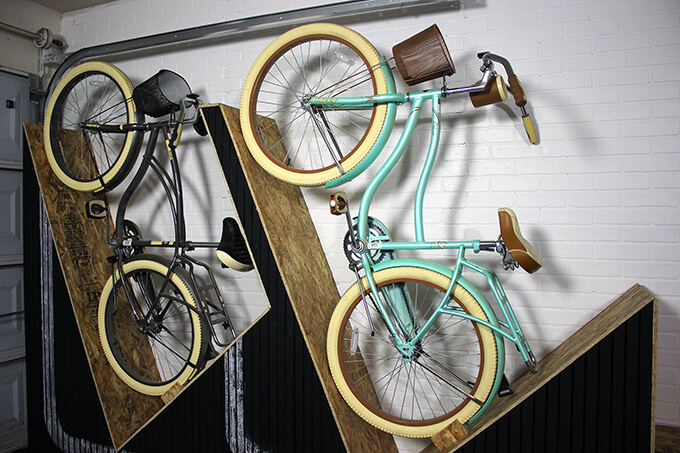
Wall-Mounted Bike Rack

We decided to paint the slats with a chalkboard paint so we can switch up the chalk design and it will go much better with what we have planned for the garage.
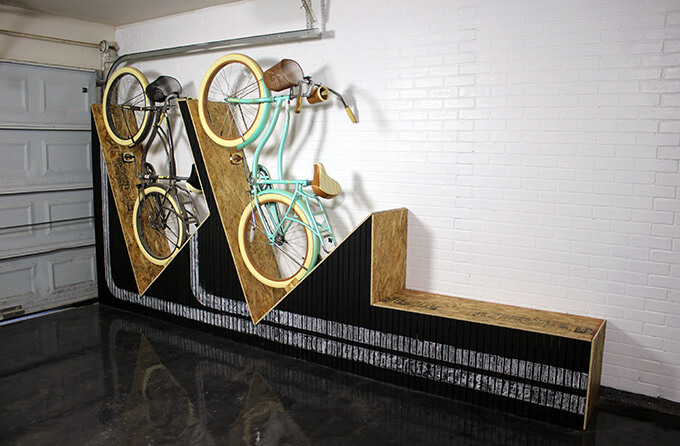
Wall-Mounted Bike Rack

We are happy with the results of our DIY wall-mounted bike rack. We were able to check off all of our must-haves for the project and included the bonus bench too!

I am happy to finally have some seating in the garage and like that it is built in rather than just having a random old chair stuck in the corner!

PIN FOR LATER
A DIY tutorial showing how to build a wall-mounted bike rack out of wood to store your bikes up against the wall in a garage. The bike rack also includes a bench that could be used to store additional bike supplies. This DIY bike rack step by step guide includes a video tutorial.

nursery bookshelves

Nursery Bookshelves DIY

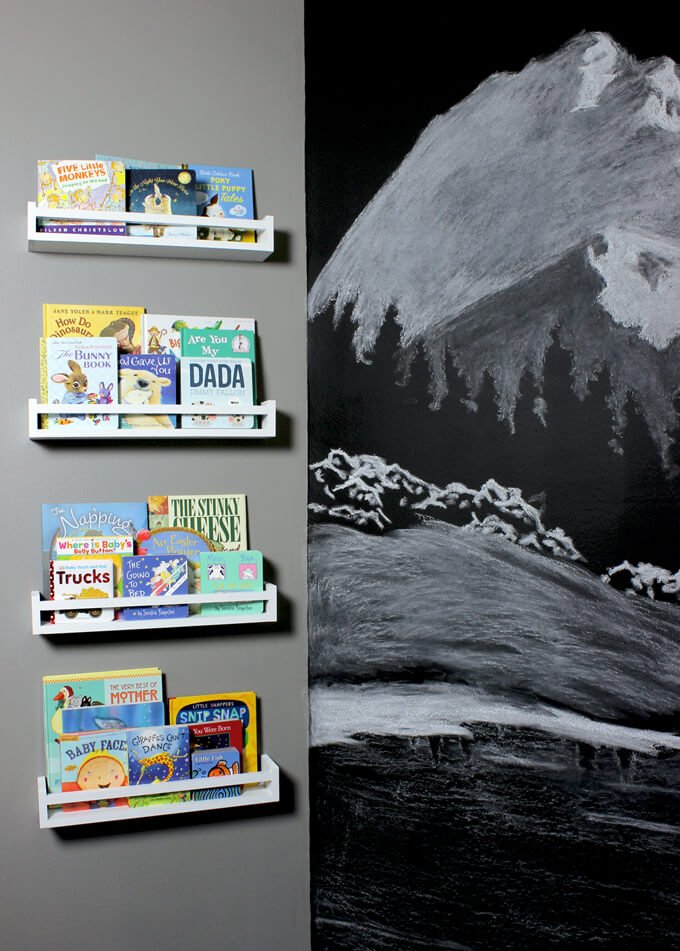
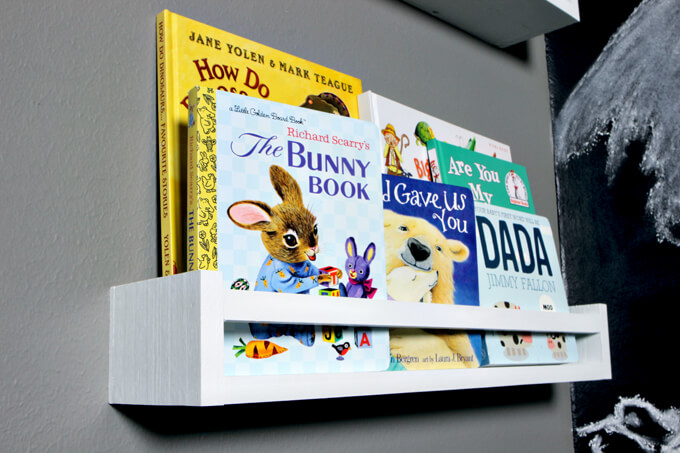
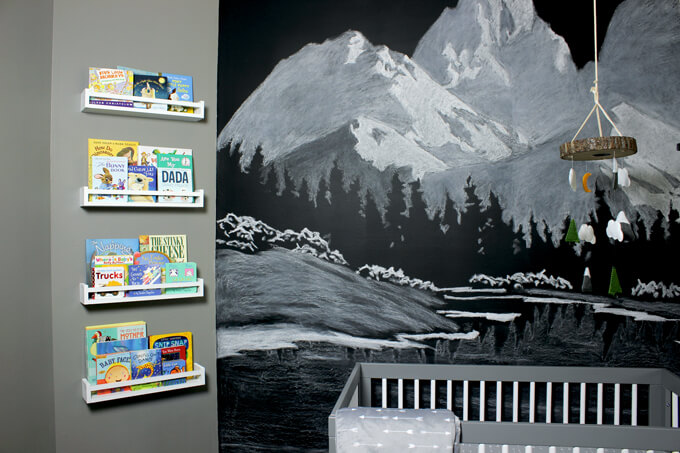
We made a set of nursery bookshelves to store, organize and display baby books.

Nursery Bookshelves DIY

Well, it looks like we are actually going to finish this nursery before baby makes his arrival! It didn’t seem like we were going to make it but he decided to stay put for a little longer and is now four days past his due date which has given us plenty of time to finish all of our last minute projects including the nursery wall storage, baby clothing rack and now our nursery bookshelves. (Plus, we have one more project on the way to share that is AWESOME.)

If you couldn’t already tell by the massive shelves we built in our library, we like to read, a lot. Both Brent and I are looking forward to reading to our son right away, even if he doesn’t understand what we are reading just yet. It was a given we would incorporate bookshelves into the nursery.

The nursery has two small walls that are at an angle so we thought that making bookshelves that ran vertically up the wall would be a good use of space.

Nursery Bookshelves DIY

A popular trend right now is using the IKEA spice racks for baby books so we took that idea and built our own larger, beefier version so we could fit more books on them and fill up the wall.

To see how we built our nursery bookshelves, check out the video or follow along with the steps below.

How to Make DIY Nursery Bookshelves

SUPPLIES

Shop the products we used for this project in one place.

FYI: This post contains a few affiliate links to products we used to make this project. Gray House Studio does receive commissions for sales from these links but at no extra cost to you. We appreciate you supporting this site. Read our privacy and disclosure policy. You can also easily shop our recommended products here.

Handmade Christmas 2021 Ornaments

2021 Christmas Ornaments
Thanks for supporting our small shop this holiday season!

TUTORIAL VIDEO

STEPS

Nursery Bookshelves DIY

CUT THE PIECES FOR THE SHELVES

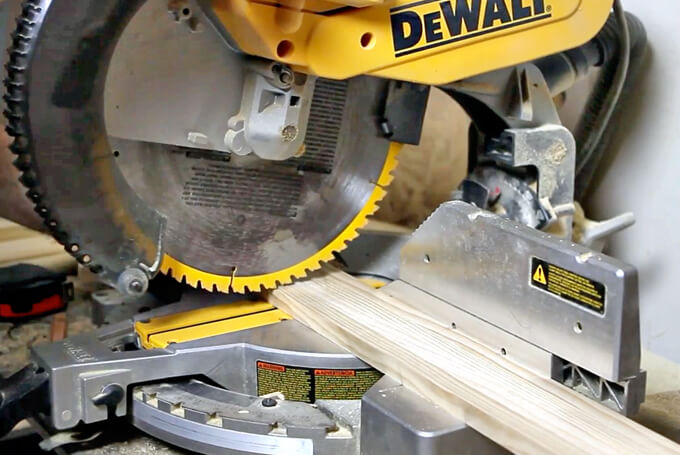
1. To begin making the nursery bookshelves, first we made all of our cuts using our miter saw. We made the following cuts:

The bottom piece of the shelf: 1”x6” cut 20” long
The two side pieces of the shelf: 1”x6” cut 4” long
The mounting plate on the back of the shelf: 1”x2” cut 10” long
The front rail of the shelf: 1”x1” cut 20” long

Because we were making four shelves we cut multiple of the same pieces at one time to make sure they were all the exact same length. We used a clamp to hold a board to the fence of the saw to make the sure all our cuts were the same.

ASSEMBLE THE SHELVES

Nursery Bookshelves DIY

Nursery Bookshelves DIY

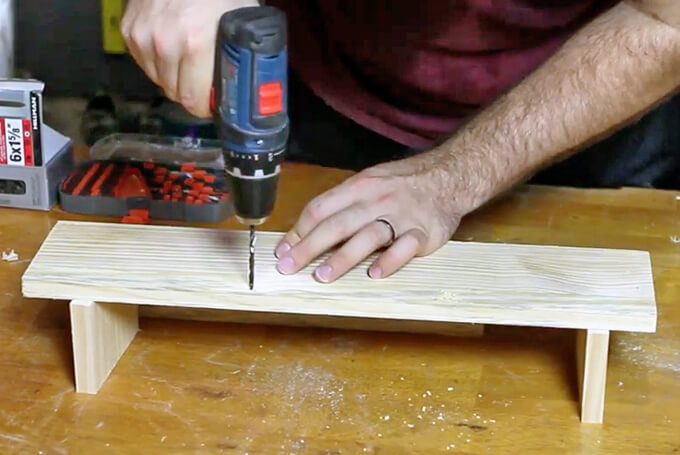
2. To assemble the nursery bookshelves, first we used our drill to drill two pilot holes into the back of the bottom piece of the shelf and attached the mounting plate piece with wood glue and 1 ⅝” wood screws to the bottom piece of the shelf.

Nursery Bookshelves DIY

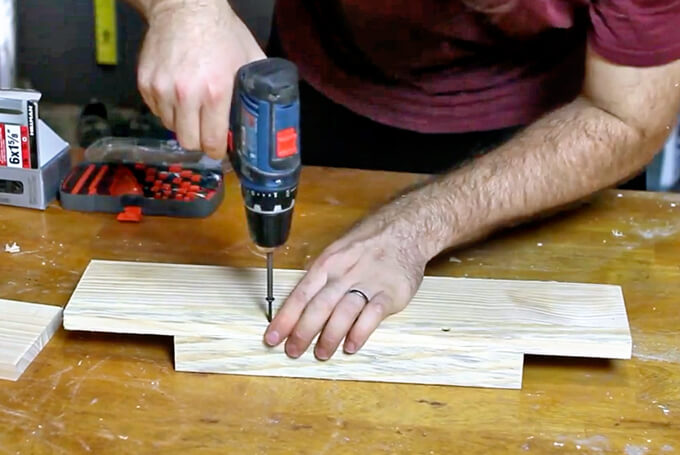
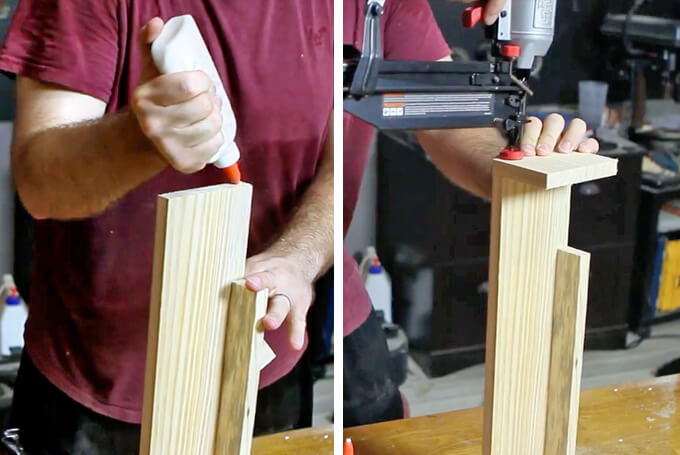
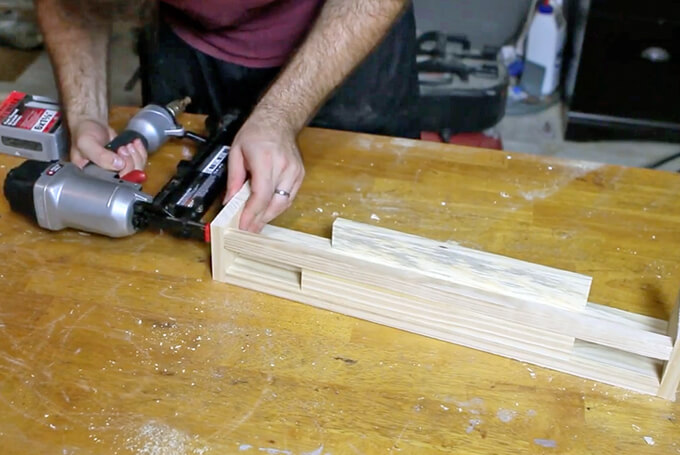
3. Next, we attached each of the side pieces to the bottom piece with wood glue and 1 ½” finishing nails.

Nursery Bookshelves DIY

4. Finally, we attached the front rail to the side pieces with wood glue and 1 ½” finishing nails.

We used a scrap 1”x2” to rest the rail on while we nailed it from the side boards with our nail gun.

PAINT THE SHELVES

Nursery Bookshelves DIY

Nursery Bookshelves DIY

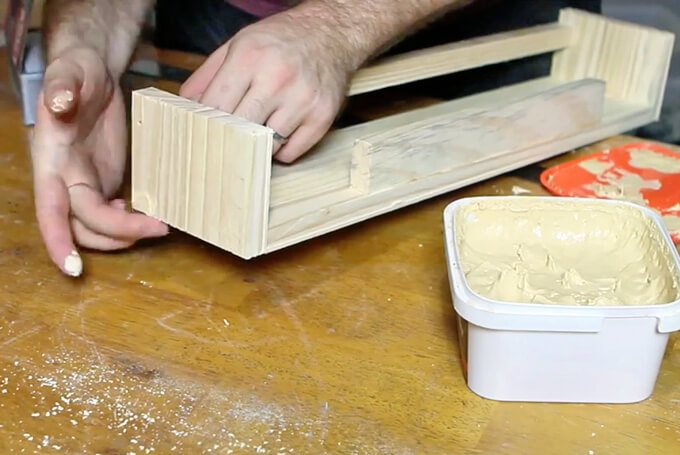
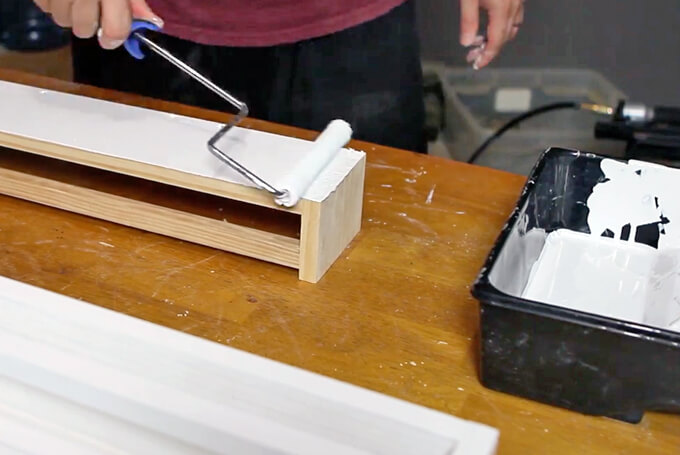
5. Once all of our nursery bookshelves were assembled, we used wood filler to fill the holes and then painted the shelves with Sherwin-Williams ProClassic® Waterbased Paint in Bright White and a nap roller for a smooth finish.

HANG THE SHELVES

Nursery Bookshelves DIY

Nursery Bookshelves DIY

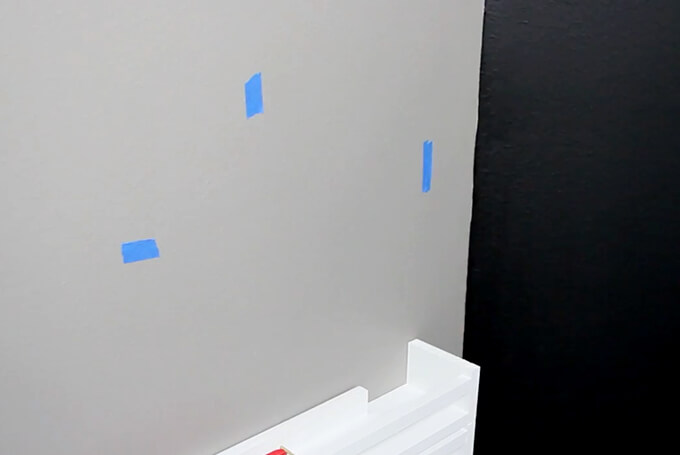
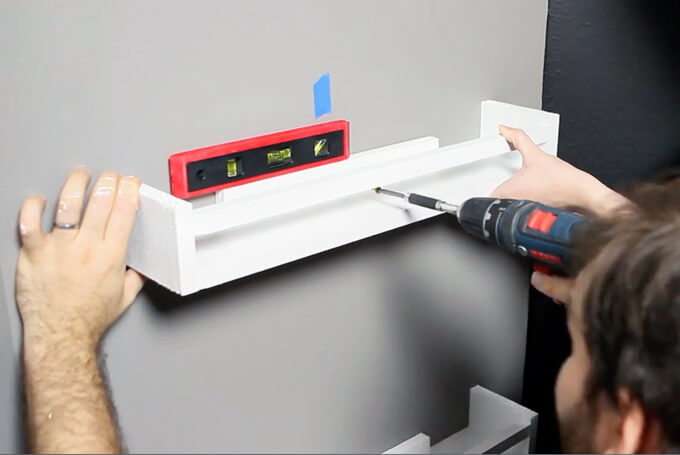
6. Before hanging the shelves, we marked the wall studs with painters tape.

Then we centered each shelf on the wall and made sure it was level (with our level).

Finally, we screwed the shelves into the wall over the studs with 3” screws.

Nursery Bookshelves DIY

The nursery bookshelves were super simple to build and turned out great. We love filling the nursery bookshelves up with books. We have been receiving books as gifts and it is so fun to add them to the shelves as we start a collection for our baby boy.

PIN FOR LATER
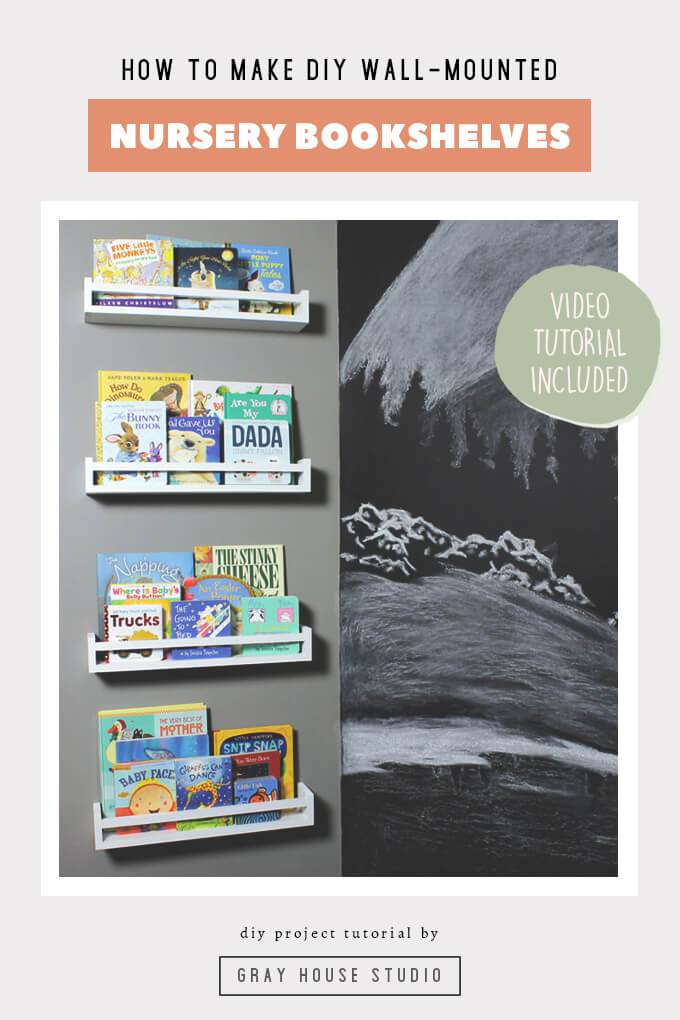
A tutorial showing how to make your own larger versions of the Ikea Bekvam Spice Rack Bookshelf. The step by step guide for our DIY wall-mounted nursery bookshelves project includes a video tutorial. Great idea if you are looking for DIY floating shelves for a nursery.

Baby Clothes Rack Nursery Storage

Baby Clothes Rack

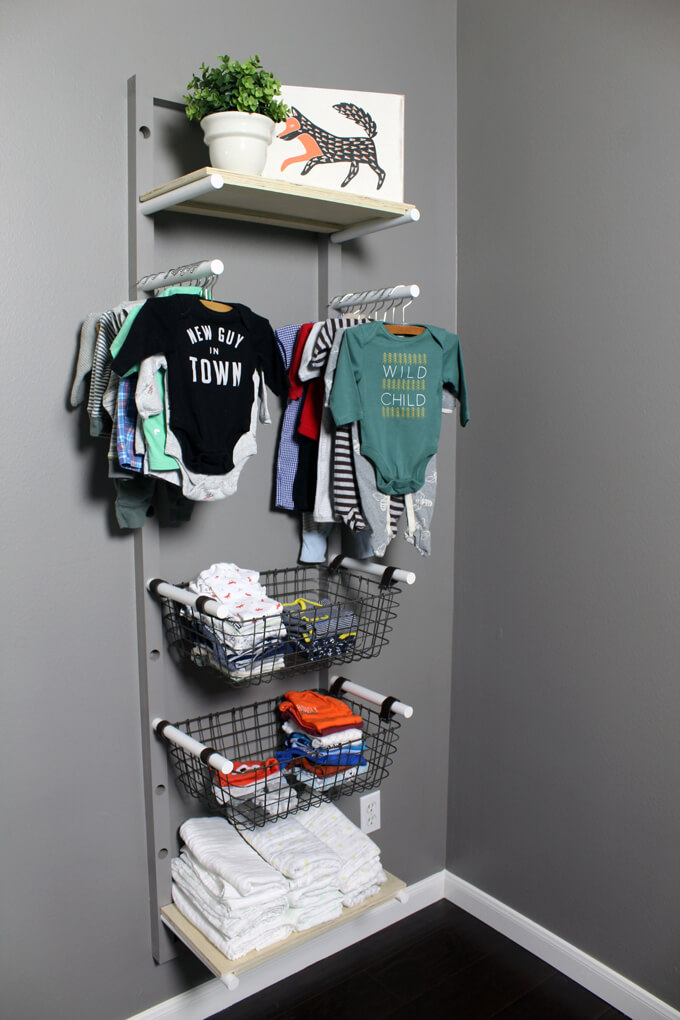
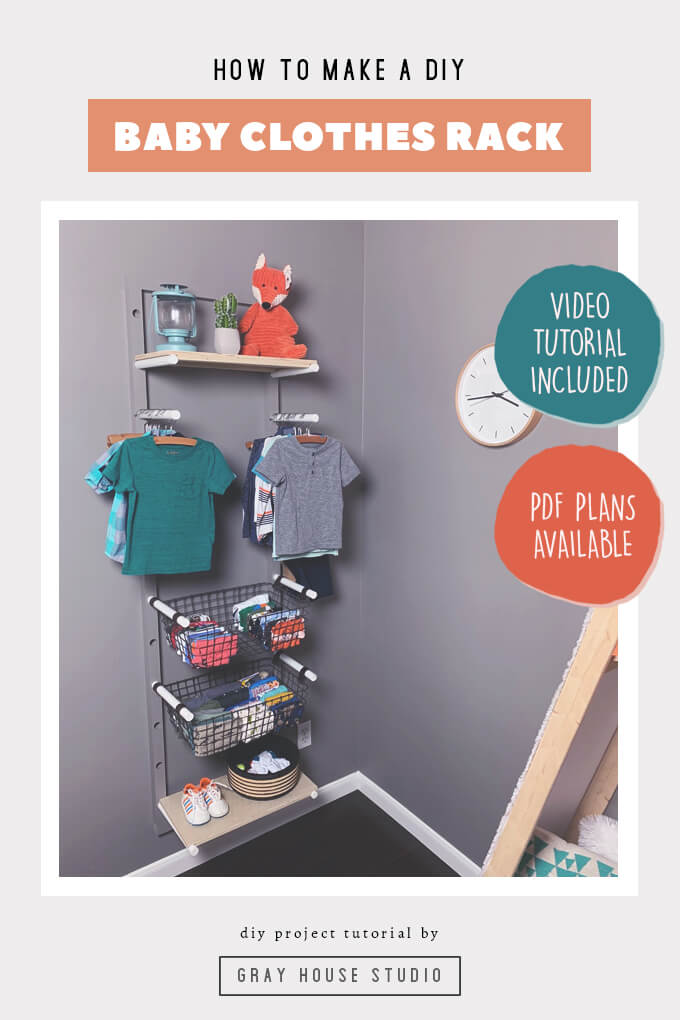
We built a wall-mounted baby clothes rack to hang and store clothes in our nursery to make up for the lack of closet in this room. You can buy the PDF plans for our DIY Baby Clothes Rack in our shop.

Baby Clothes Rack

You know the proverb, “necessity is the mother of invention”? Well, Brent and I found ourselves needing to apply this saying to our baby clothes storage situation in the nursery.

The problem: The nursery does not have a closet therefore there was no designated space to store and organize baby clothes.

I can’t tell you how many hours I would sit in the nursery and just stare at the wall we designated for clothes storage and try and brainstorm ideas for how to store the clothes.

I was frustrated because I knew I wanted something specific, I just didn’t know what that something was.

We could have used a dresser but with the crib, changing table and a wood reading nook tent we are building, we didn’t have room for anymore large furniture.

I spent hours searching for ideas everywhere but everything I could find would take up too much floor real estate.

I had two criteria in mind: I didn’t want it to take up a lot of space and I wanted it to look like a display you would see in a store since the clothes were going to be out in the open and not behind closet doors.

Baby Clothes Rack

Then, I came across an image of dowel rods holding a sack of potatoes and a light bulb went off. Seriously, inspiration can come from the strangest of places.

Since starting Gray House Studio I have come a long way in my ability to visualize designs and concepts and the fact that I could see a baby clothes rack from this idea makes me pretty proud.

I explained my vision to Brent and he executed my idea perfectly and even threw in a few other great suggestions because he is awesome like that and thus our wall-mounted baby clothes rack was made!

Baby Clothes Rack

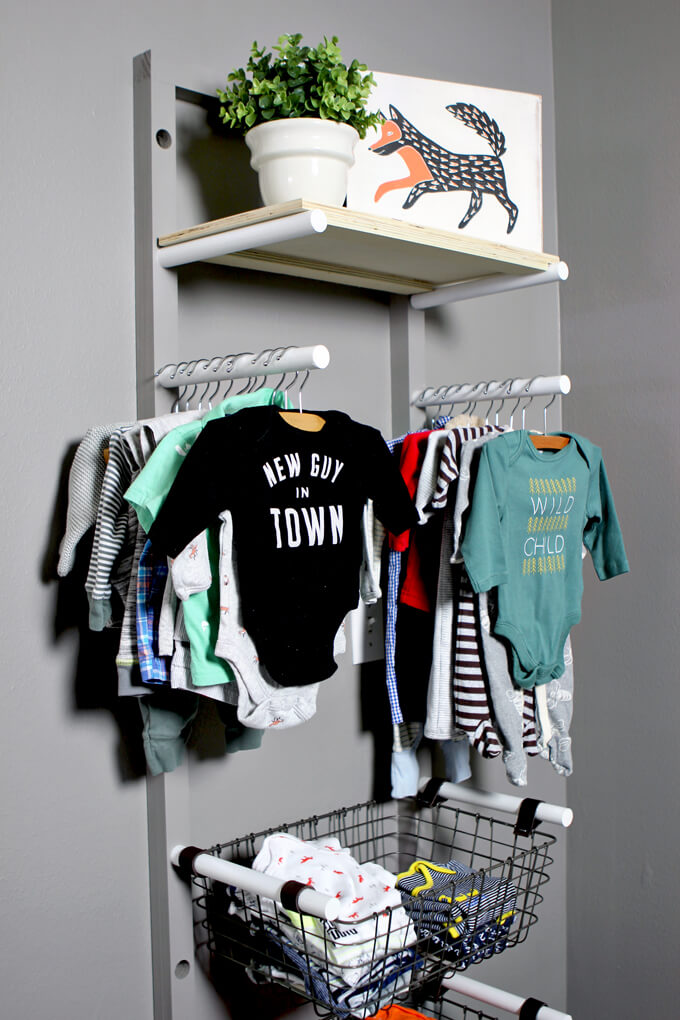
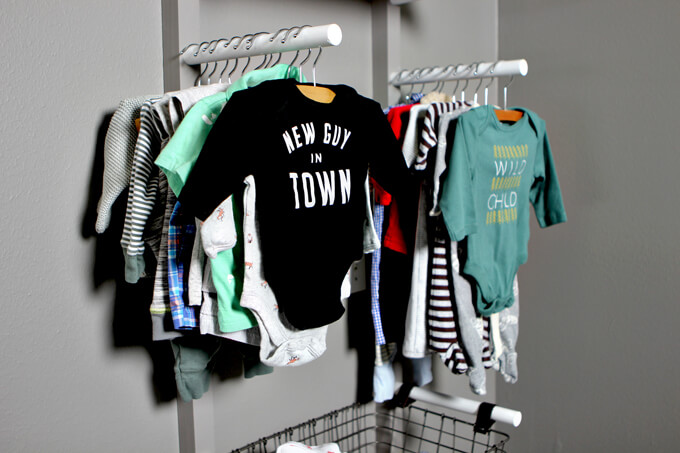
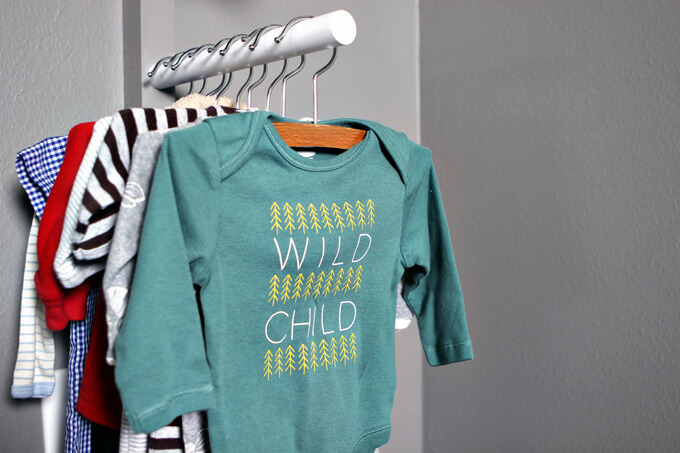
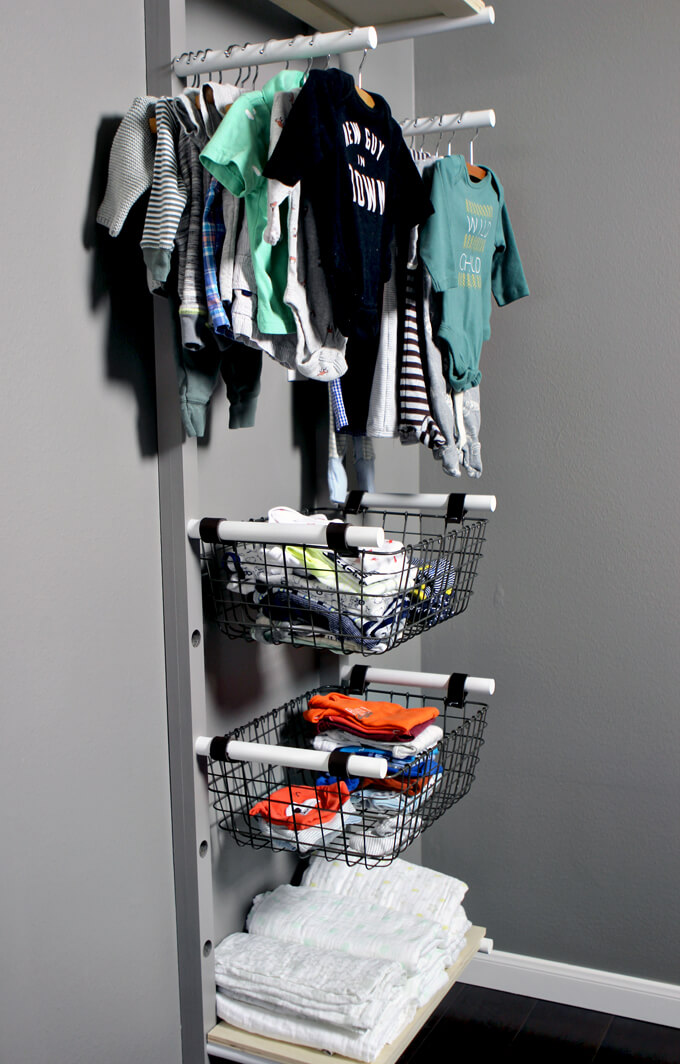
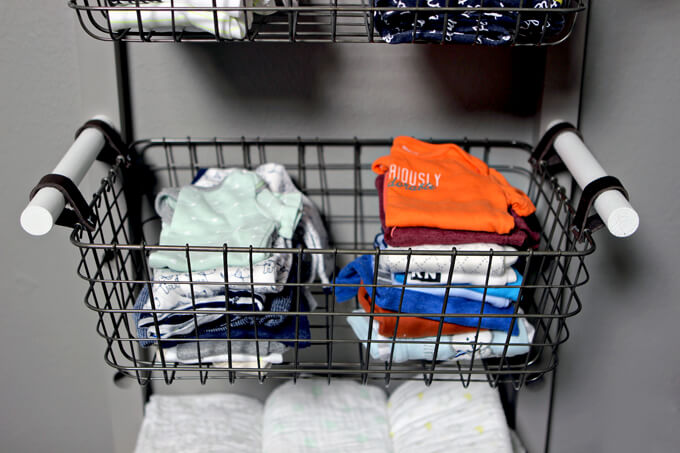
On the top dowel rods are hanging shirts, pants and some of my favorite onesies.

I ordered wood hangers to make it look more like a display. Plus, is there anything cuter than baby wood hangers? They are so tiny!

We purchased these metal wire baskets from Target.

We bought them first so we could build the width of the baby clothes rack frame around them so they would fit perfectly.

They had gold handles which were not the style we were going for and would not hang on the dowel rods anyway so Brent removed them.

Baby Clothes Rack

Brent had the great idea to create leather straps out of some leather scraps to hang the baskets on the dowel rods. This worked really well and tied the look to the nursery wall storage bar on the opposite wall.

Baby Clothes Rack

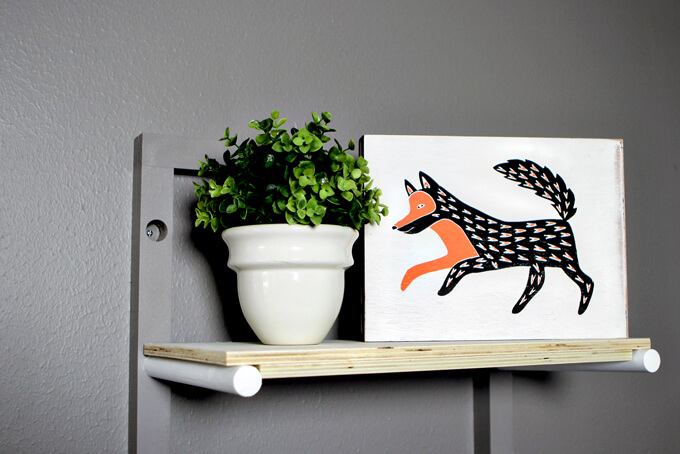
We added a shelf at the top to add a few decor items. I stole the fox artwork from the gym shelves but it fits with this room better anyway because we are incorporating little foxes here and there throughout the room.

To see how we built our baby clothes rack, check out the video or follow along with the steps below.

2022 Personalized Christmas Ornaments
*** Thanks so much for supporting our small shop – Moon Rock Prints – this holiday season! ***

How We Made Our Baby Clothes Rack

SUPPLIES

FYI: This post contains a few affiliate links to products we used to make this project. Gray House Studio does receive commissions for sales from these links but at no extra cost to you. We appreciate you supporting this site. Read our privacy and disclosure policy. You can also easily shop our recommended products here.

PROJECT PLANS

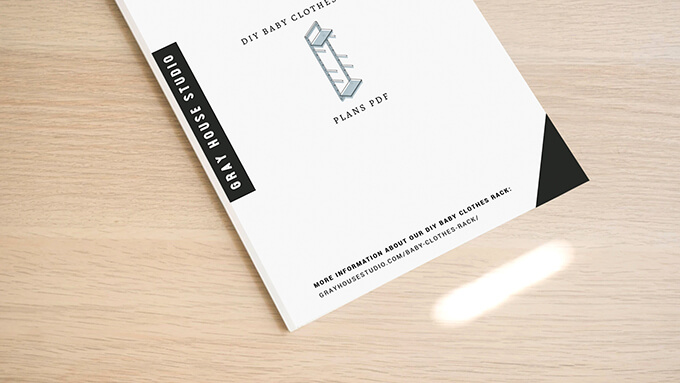
DIY Baby Clothes Rack Woodworking Plans

Get our Baby Clothes Rack Plans

When you purchase our DIY wood baby clothes rack plans you get a PDF with a detailed materials list, a cut list, exact dimensions for each piece, building instructions – all for only $7. We appreciate you supporting Gray House Studio!

TUTORIAL VIDEO

STEPS

Baby Clothes Rack

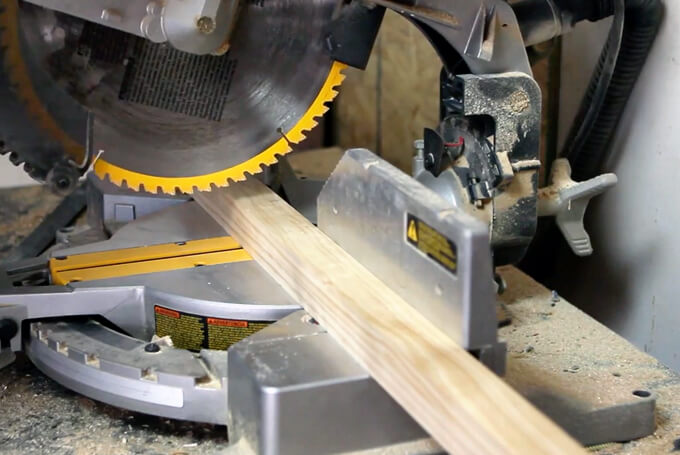
1 To start the baby clothes rack, we used our miter saw to cut two pine 2×2”s into four pieces. Two long pieces for the sides of the rack and two short pieces for the top and bottom of the rack.

Baby Clothes Rack

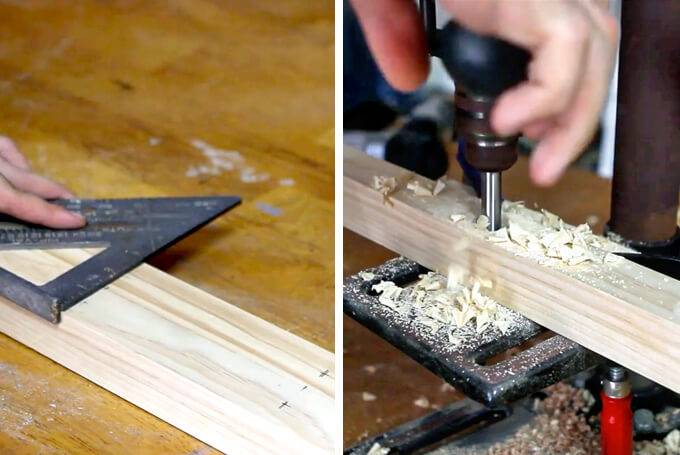
2 On the two side pieces we used a framing square to make marks six inches apart where we needed to make the holes for our dowel rods.

We used a drill press with a 1” forstner bit to drill the holes in the side pieces but stopped each hole ¼” shy of going all the way through the board.

Baby Clothes Rack

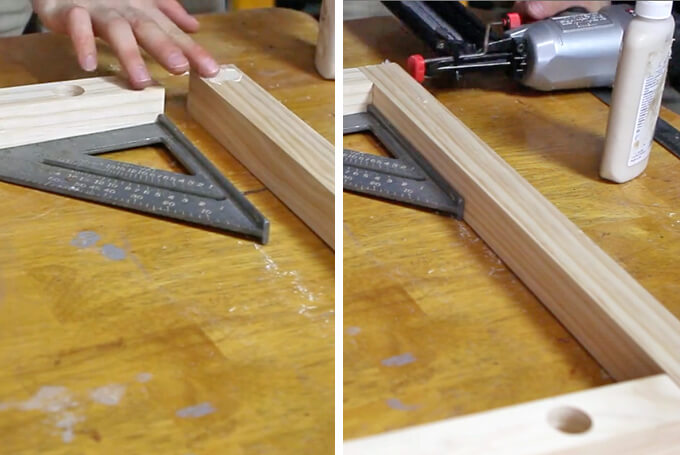
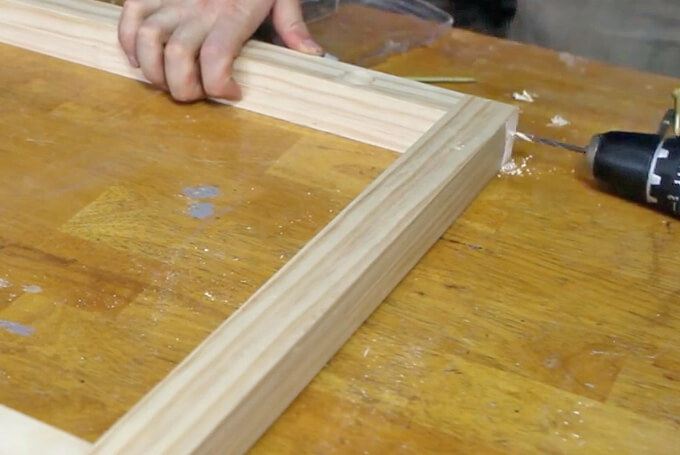
3 Next, we attached the four pieces of the frame together using wood glue and 1 ½” finishing nails.

Baby Clothes Rack

4 To provide extra strength and support, we came back and drilled pilot holes and secured the pieces of the frame together using 3” decking screws.

Baby Clothes Rack

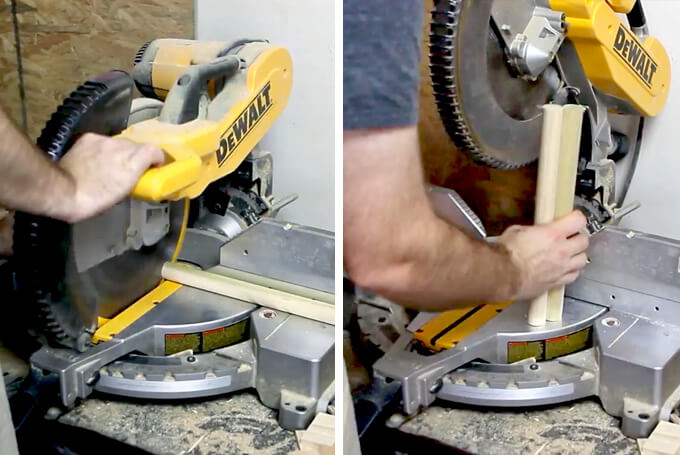
5 Once the frame was assembled we took our two dowel rods and cut them down to 12” pieces using the miter saw.

Baby Clothes Rack

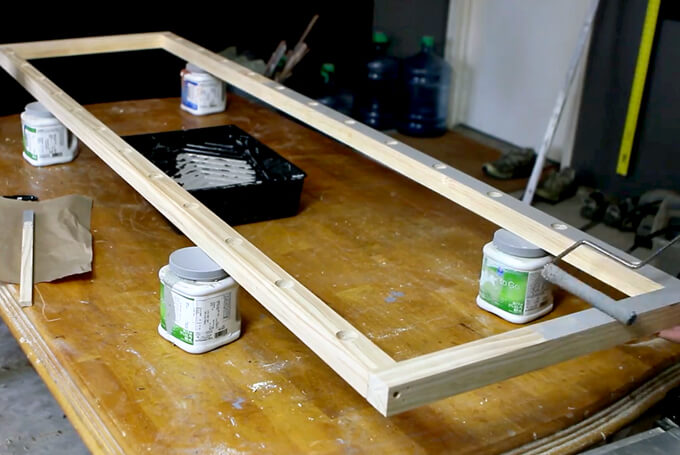
6 We used a roller to paint the frame of the baby clothes rack with Sherwin-Williams ProClassic® waterbased paint in Dovetail, the same color as the wall in the nursery.

We used a smaller paintbrush to paint in the holes of the frame.

Baby Clothes Rack

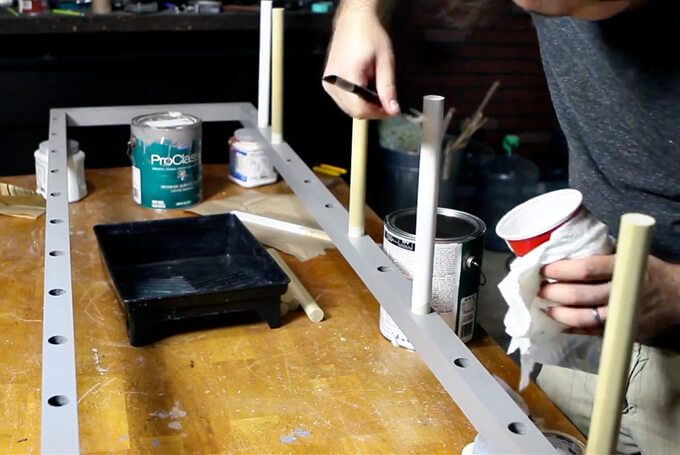
7 Then we painted all the dowel rods with Sherwin-Williams ProClassic® waterbased paint in Bright White with a smaller paintbrush.

Baby Clothes Rack

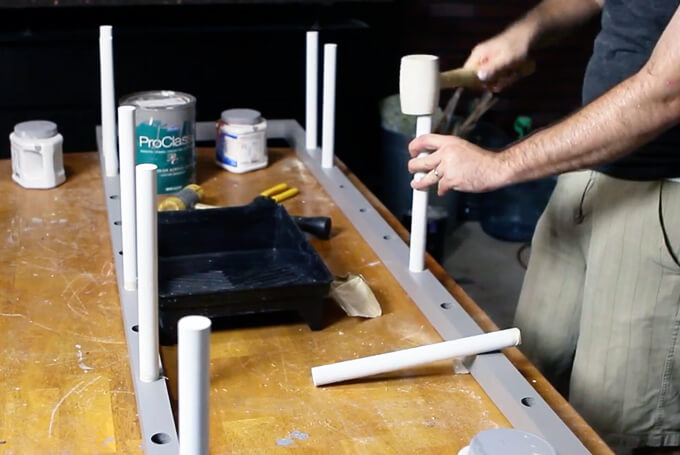
8 We inserted the dowel rods into the holes of the clothes rack frame with a few taps of a rubber mallet.

Baby Clothes Rack

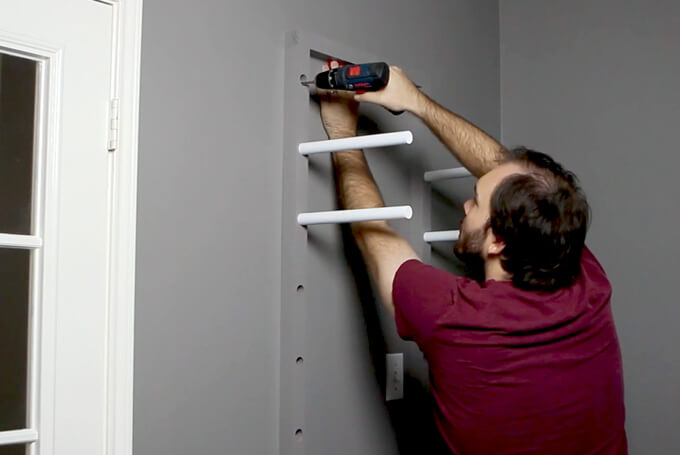
9 We installed the frame in the nursery by using a drill to screw the rack into the wall studs and used a level to make sure it was straight on the wall.

Baby Clothes Rack

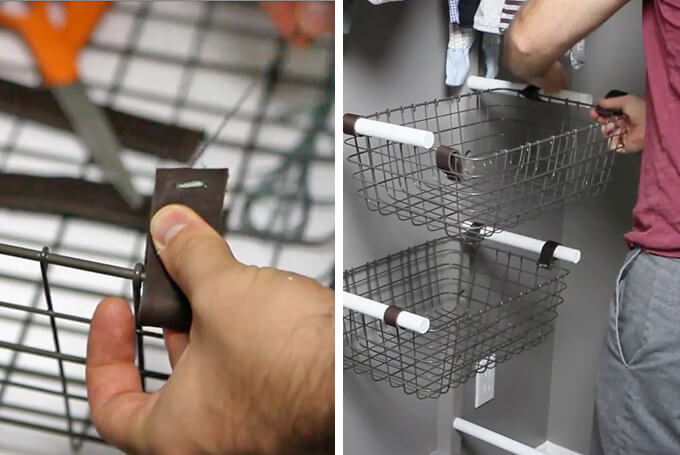
10 Finally, we removed the handles that came on the baskets and used embroidery floss to sew 1” wide leather loops out of leather scraps onto the metal baskets so they would hang from the dowel rods.

Baby Clothes Rack

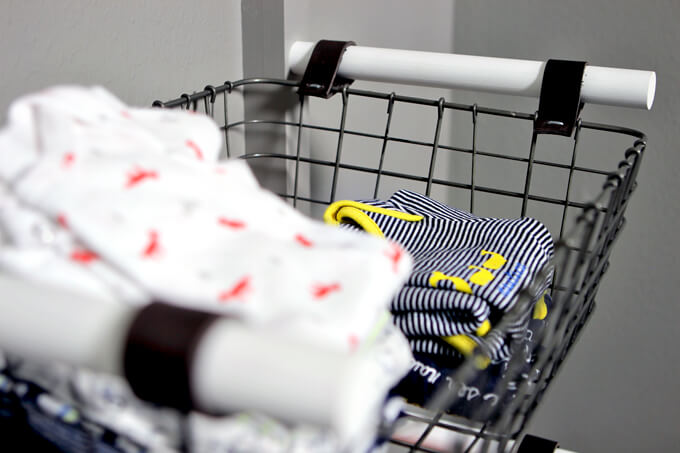
The metal baskets work really well.

They are the perfect depth for storing lots of onesies, hats, socks, etc. and are really easy to grab but still look nice and organized.

Baby Clothes Rack

I purchased wood baby hangers because I thought wood hangers would look nicer out in the open.

Baby Clothes Rack

We will probably store shoes on the bottom shelf once he has shoes but for now it is holding extra blankets.

I love all of the nursery projects we have made so far but the baby clothes rack is definitely one of my favorites because I think it is unique and Brent really made my idea come to life.

By being vertical and hanging on the wall it takes up no floor space but has plenty of storage space to keep baby clothes organized.

Plus, it looks nice enough to be out in the open displaying clothes.

PIN IT FOR LATER

Store and organize your baby's clothes in the nursery with this unique wall-mounted baby clothes rack. It is a great solution if a closet is not available. This diy project tutorial includes a video tutorial.

Nursery Wall Storage

Nursery Wall Storage

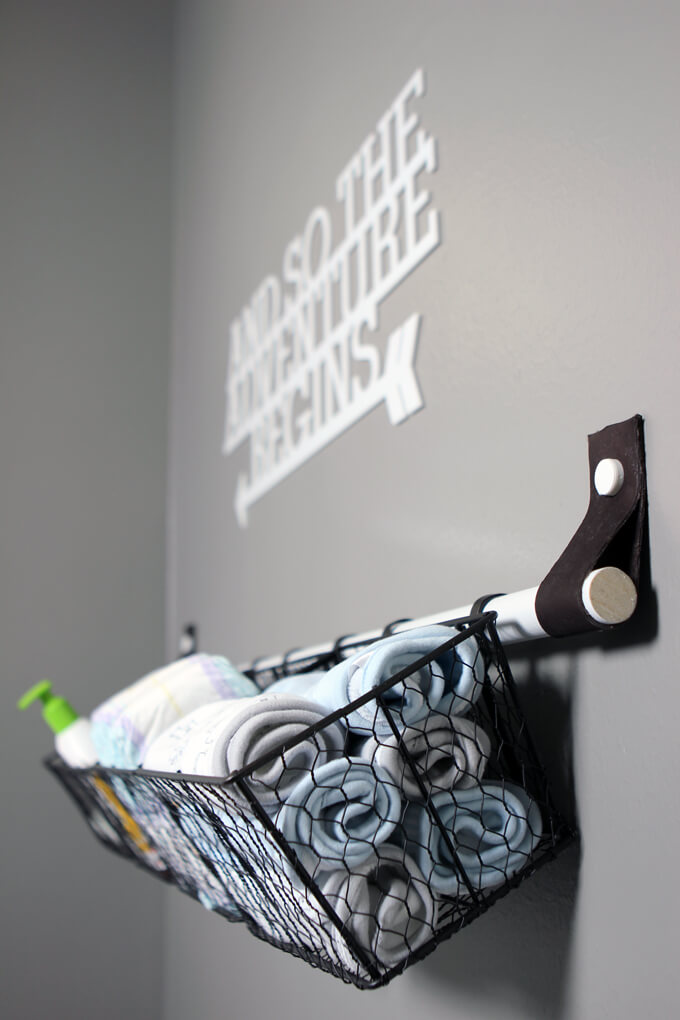
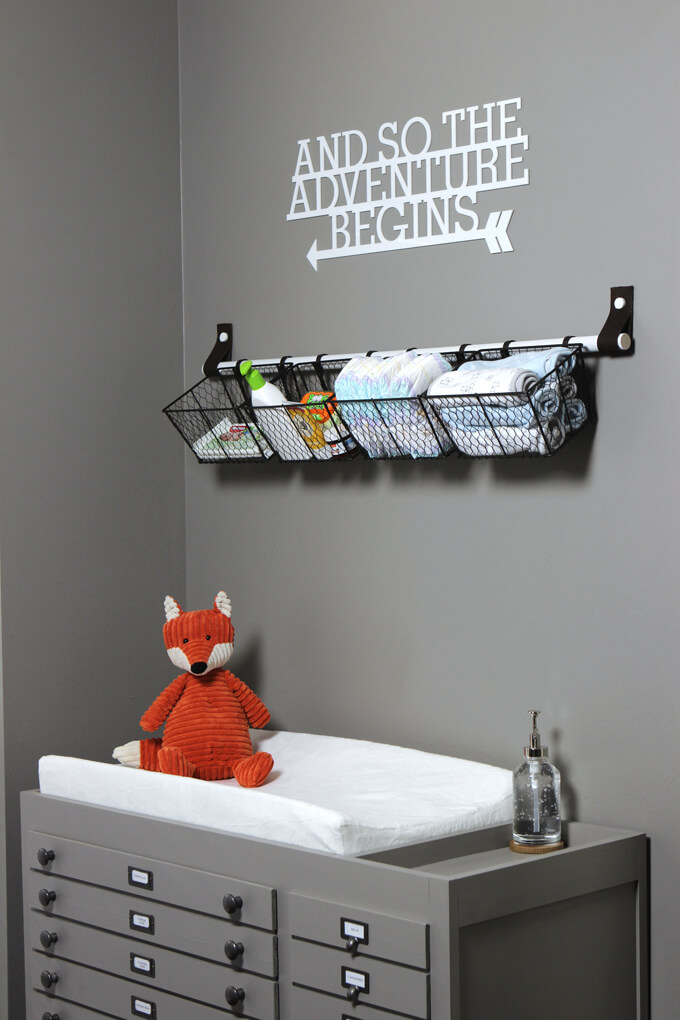
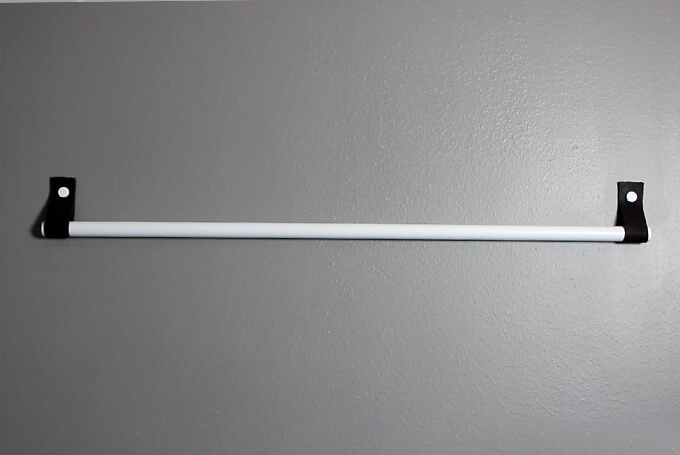
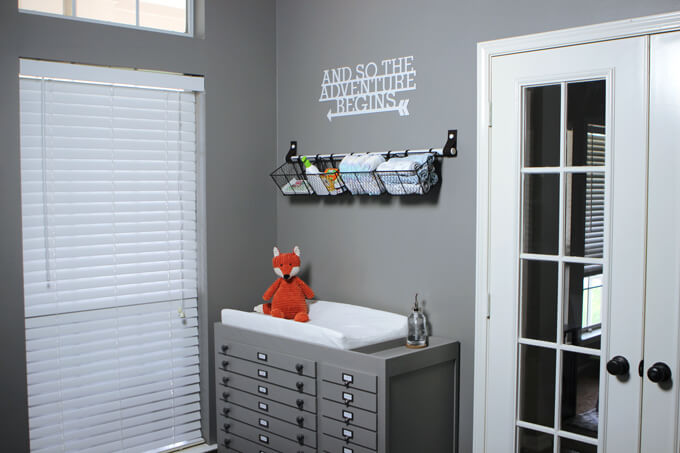
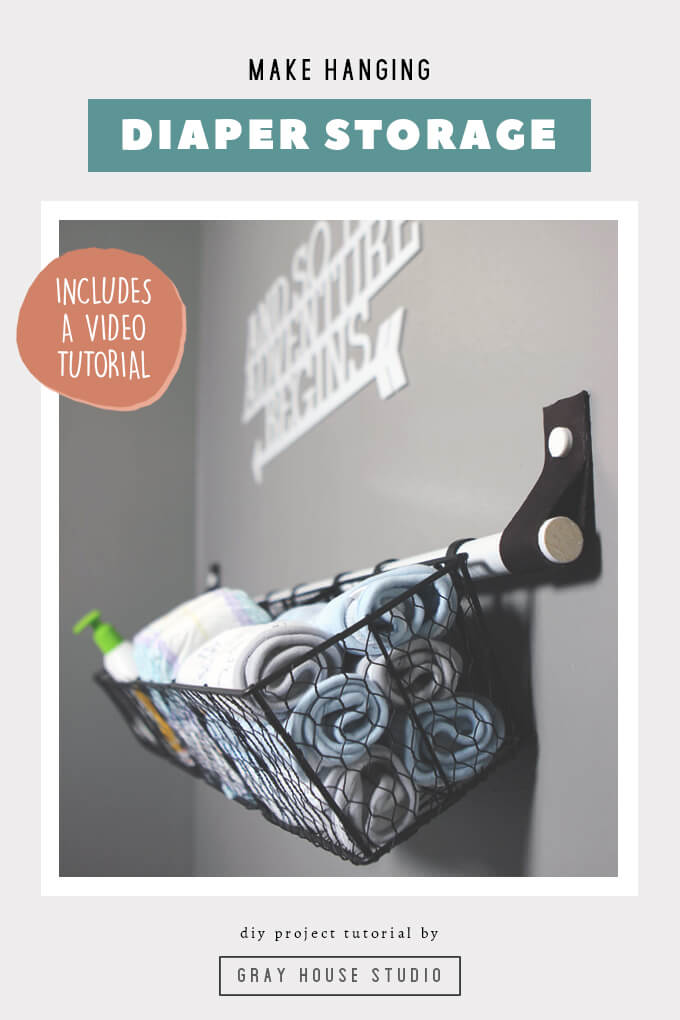
We used a dowel rod, scraps of leather, and a few baskets to create a simple nursery wall storage above the changing table in the nursery.

Nursery Wall Storage

Last week we shared the baby changing table that Brent built for the nursery.

This week we are sharing another project we worked on, a nursery wall storage solution to go above the changing table that turned out to be really simple to put together and cost us next to nothing to make!

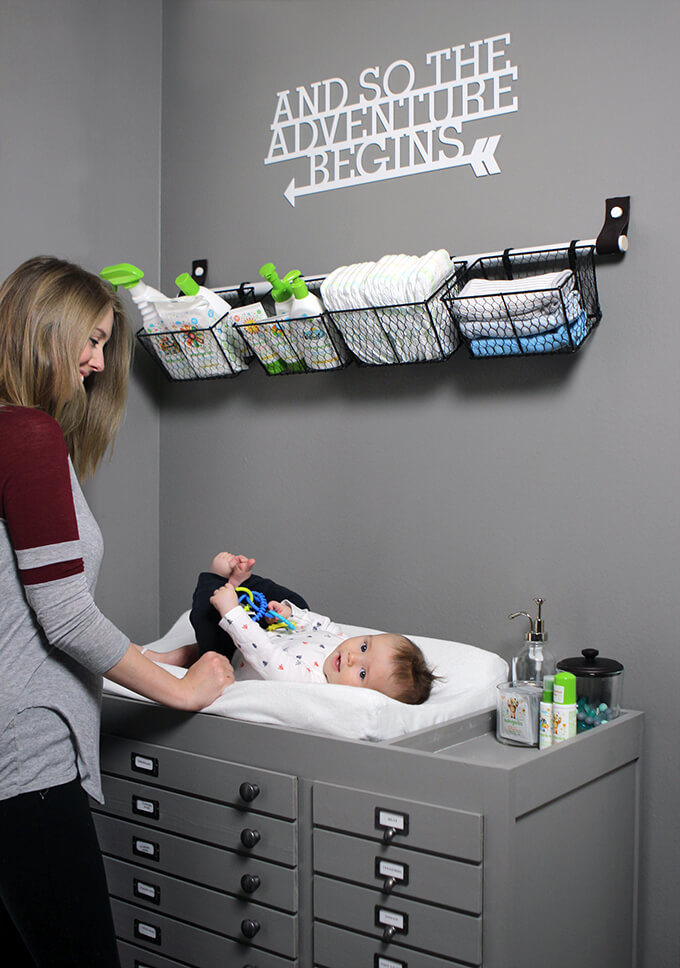
The changing table offers plenty of space to store and organize baby supplies but I liked the idea of incorporating a way to store frequently used baby items, like diapers, so they are easy to grab in a second, right at arms length.

Nursery Wall Storage

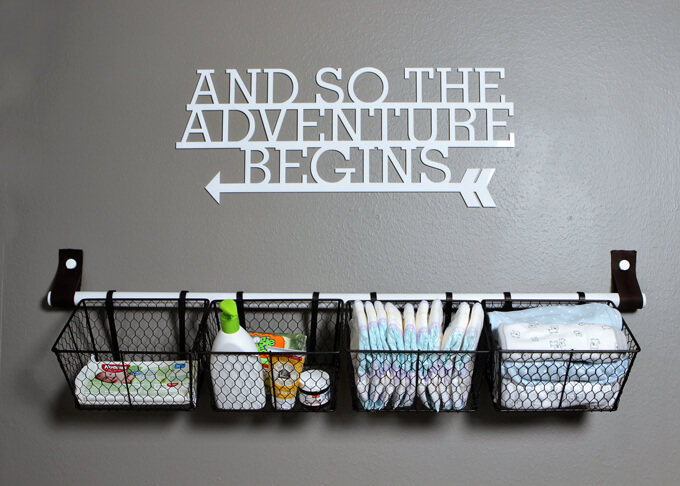
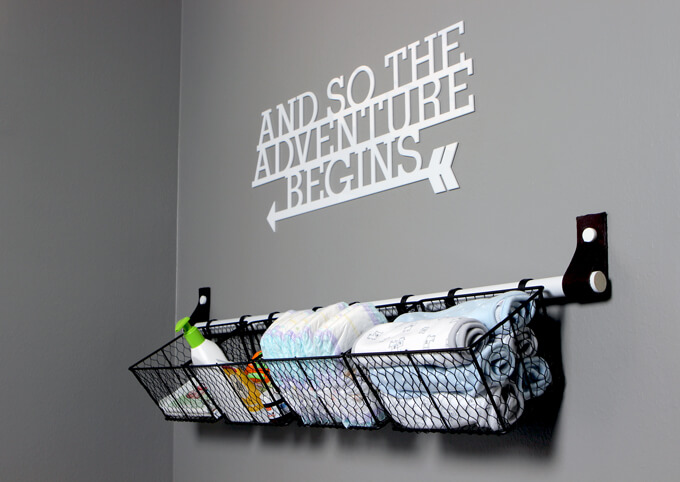
We ultimately decided to keep it simple and make a bar where we could hang a few wire baskets with supplies as a diaper storage solution.

We decided to use a dowel rod that we could spray paint white to match the vertical bars on the crib.

To mount the bar to the wall, Brent came up with the idea to make straps out of leather we already had leftover from another project to hold the dowel rod and match the leather straps on the baby clothes rack.

We bought two sets of these baskets from Kohl’s. They originally came with a different type of bar.

Nursery Wall Storage

UPDATE: Now that we have a wiggly four month old, this nursery wall storage above the changing table has made our lives a thousand times easier. I can grab the supplies I need quickly from the baskets while keeping a hand on him at all times.

Nursery Wall Storage

Follow along with the video and steps below to see how to easily make this nursery wall storage project.

2022 Personalized Christmas Ornaments
*** Thanks so much for supporting our small shop – Moon Rock Prints – this holiday season! ***

How We Made Our Nursery Wall Storage

SUPPLIES

Shop the products we used for this project in one place.

FYI: This post contains a few affiliate links to products we used to make this project. Gray House Studio does receive commissions for sales from these links but at no extra cost to you. We appreciate you supporting this site. Read our privacy and disclosure policy. You can also easily shop our recommended products here.

TUTORIAL VIDEO

STEPS

Nursery Wall Storage

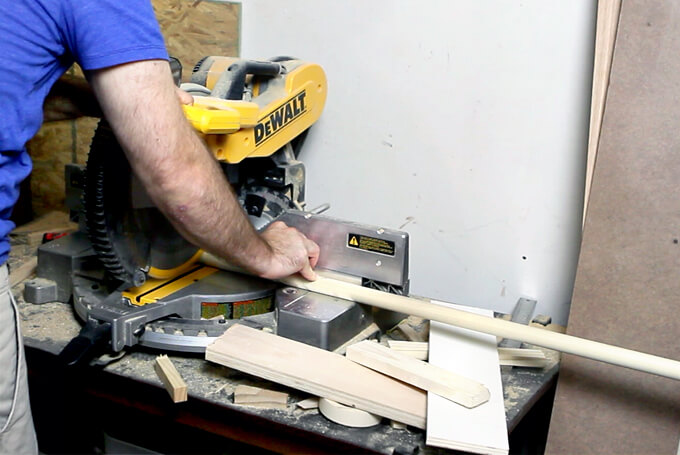
1. To begin the nursery wall storage project, we started by cutting the 1″ dowel rod on the miter saw to match the width of the changing table.

Nursery Wall Storage

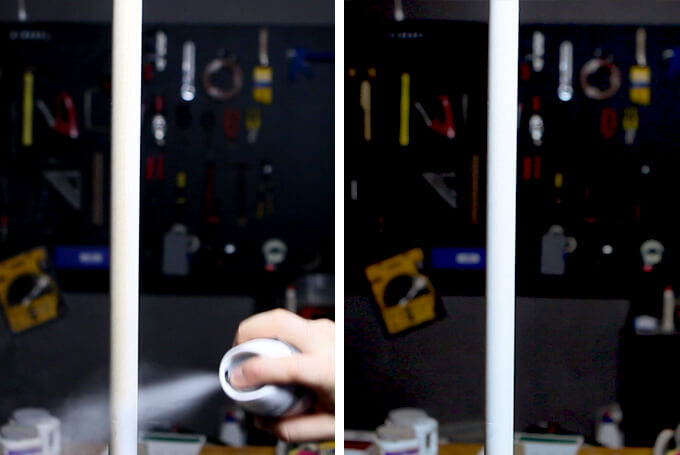
2. To make painting the dowel rod easier, we hung it from the garage door by attaching a screw in one side. We applied a few coats of white spray paint and then used 150 grit sandpaper to sand the rod and painted a few more coats.

Nursery Wall Storage

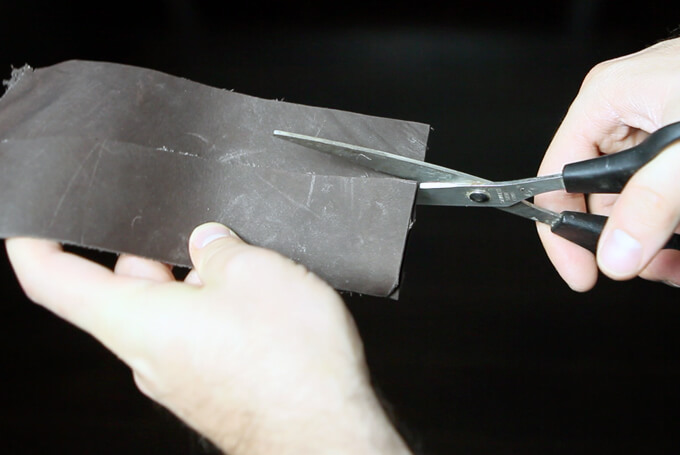
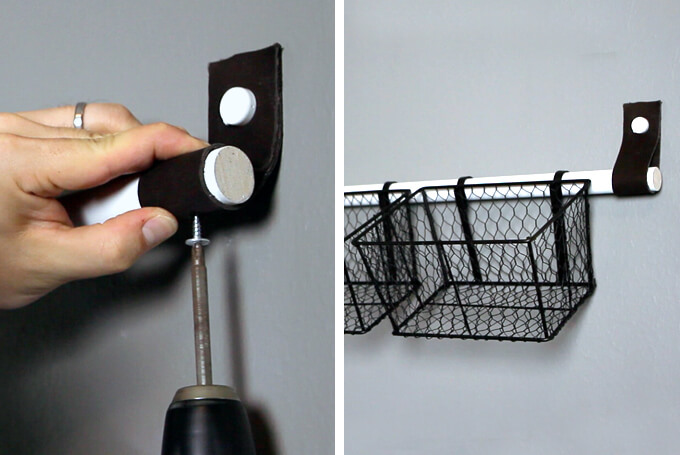
3. Next, we took some leftover leather scraps and cut two strips to use to hang the dowel rod.

Nursery Wall Storage

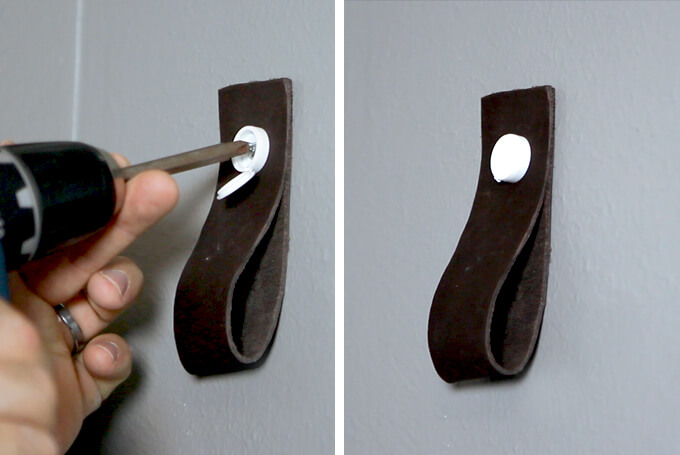
4. We measured and marked where we needed to drill the holes to hang the leather straps. Then used our drill to drill two holes into the wall to make inserting the drywall anchors easier.

We marked a hole in the center of the leather pieces and screwed the leather loop into the drywall anchor. We used a hinged screw cover to cover the screw to finish off the look.

Nursery Wall Storage

5. One the leather straps were in place, we hung the dowel rod from them.

Nursery Wall Storage

6. To secure the dowel rod to the leather straps, we drilled one 1/2″ screw from the back of each piece of leather into the dowel rod so they would be out of sight.

This just added an extra precaution that the dowel rod would not slip out of the leather straps.

Finally, we hung our wire baskets. They already had hooks attached because they were meant to hang on a different type of bar so we just adjusted the hanger part so they would securely fit around the dowel rod.

Nursery Wall Storage

After the baskets were nice and secure on the rod, I added items I think we will need to grab often like burp cloths, diapers, lotion, wipes, etc.

Nursery Wall Storage

To finish up this wall, we hung an adventure sign above the nursery wall storage bar that fits with our modern outdoor nursery theme. I love how all the projects came together for this area of the nursery and how it has a cohesive but non cluttered feel.

I know I (better yet…we) will be spending a lot time standing here changing diapers!

PIN IT FOR LATER

We used a dowel rod, scraps of leather, and a few baskets to create a simple nursery wall storage above the changing table in the nursery to store diapers and baby changing supplies. This DIY project includes a video tutorial.

Industrial Home Office Organization

Industrial Home Office Organization

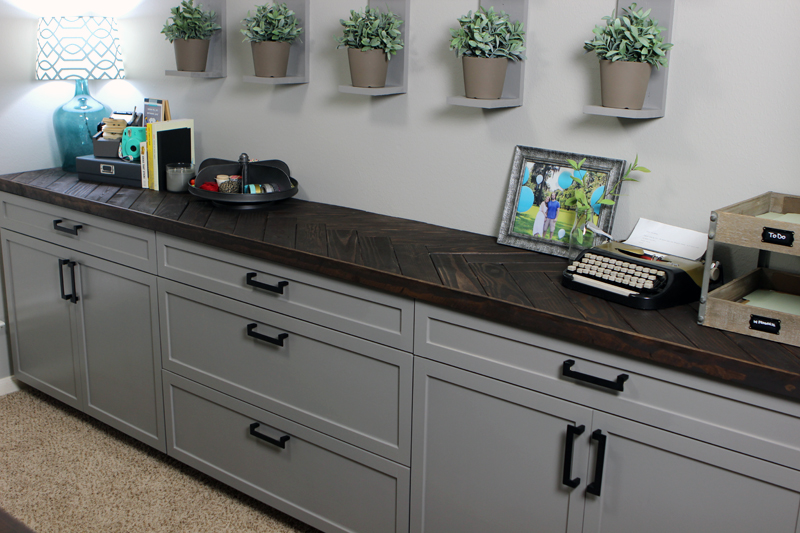
We’re sharing our favorite industrial home office organization pieces that not only help control clutter but look cool too!

Industrial Home Office Organization

I don’t know about you but our home office was the room in our home that seemed to collect the most clutter. Whether you spend long days working in a home office like I do or it just gets occasional use during the nights and weekends, controlling all the paper and supplies that stack up in and around the office can be an overwhelming task. I mean, where does all that stuff come from? Am I right?

A few months ago we had to move our office from a room with doors to the front room in our home without doors and I went into a bit of a panic mode. How in the world was I going to keep all my office supplies (and boy do I LOVE office supplies), paperwork and incoming and outgoing mail neat and organized so I wouldn’t be completely embarrassed if someone stopped by unexpectedly to visit?

When I first started planning our home office I knew I needed to incorporate a few essential home office organization pieces to help get the job done. My favorite pieces came from World Market because not only were they practical and functional but also looked like cool vintage industrial decor pieces as well which fit the style of the room perfectly.

Industrial Home Office Organization

Now that our home office makeover is complete I am thrilled with how nicely everything is organized. It is always so much easier to keep things straightened when things have a specific spot to go back to and when everyone in the house knows exactly where things need to go. Plus, since all the organization pieces we picked out pretty much double as decor pieces we killed two birds with one stone and didn’t have to spend a lot extra to decorate the room. Win!

HOME OFFICE VIDEO TOUR

[yotuwp type=”videos” id=”doQ4ZK4LKuE&t=46s” title=”off” description=”off” player=”width=590&modestbranding=0&showinfo=0″]

Subscribe to our YouTube Channel

Like our video? Subscribe and help us reach our goal of 100k subscribers.

7 Industrial Home Office Organization Ideas

Industrial Home Office Organization
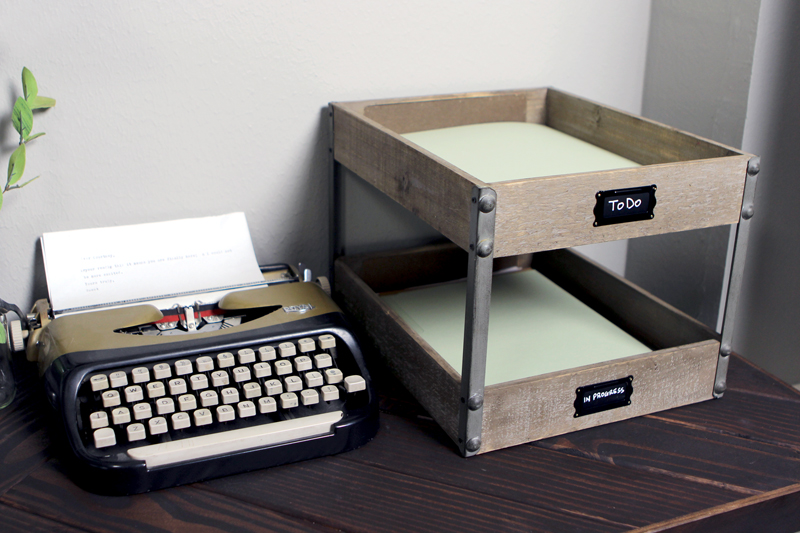
#1 Two-Level Tray

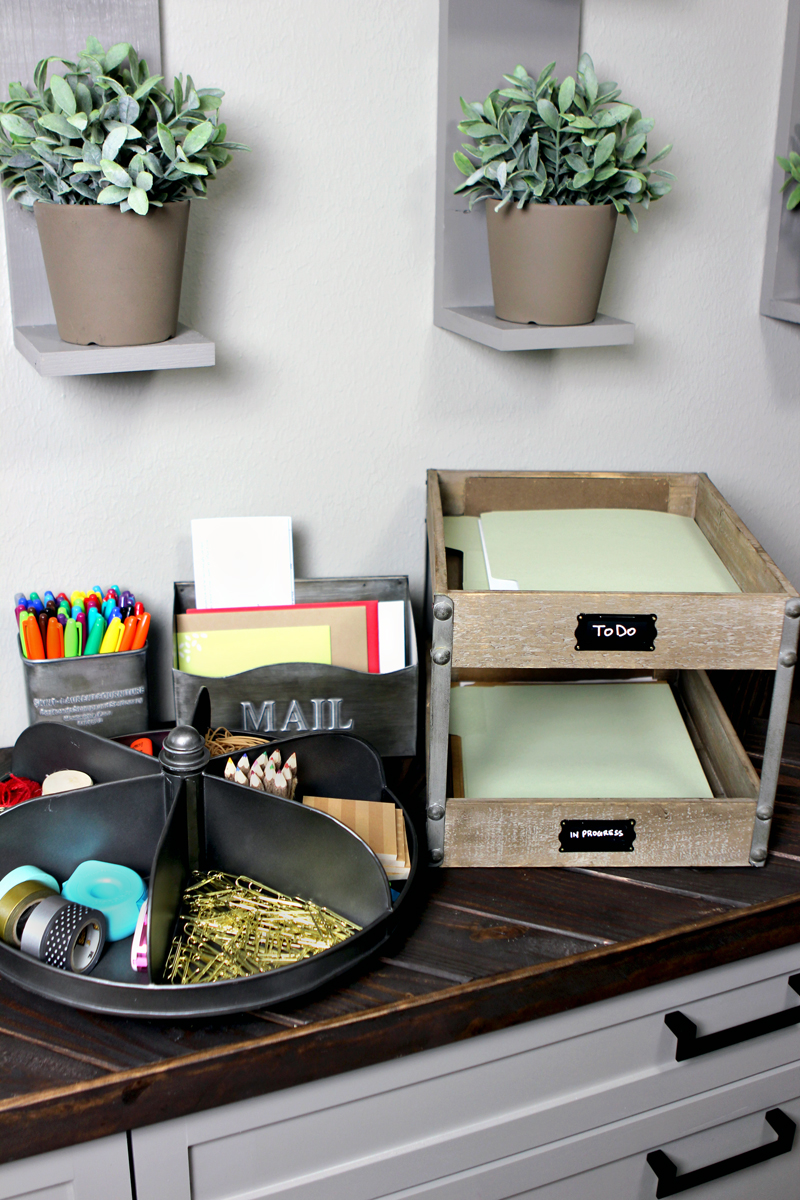
You can get a lot of milage out of a tray that sits on your countertop by using it to sort important papers that need attention such as being mailed back out or signed and returned.

A multi level tray works well to distinguish between the different types of paperwork so that paper so paperwork that requires one person’s attention can be in one tray and paperwork that another family member need to return and sign can be in another one.

I use it to keep client folders grouped into projects that need to be started and projects that are currently in progress.

I personally love the industrial style of this tray; not only is it functional, but it looks like a piece of decor sitting out on the counter.

Unfortunately, this exact product is no longer available but this tired tray is cool too.

Industrial Home Office Organization Rolling Printer Stand
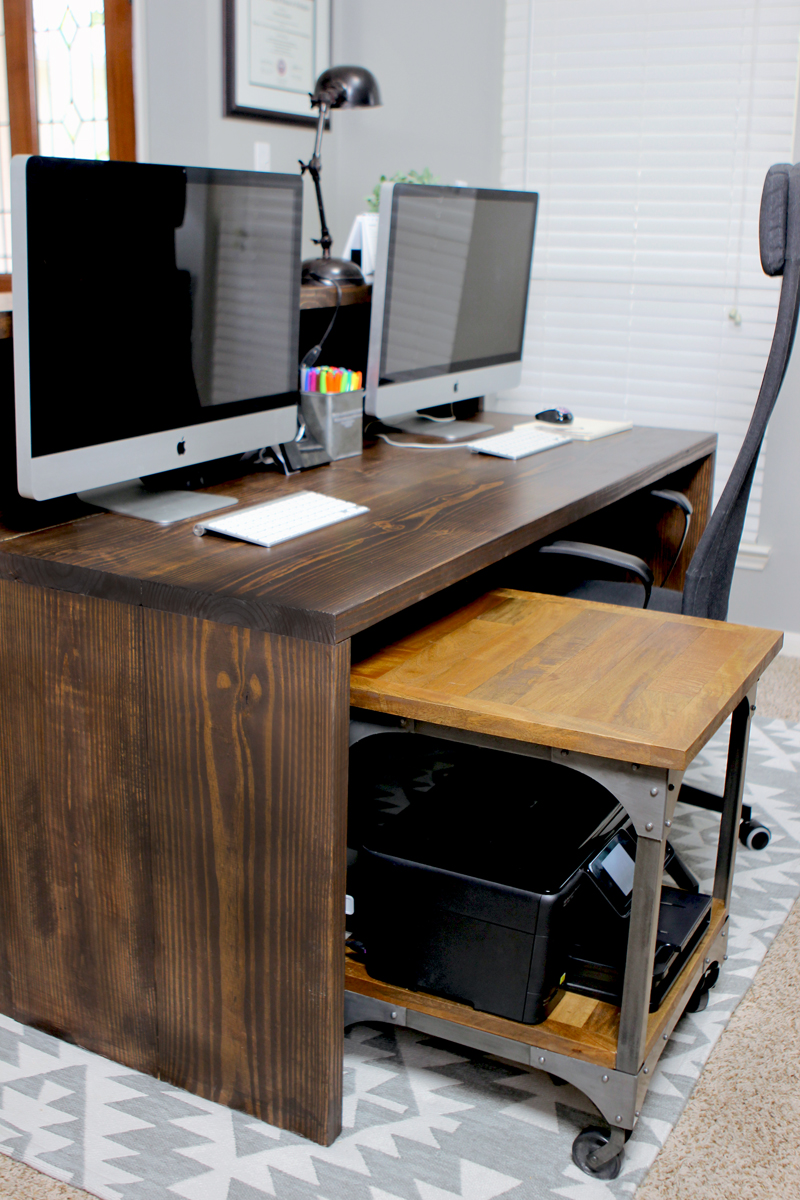
#2 Rolling Printer Stand

The printer is a necessary in a home office but it doesn’t look cute when it is out in the open and they are usually too big and oddly shaped to hide.

A fun solution we came up with is to set your printed on an end table with two shelves that can roll out from under your desk.

The printer can be placed on the bottom shelf and extra paper on the top of the rolling table.

The end table could also roll out to provide extra work space. This is a nice solution that allows the printer to be easily accessible while also keeping it out of plain sight when it is not being used.

Unfortunately, this exact product is no longer available but you could add casters to this end table.

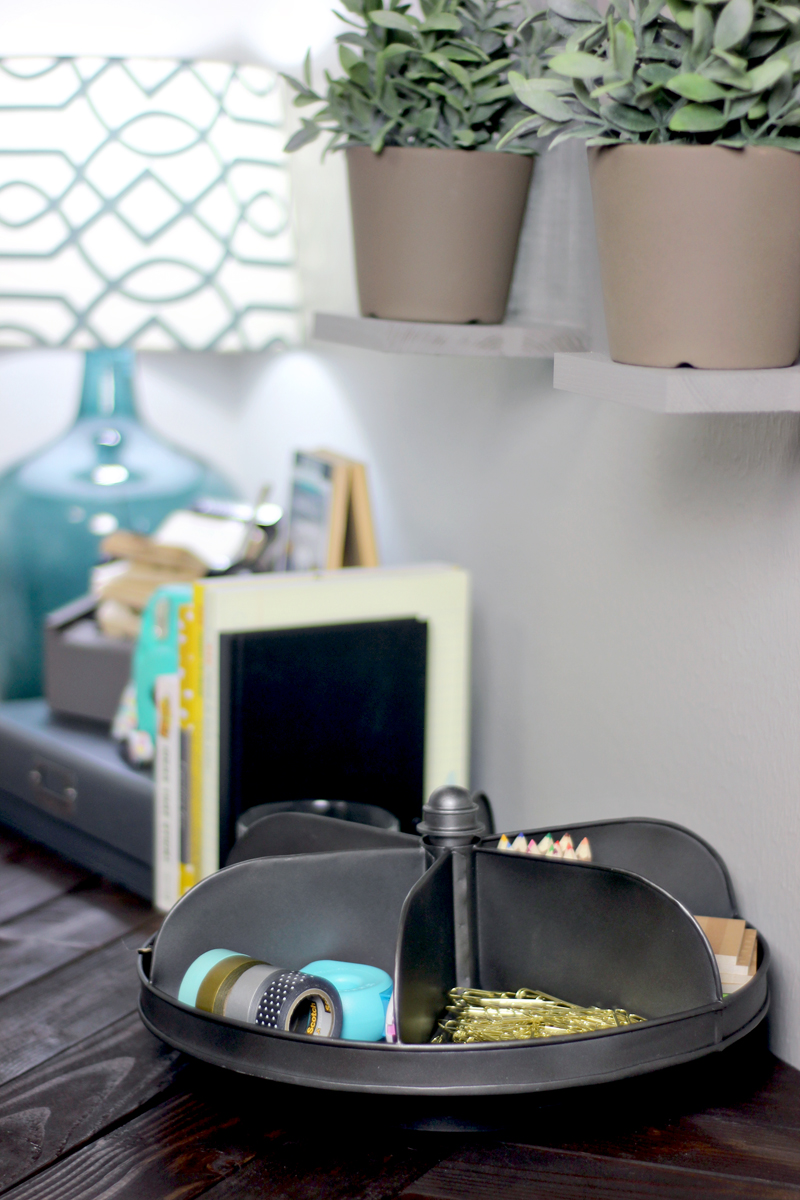
Industrial Home Office Organization Industrial Lazy Susan
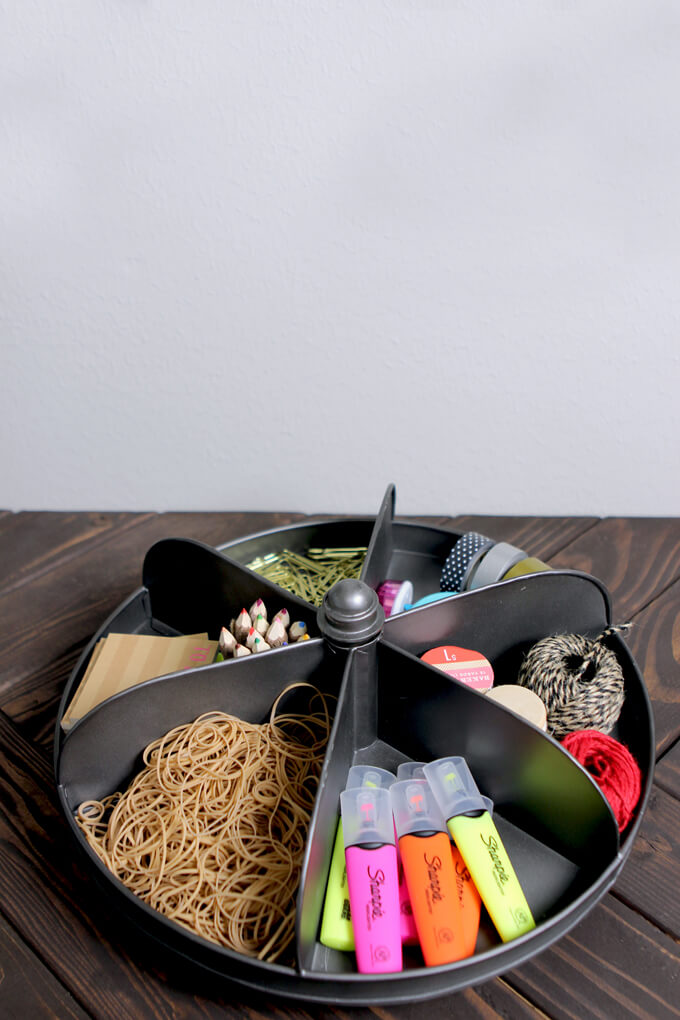
#3 Industrial Lazy Susan

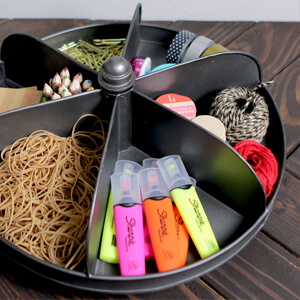
In keeping with the industrial vibe, a hardware bin lazy susan makes for a really fun, easy, and clean solution to store your most used and best-looking office supplies. From twine to washi tape, everything will have a designated spot and supplies are always organized and easy to grab.

Shop the Hardware Bin Lazy Susan

Industrial Home Office Organization Mail Holder
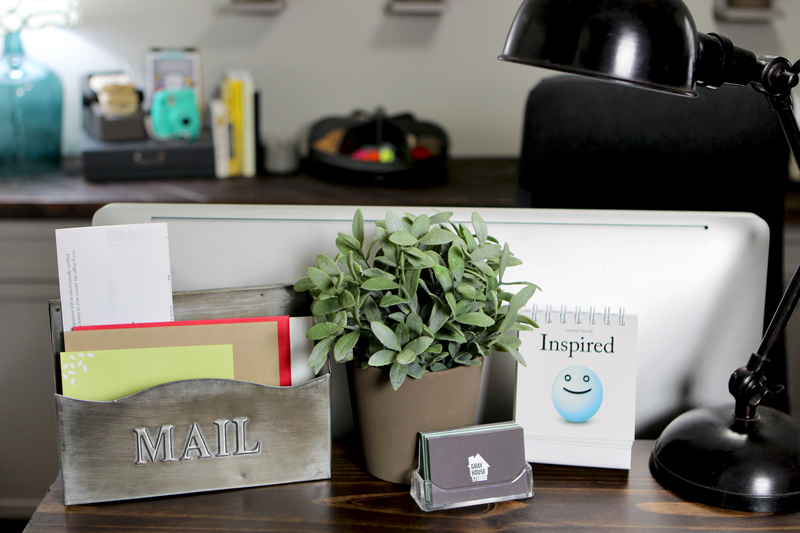
#4 Industrial Mail Holder

A stylish mail holder placed in a location in your home where you walk by often is a great place to store time-sensitive mail, bills that need to be paid or outgoing mail.

We have one sitting on the front of the desk in our home office so that we never lose a bill in the mound of mail we get and can easily grab the mail that needs to go out as we walk out the door.

Shop the St. Laurent Mail Holder

Industrial Home Office Organization Pencil Cup
#5 Industrial Pencil Cup

Why is it that pens are always laying around the house, but when the time comes that you actually need to use one, you can’t find one anywhere?

A pencil holder on our desk easily solves this problem. Note: not all pencil holders are created equal. I love the size and vintage-industrial appearance of this pencil cup; as you can see, it’s large enough to hold my extensive colored marker and Sharpie collection.

Shop the St. Laurent Pencil Cup

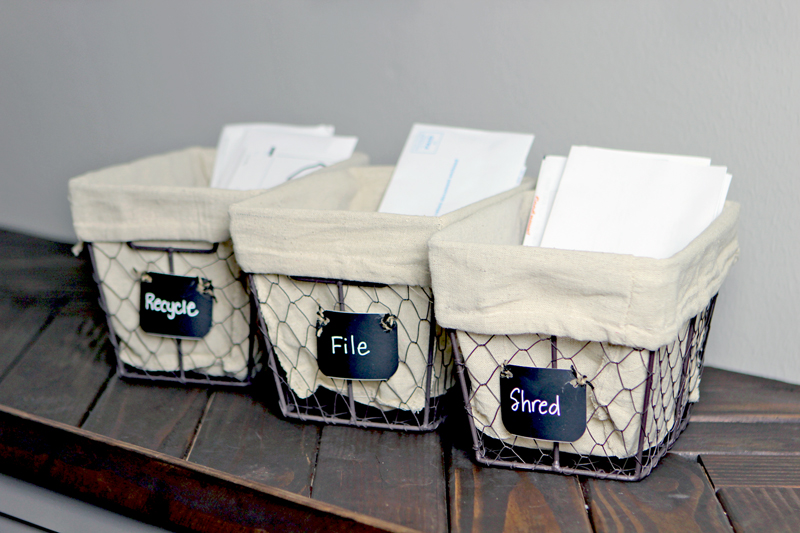
Industrial Home Office Organization Wire Baskets
#6 Wire Baskets for Sorting Mail

Mail clutter was a huge problem in the past in my home. Even when we request to go paperless, we still mail thanking us for going paperless!

With busy daily schedules it is hard to stay on top of sorting the mail, but fortunately, wire baskets make for an easy organization system.

Labeling each wire basket (“file”, “shred” and “recycle”) allows you to easily and quickly assign the paper to its appropriate basket.

Tip: Using smaller baskets forces you to clear them out on a regular basis and keeps clutter at bay.

Charlotte Lined Wire Baskets

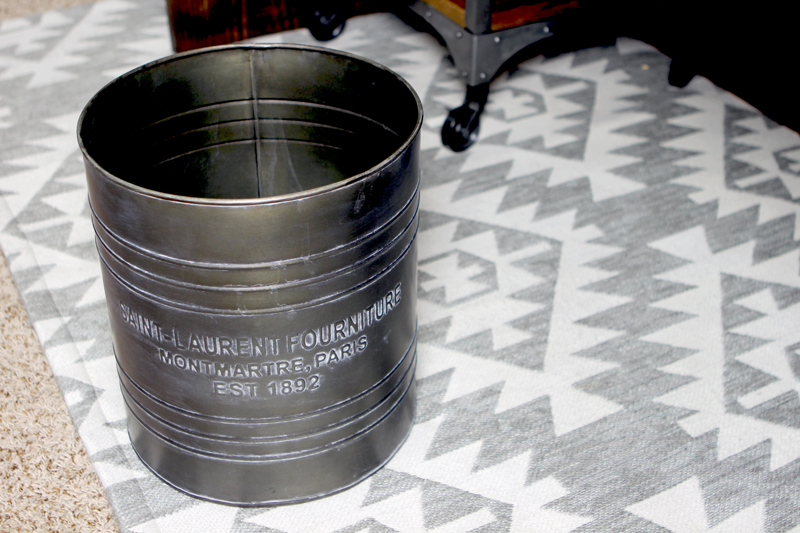
Industrial Home Office Organization Metal Trash Can
#7 Metal Trash Can

A trash can in a home office is a must but it doesn’t have to be plain and boring.

This oversized metal trash can looks more like an industrial decor piece rather than a can for storing garbage.

Also, if you are think outside the trash can, it could make for a cool base to hold a large faux plant.

Shop the Embossed Metal St. Laurent Trash Can

Industrial Home Office Organization

There you have it! These are my favorite industrial home office organization pieces!

Having a home office be the first room guests see when they walk in the door seemed a little intimidating to us at first, but we are happy with how easy it has been to keep our office organized just by incorporating these industrial-style storage pieces.

No matter where your work space is, you can have the organized office of your dreams and easily control the clutter with just a few must-have storage pieces.

SHOP THIS POST

FYI: This post contains a few affiliate links to products we used to make this project. Gray House Studio does receive commissions for sales from these links but at no extra cost to you. We appreciate you supporting this site. Read our privacy and disclosure policy. You can also easily shop our recommended products here.

PIN FOR LATER
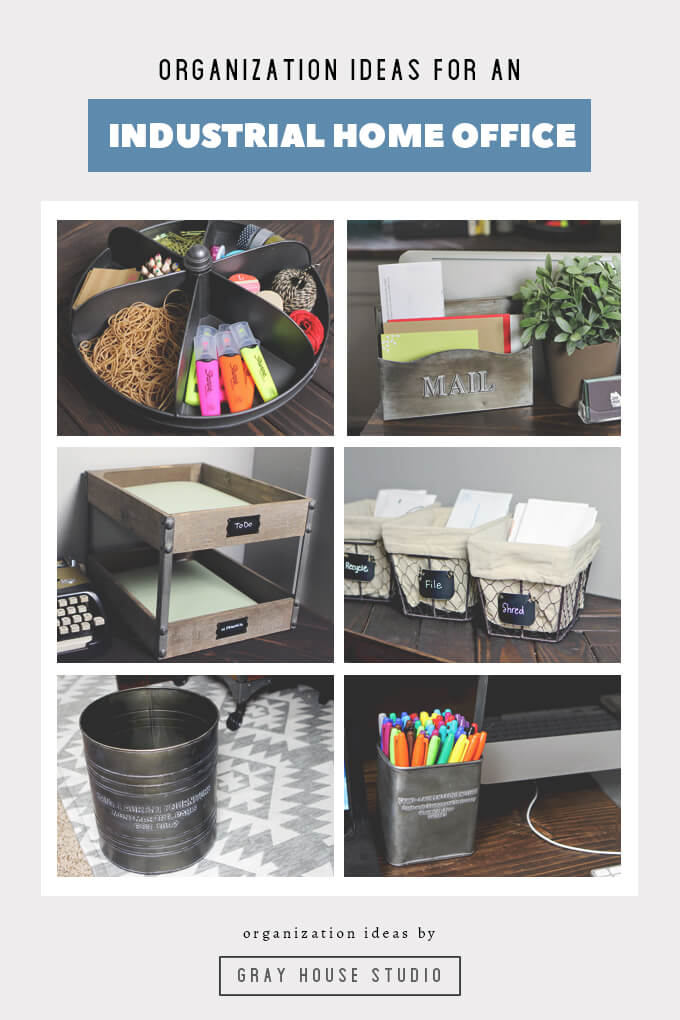
We've collected seven products that will help control the clutter in your industrial styled home office. Not only are these home office organization pieces helpful, they look really interesting and unique as well. These tips will help you kick start organizing a home office.