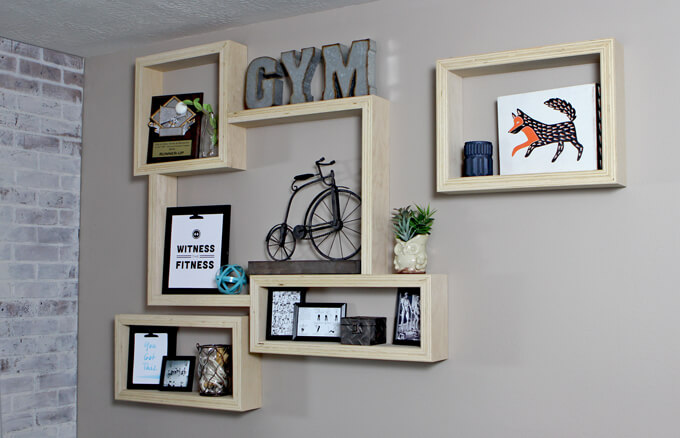
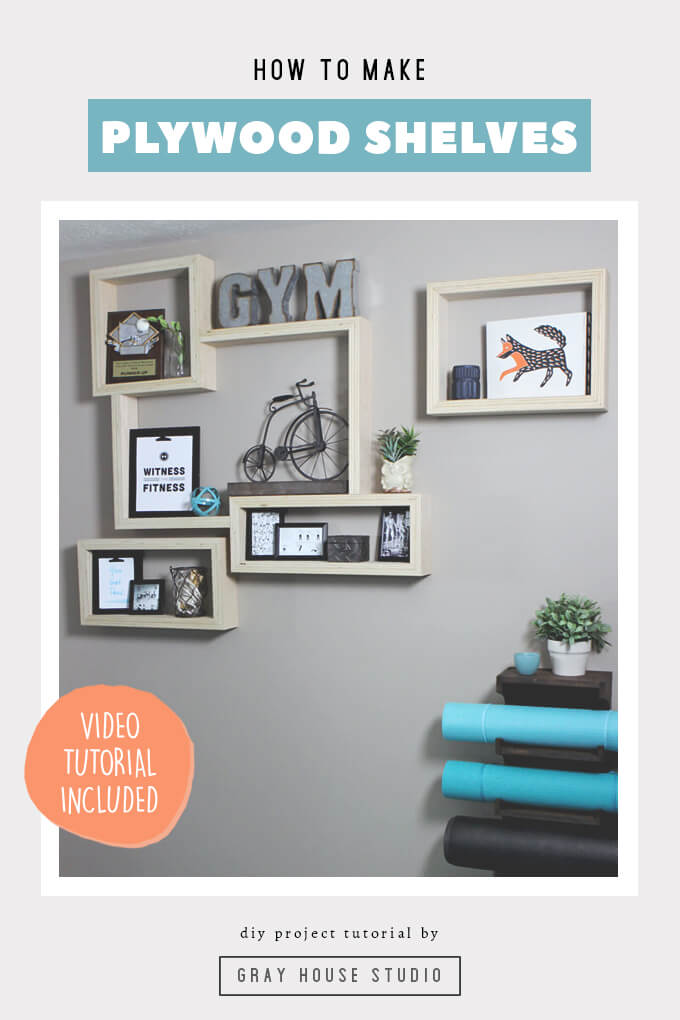
Check out how we made wall-mounted plywood shelves for our home gym.
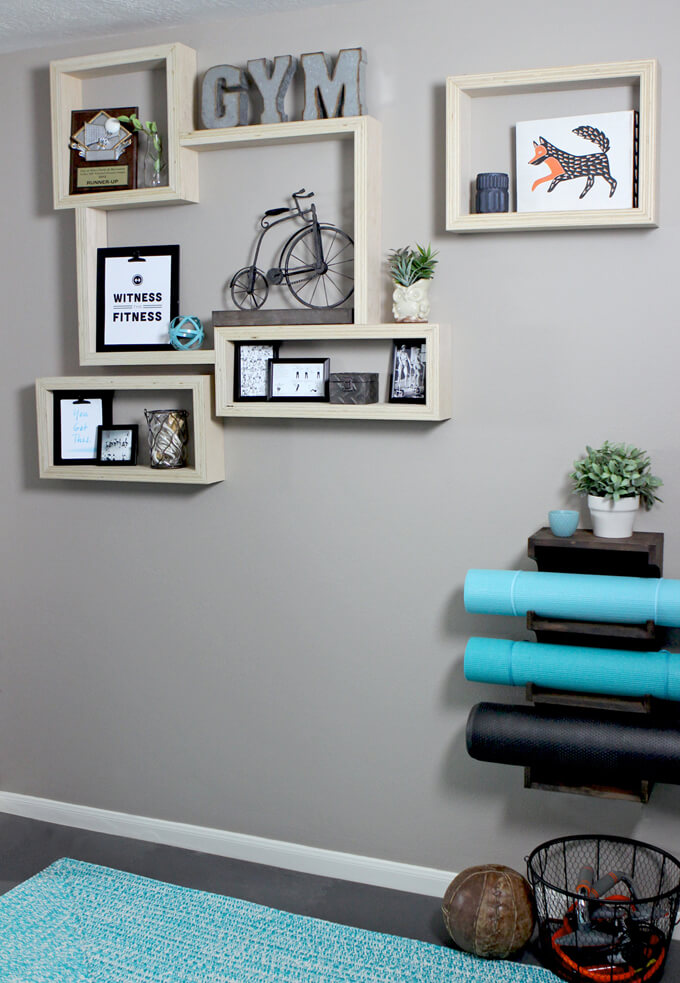
The past few weekends we tackled a pretty large project for our home gym, a huge wall of plywood shelves with an exposed edge.
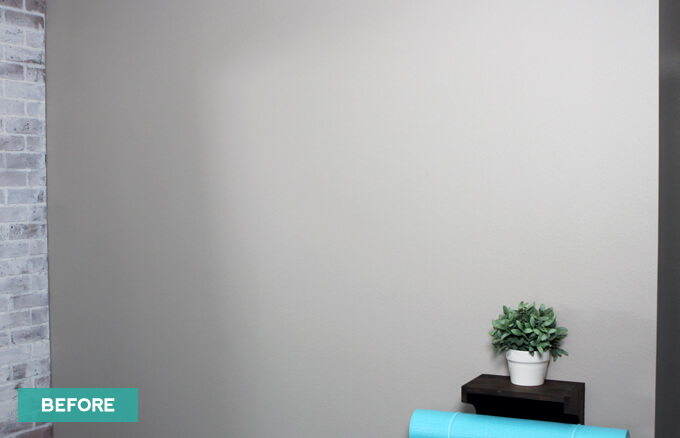
We had initially intended to have a large piece of art on this wall but I am learning that it is always a good idea to be flexible when it comes to designing and decorating your home because you never know when a better idea could come along.
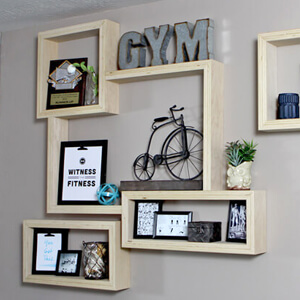
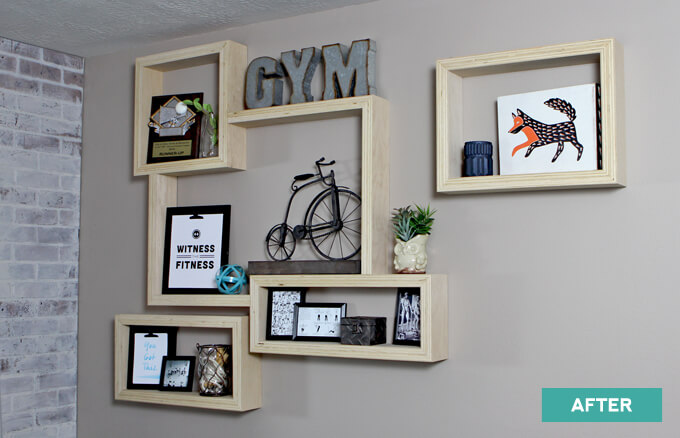
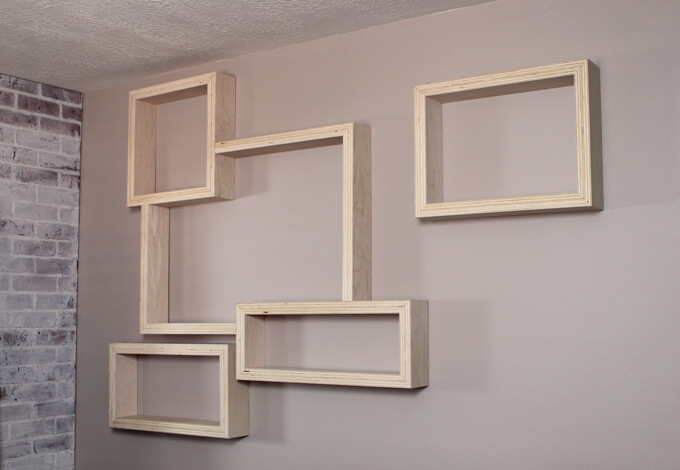
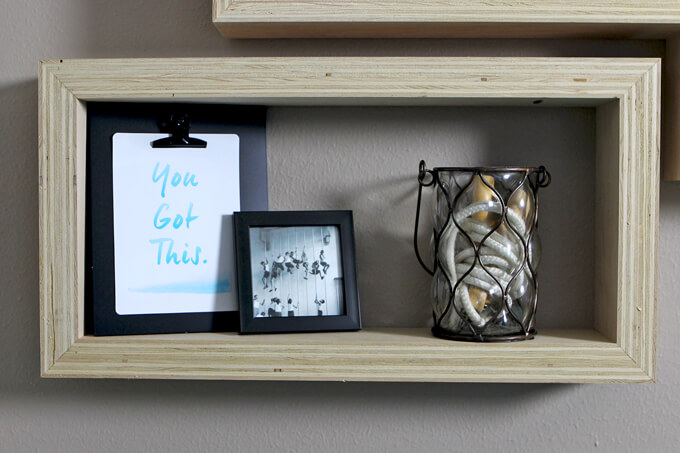
After giving it some more thought we changed our minds and decided it would be fun to make the shelves into a form of art by creating a design of different shapes. It is quirky but we love it!
Can you believe we made all those shelves with just one piece of plywood?Check out how we made our DIY wall-mounted plywood shelves below.
FYI: This post contains a few affiliate links to products we used to make this project. Gray House Studio does receive commissions for sales from these links but at no extra cost to you. We appreciate you supporting this site. Read our privacy and disclosure policy. You can also easily shop our recommended products here.
Like our video? Subscribe and help us reach our goal of 100k subscribers.
STEPS
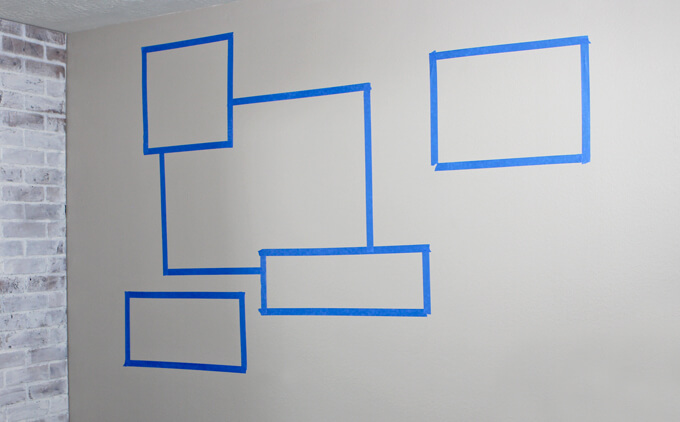
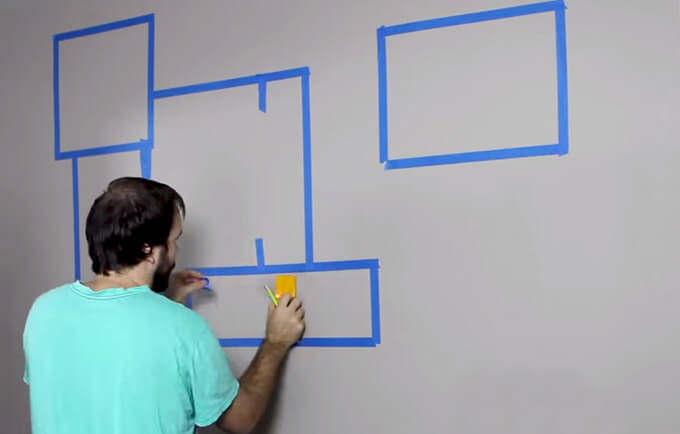
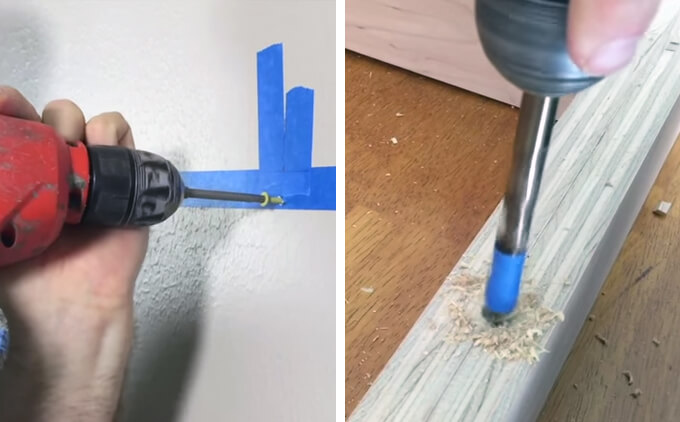
1. We used blue painters tape to first create the shapes of the shelves on the wall. This helped us determine the exact measurements we needed to cut the wood.
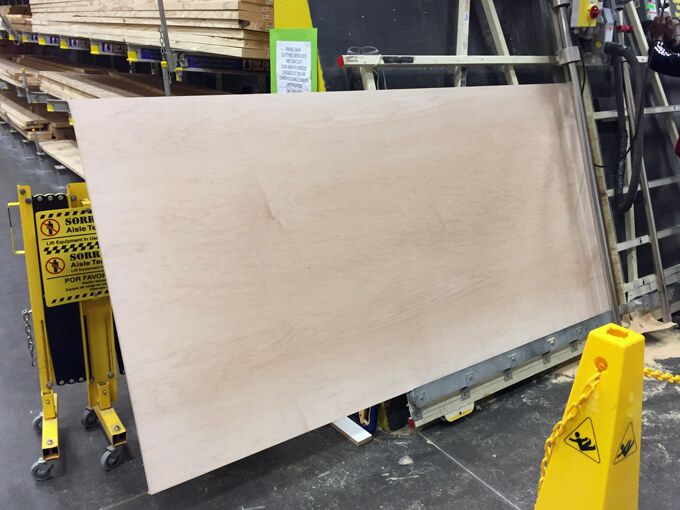
2. We bought a large piece of really nice plywood to use for our shelves. We had our local hardware store cut down the piece into smaller sizes so it would be easier to work with and fit in our car.
3. Next, we had to cut down the large pieces of plywood into many, many, many smaller pieces using our table saw.
Brent made a crosscut sled to make the process easier and to make sure each board was cut to the exact the same size.
I helped keep the boards steady. To save time and energy, we cut all the boards to be the same size which was the longest side on the shelves.
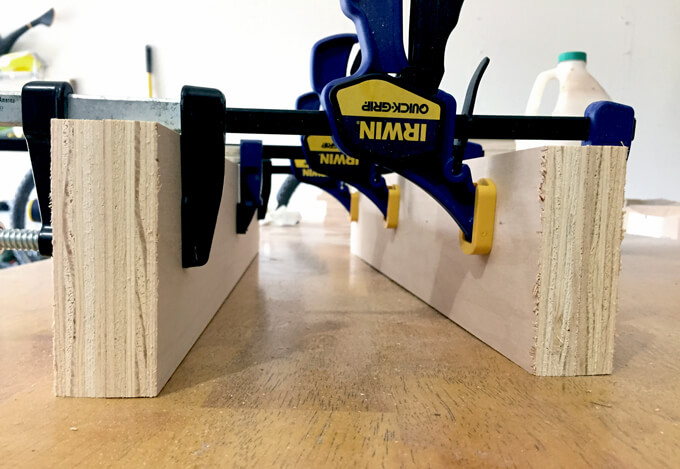
4. We wanted the shelves to be nice and thick so for each piece of the plywood shelves we used wood glue to attach the boards together and then used our small clamps to keep them together them while they dried in place.
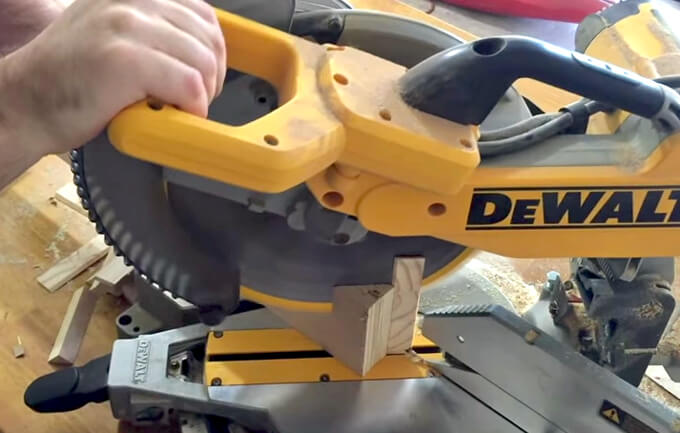
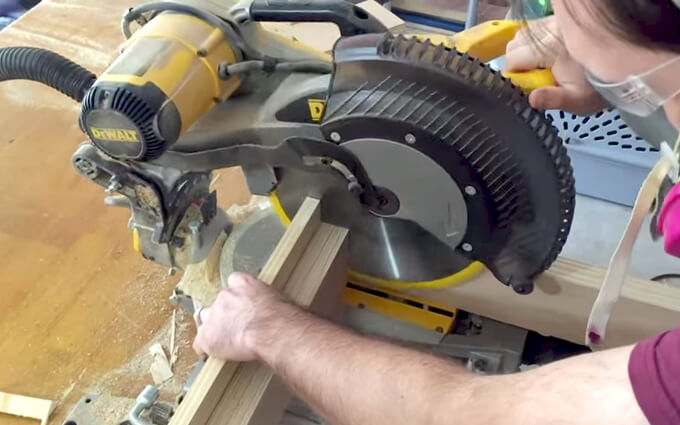
5. After the boards were dry, we used a miter saw to cut the boards down to size at a 45 degree angle so the boards would go together like a picture frame.
We used a backing board to prevent tear out so all the boards would be nice and smooth.
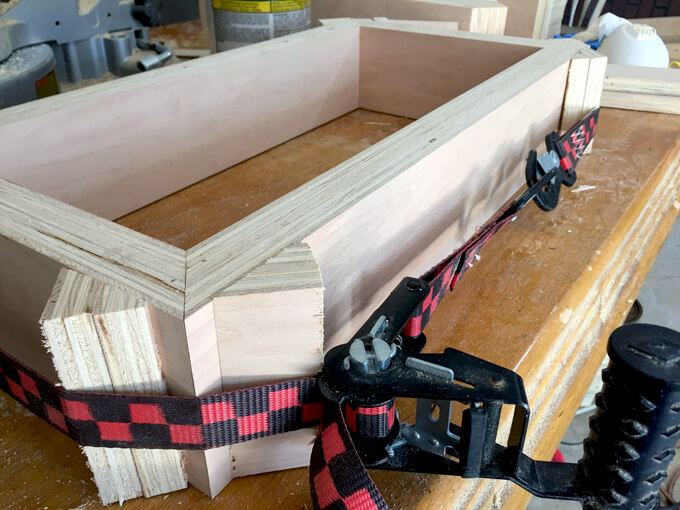
6. We applied wood glue to each corner of the smaller shelves and then put them together using scrap boards and a ratchet strap that held the pieces tightly in place as they dried.
7. For the large shelf we used the miter saw to cut the piece into two L shapes.
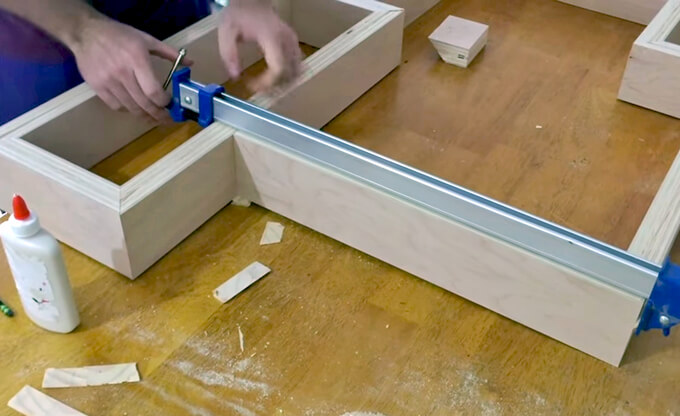
8. We glued the two L shape pieces to the two smaller shelves and then used large clamps to hold the piece in place while the glue dried. This completed the large shelf assembly.
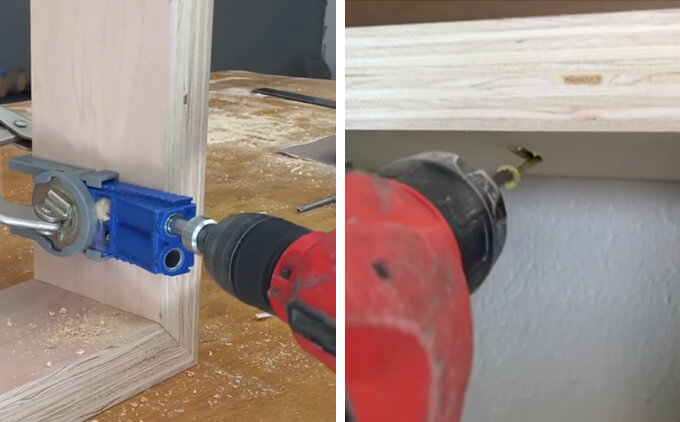
9. Back in the room we used our stud finder to located where each screw needed to go so it was in a stud. We marked these spots with painters tape. We also marked these same spots on the shelves.
10. Before removing the tape on the wall, we used the marks we made with the tape to locate where to secure the screws in the wall and used a drill to make holes in the shelves in the same location to match.
12. Finally, we got all of our shelves up hanging on the wall.
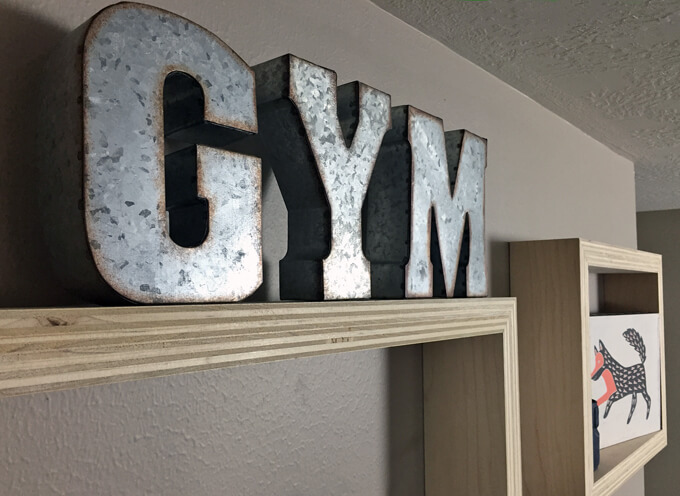
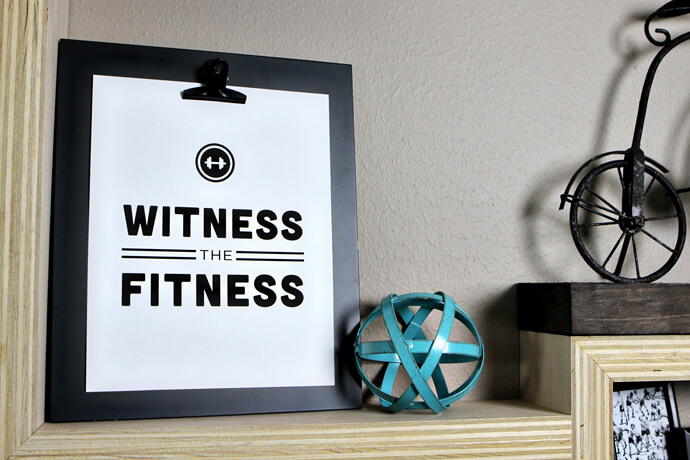
I went out one day shopping to try and find items to fill up our new shelves that would fit the right depth, had a vintage/industrial feel, were quirky, and not too expensive.
I am a shopping novice so I was a little intimidated to get all the items in one trip but with my measurements, a tape measure and a photo, I managed to get the exact right amount of items to decorate the shelves.
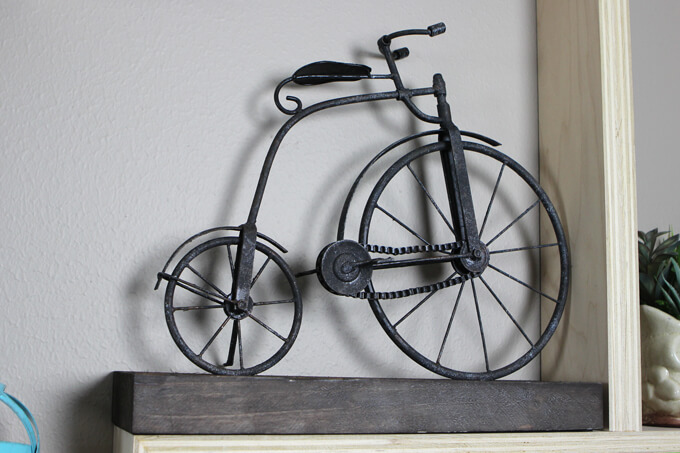
This bike was a really cool find.
I did measure everything depth wise before I bought it to make sure it would fit on the plywood shelves but I didn’t realize the bike would fit perfectly on the one area of the shelf. It was like it was like the bike was made for the shelf or the shelf was made for the bike.
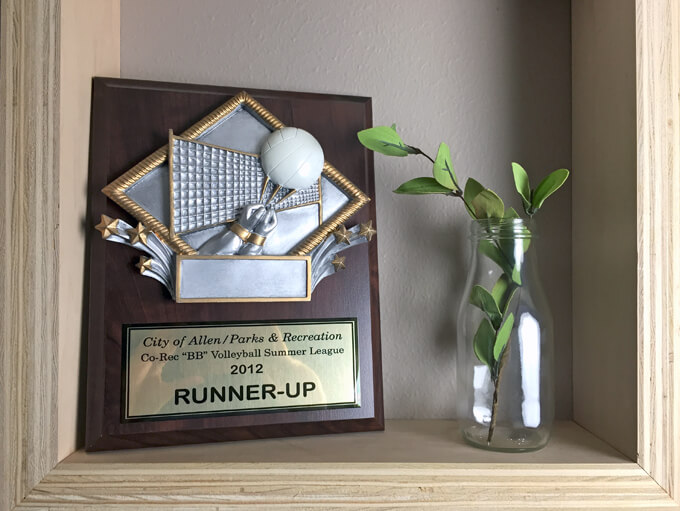
I love playing volleyball so obviously I had to display my super awesome summer 2012 runner-up Parks & Recreation co-ed volleyball team plaque from back when I lived in Dallas. We did win a couple of seasons but somehow when we got runner-up it was my turn to take the plaque home.
Funny how that works…oh well. I have been waiting patiently to find a place to showcase this beauty. Haha.
We are extremely happy with how the shelves turned out. They are quirky and fun which makes us happy. If there was anywhere you could get away with eclectic shelving, I think a home gym is the place.
I would like to report that since the shelves went up in the home gym last weekend I have worked out in there 4 out of the 5 week days this week which is my new record since we bought the treadmill. Is there a correlation? Maybe, just maybe.
The room is shaping up to be a really enjoyable space to spend our time. We only have a few projects left in this room which include building a locker area, new lighting, building a stand for weights, and to do something cool with the window. We can’t wait to get this room finished!
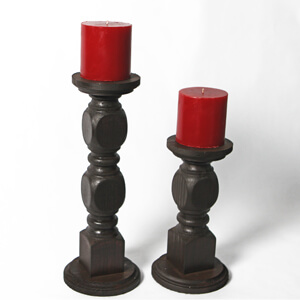
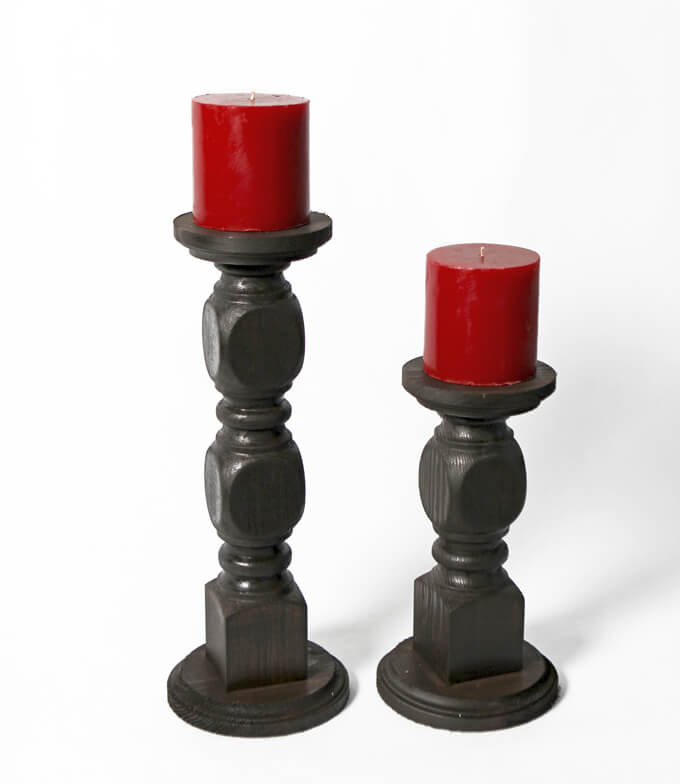
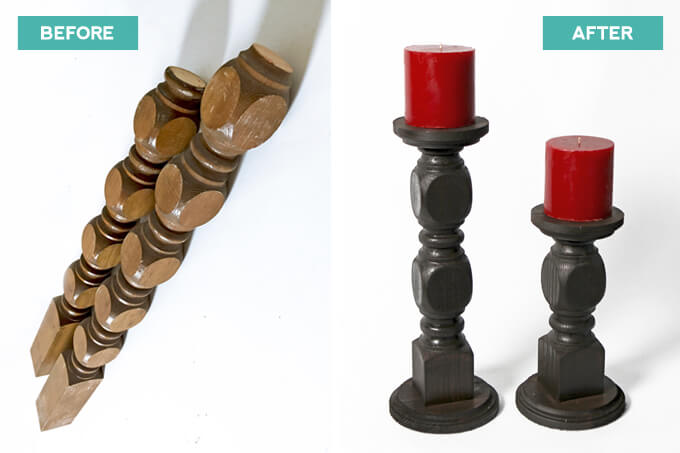
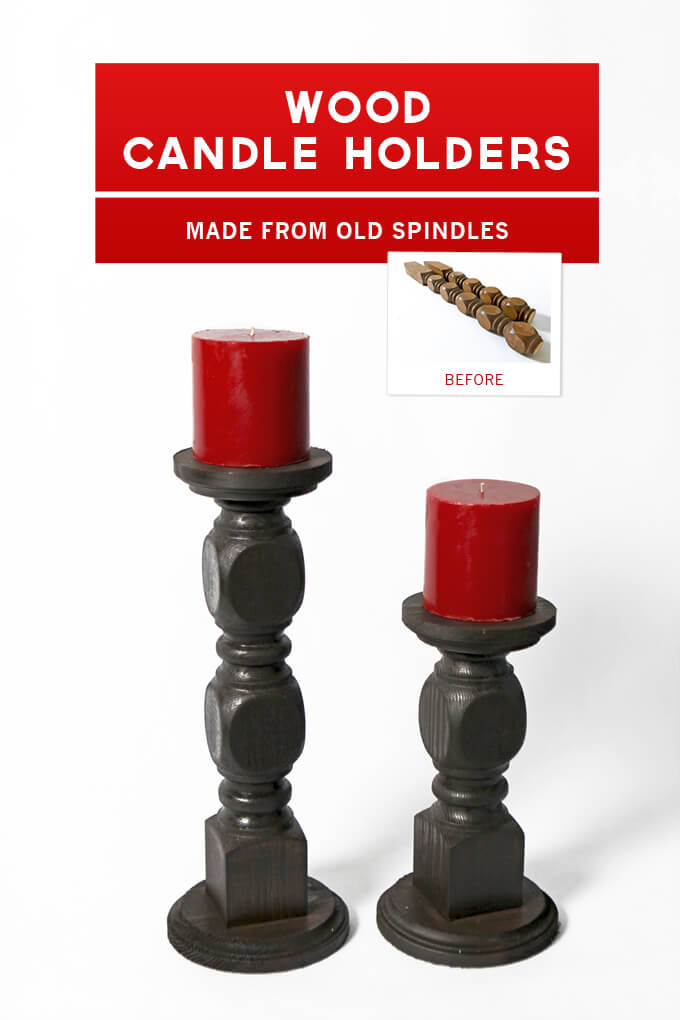
We gave new life to old spindles by transforming them into wood candle holders.
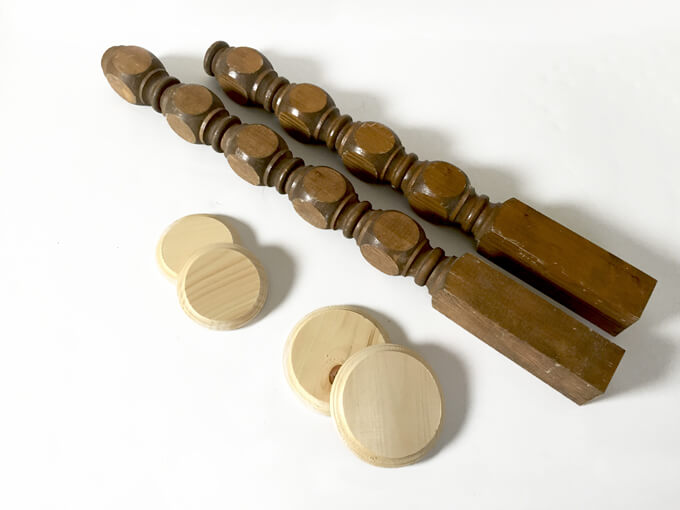
Hello! Courtney here today sharing a project that I worked on this past week that meant a lot to me. My grandparents are doing a little remodeling around their house and decided to open up the space above their wet bar by taking down the spindles that ran from the bar to the ceiling. These spindles were original to the house which makes them older than me!
My grandparents gave them to us in case we could use them for a project. I then had the idea to recycle the spindles and use them to make wood candle holders as a gift to give my grandmother for her birthday this week. It came together really quickly with very little supplies and I am so proud of how it turned out.
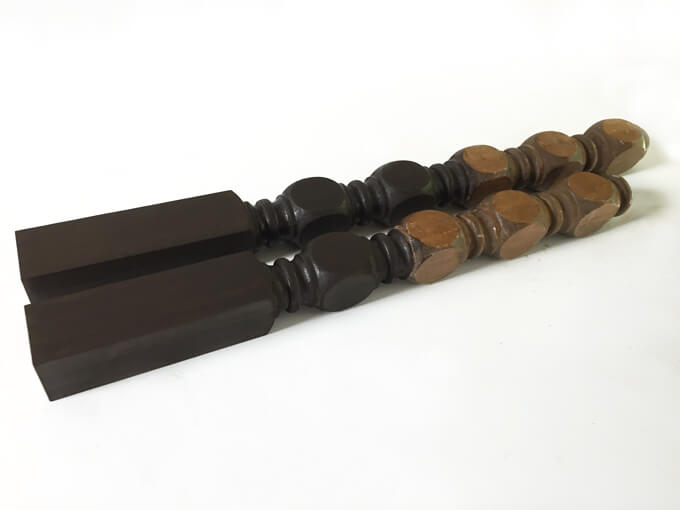
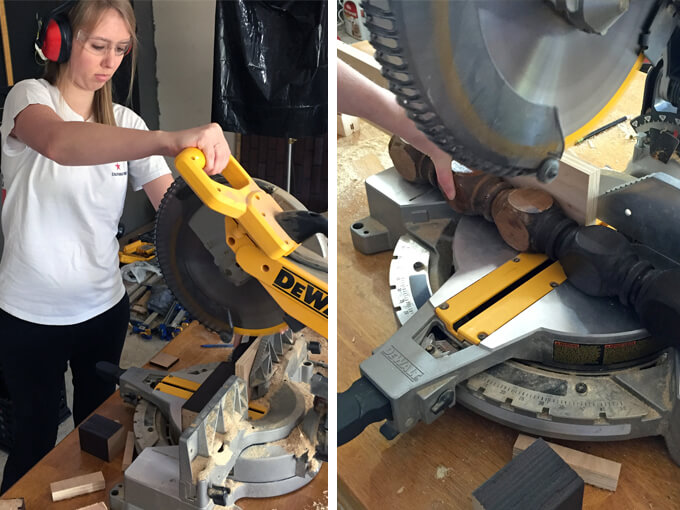
1. I wanted to change the colors of the spindles but the spindles had a clear coat on them so I needed to sand them down. It was a tricky task because of the details on the spindles there were lots of tiny areas to try and sand down. I HATE the sound and feel of sanding so I usually wear gloves and headphones while tackling this process.
2. After I sanded down the area, I stained the sanded parts with our favorite color stain, Rust-Oleum Ultimate Wood Stain in Kona. I put two coats on to make sure it was nice and covered.
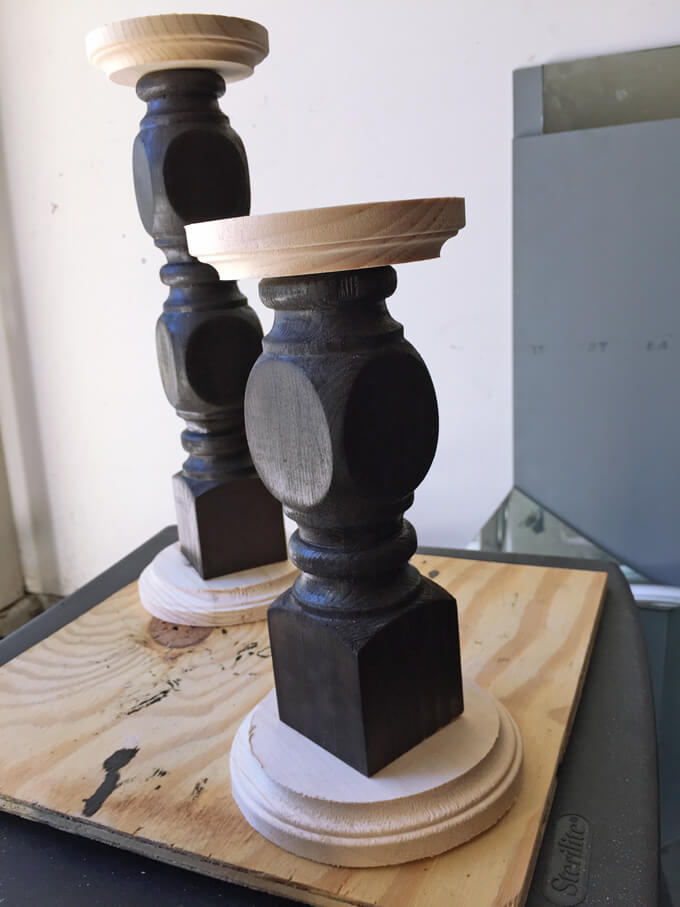
3. After the stained dried, I cut down the spindles to the area I stained with the miter saw. I decided to make them varying heights.
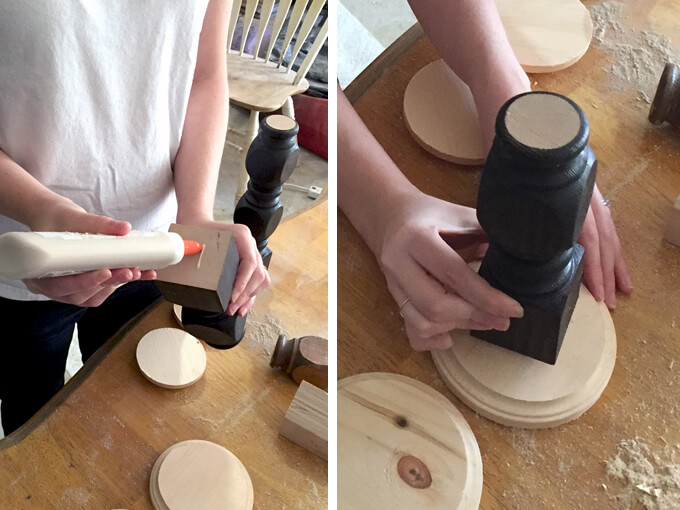
4. I made two cuts with the miter saw. The first was to trim down the square part and the second was to cut right above one of the circle sections so I would have a nice flat area to attach my top wood disc. It came out great!
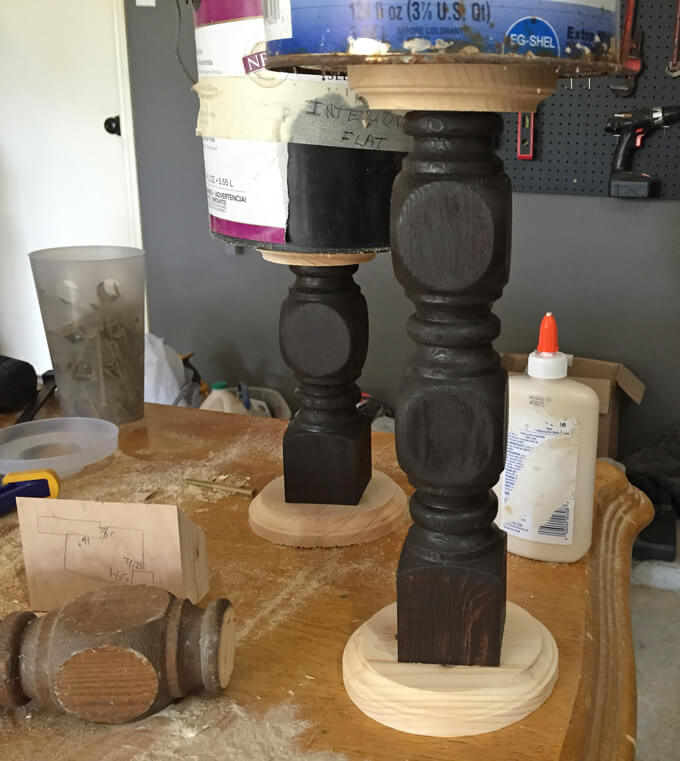
5. Don’t let that bottle fool you, that is not Elmer’s glue but rather super strength wood glue. Brent put it in an old glue bottle to make it easier to use. Brilliant! I used a tiny dab of wood glue to attach the two wood discs to the spindle to create the candle holder.
6. I had a hard time using a clamp to hold the pieces in place without the pieces getting moved off center so I went for option B, old paint cans. Paint is tedious to dispose of which is why we still have old paint cans that were here when we moved in still sitting in our garage. However, they came in handy in this situation. I set them on top of the candle holders to apply pressure.
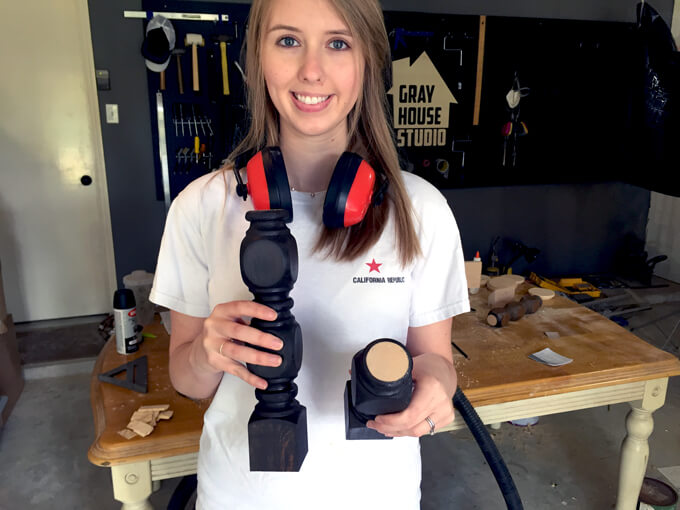
7. Once the top and bottom pieces were attached to the spindle, I stained the wood discs the same Kona colored stain to match the spindle.
In just a day I was able to give new life and purpose to old spindles. I love the design of the spindles and while they definitely looked out dated in their original location they look perfect as candle holders! Plus, the sentimental side of me loves the fact that they come from grandparents’ home.
We have plenty more spindles and we can’t wait to make another project with them.
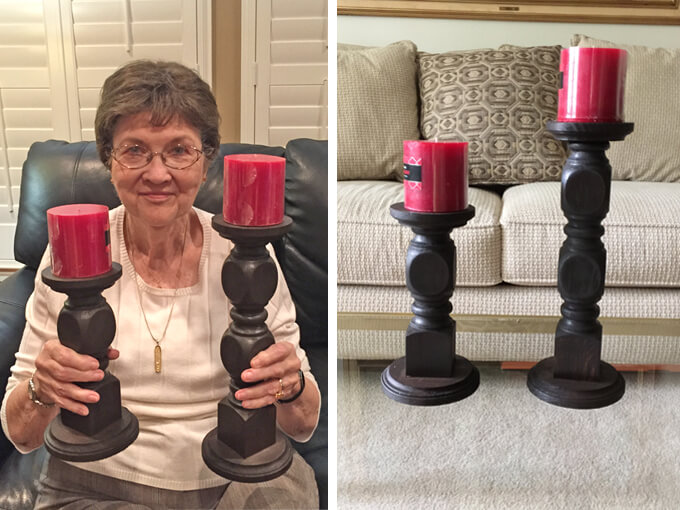
Brent and I were super excited to surprise my grandmother with them for her birthday last night. All my hard work sanding was rewarded when I saw her eyes light up the minute she realized they were made from her spindles. It made my day.
Those spindles were a part of their home for 33 years so now she has the best of both worlds. Their home is more modern with them removed, but she has a touch of nostalgia with the wood candle holders sitting on her coffee table.
Have you re-purposed spindles for another use? We would love to hear your ideas or suggestions for our next spindle project.
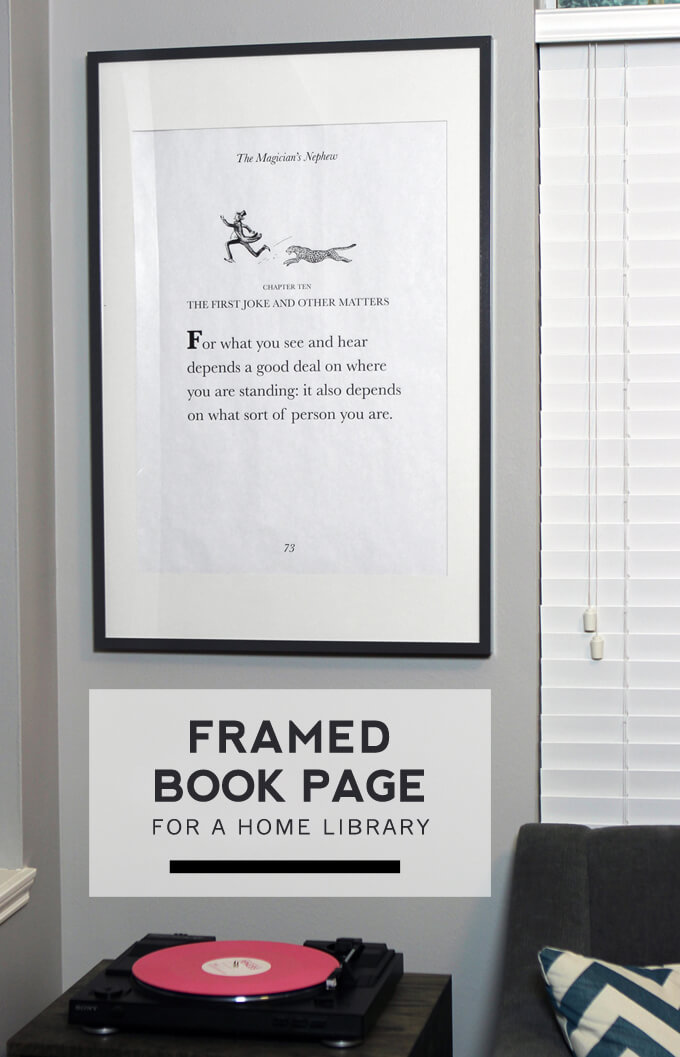
To fill in a tricky empty corner in our home library we hung an enlarged framed book page that we created featuring a favorite quote.
Do you have a spot in your home that you don’t quite know what to do with? For us it was a corner in our library. We are closing in on having our library finished, short of our flooring but that is a rant for another day. The library is not huge so we are cautious of making it feel overcrowded with too much “stuff”. For awhile we had our traveling tree filling up this corner.
I call it our traveling tree because I bought this tree back when I was decorating my first “grown-up” apartment. I still like the tree but since we moved into our house I have not found the right spot for it. So I move it around from room to room, corner to corner to act as a temporary fill in for empty spaces. But I never like how it looks there so it ends up moving on to the next empty spot once I find something better to replace it with.
Poor, sad traveling tree, maybe someday it will find a place to call its forever home.
It wasn’t until I moved the tree that I realized how much I didn’t like it in that corner because it was too much next to the love seat. While browsing Pinterest one evening I stumbled across an example of a large framed book page.
A lightbulb went off. What would be better in a library than a large framed book page? It would be just big enough to fill up the corner without looking too crowded.
I remembered that sitting in our closet unused was a huge frame Brent found in the IKEA reject section for $5 that looks perfectly fine. Ah, we love when a project that is a solution to an empty space costs us almost nothing and is easy to quickly put into action.
Our Framed Book Page Project
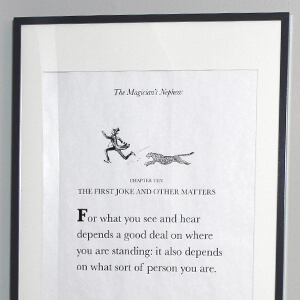
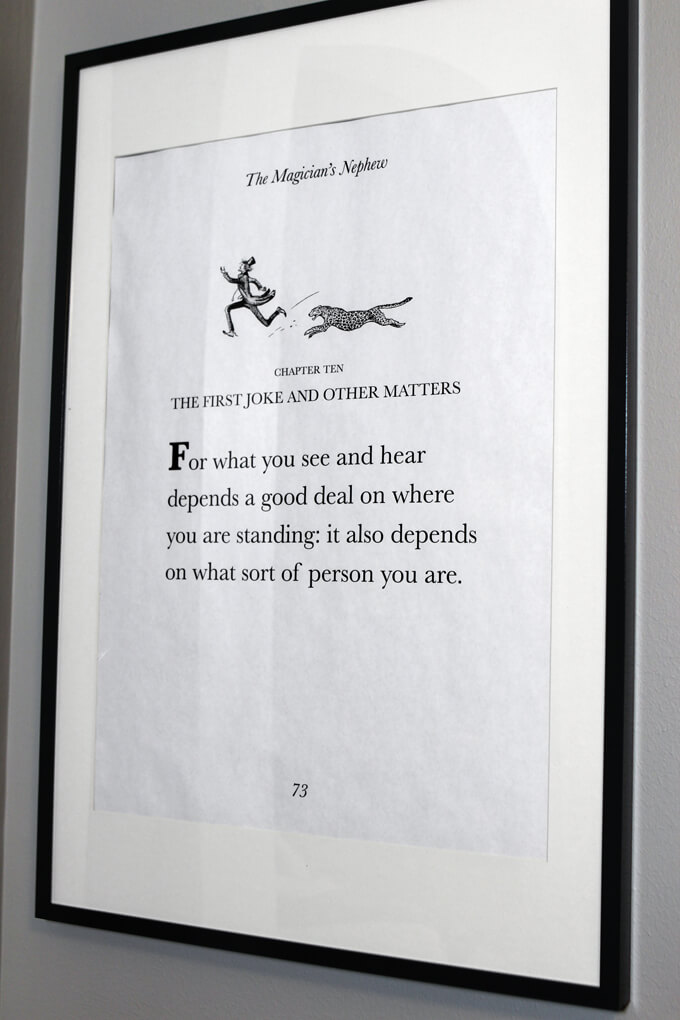
The hardest part was determining what page in what book out of the hundreds of books we have to use. We sat in our library and flipped through tons of books and then I remembered a line about perspective that I really liked from the Magician’s Nephew (part of The Chronicles of Narnia series). “For what you see and hear depends on where you are standing: it also depends on what sort of person you are”.
The line was buried in the page which was all text so Brent and I decided to get creative and create our own fake book page featuring this quote so it would be more prominent. I really liked the title page for the chapter it was in so I scanned that page of the book and opened it up in Illustrator.
I created a new document that was the size we wanted to print so that would fit in our large frame and all the text and graphics would be the right size and resolution. Then I created our new fake book page by adding the the graphic from the title page and typing the book title at the top, chapter title in the middle, the quote we wanted to feature and included the page number at the bottom.
We needed all the text a lot larger so it would be visible and easy to read. We then had it printed, cut it to size, popped it in the frame and hung it up.
The whole project took us about two hours from finding the quote to hanging it on the wall and cost us $5 for the frame and maybe $2 to have it printed.
We had two copies printed just in case we messed one up while cutting it to fit in the frame. While we love building huge detailed projects, we are quite fond of these quick Sunday afternoon decor projects too.
We think a framed book page is the perfect solution to that tricky corner and addition to the library. Plus, since I tend to have commitment issues when it comes to decor in our home, I love pieces that are flexible and easy to switch out. If Brent or I find a new favorite quote from a book we can inexpensively change out the book page in the frame, keeping our library feeling fresh.
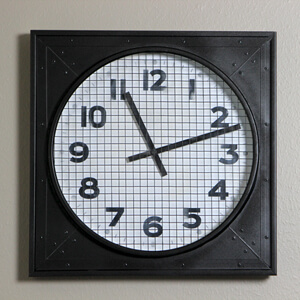
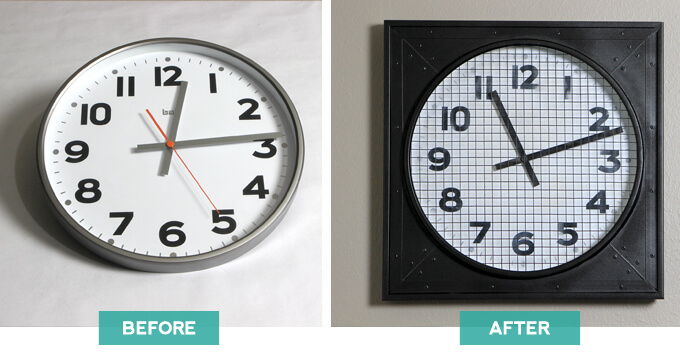
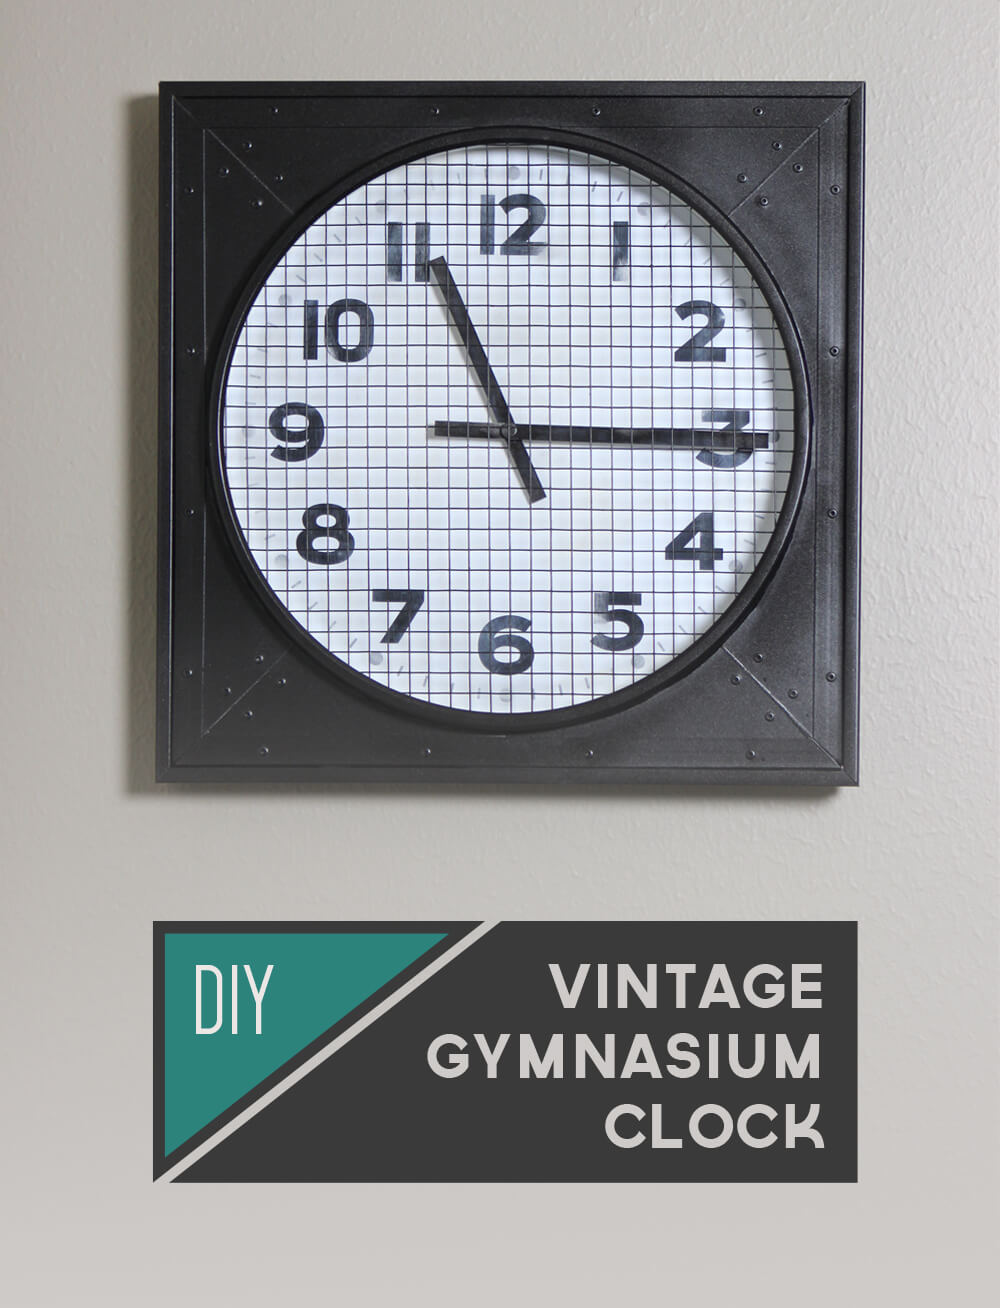
For this knockoff project we created our own DIY vintage gymnasium clock based on the Restoration Hardware 1940s Gymnasium Clock for our home gym.
This weekend we completed another DIY project for our home gym makeover and it turned out awesome. We wanted to see if we could turn back time and if we could find a way… to make a brand new modern clock look like a vintage gymnasium clock. The style we are going for in our home gym is vintage & industrial so it just made sense to incorporate an old-fashioned gym clock with the metal grill.
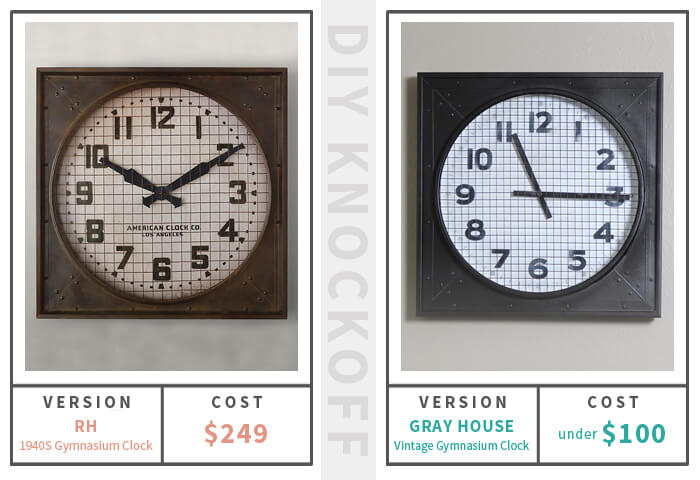
DIY KNOCKOFF
I found some great examples for inspiration but the Restoration Hardware 1940s Gymnasium Clock really hit both the vintage AND industrial look I was looking for perfectly. Brent took one look at it and was very confident we could make our own that looked just like it so I was extremely happy because we are on a budget with this room makeover and I couldn’t bare to hand over $200 for a clock, even if it is a really big, really cool clock.
So we made our own slightly smaller version of theirs using a basic clock. The whole project should have cost us around $80 but we actually got the clock with a gift card we won in a contest. Score! So our whole DIY vintage gymnasium clock project took about a day and cost us around $20. Ah, one less zero sounds so much nicer.
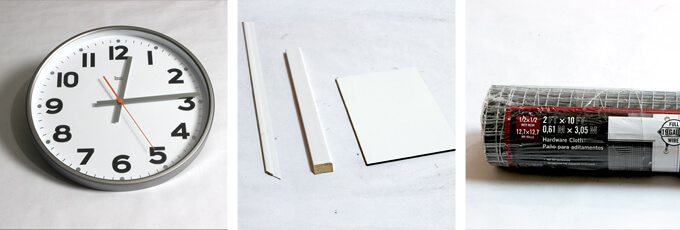
SUPPLIES
MATERIALS
A Plain Wall Clock
Metallic Satin Oil Rubbed Bronze Spray Paint
1/8 x 32-in x 48-in Markerboard Hardboard
3/4-in Sequentia Wall Panel Moulding
1.125-in x 7-ft Baseboard Moulding
Silver Galvanized Steel Hardware Cloth
1/8-in Aluminum Rivets
White paint
TOOLS
Table saw
Router
Drill
Box cutter
Snips
220-Grit Sandpaper
#0 Steel Wool Pad
Nail gun and finishing nails
How We Made Our DIY Vintage Gymnasium Clock
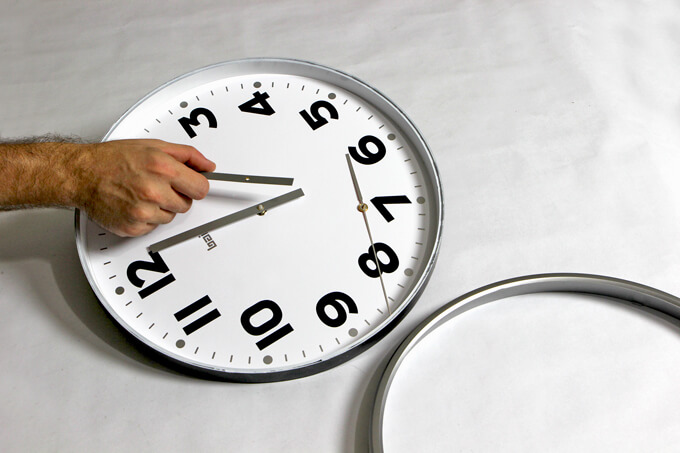
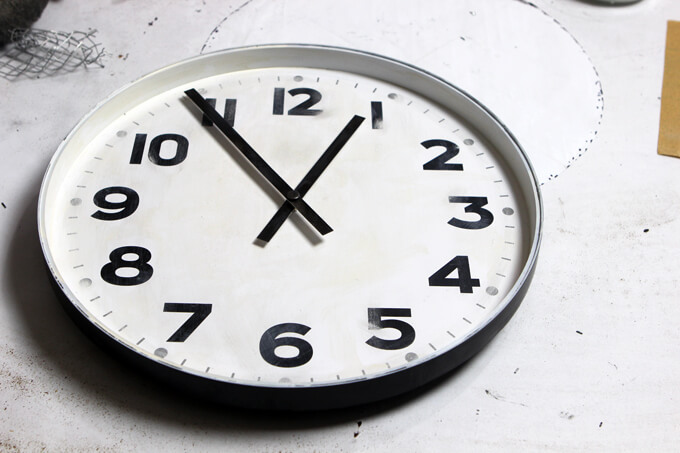
1. The first thing we did was to disassemble the clock. We pulled off the outer rim and piece of glass so we could we remove the hands off the clock by pulling them straight up from where they were connected to the center of the clock. We started with the hand on the top and then moved down one hand at a time.
2. We traced the outer rim of the clock onto a large piece of paper and cut it out to use as a template. We set it aside for when we were ready to use it.
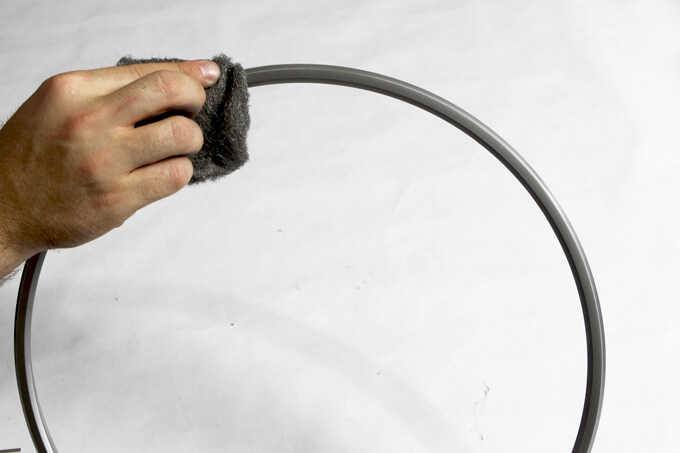
3. Next, we sanded the rim and the hands of the clock with a #0 steel wool pad to provide a rough texture for the spray paint to adhere to. We used steel wool because it leaves small enough scratches that the paint finish will still be smooth. The scratches left by sandpaper can be seen through the paint.
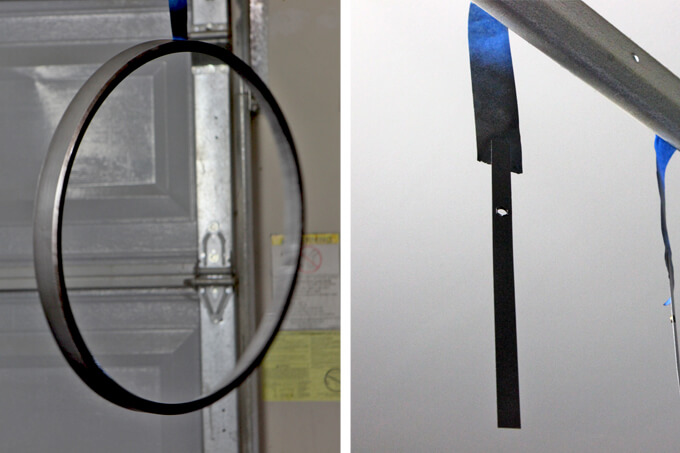
4. We spray painted the pieces we removed from the clock (the outer rim and the hands) with metallic satin oil rubbed bronze spray paint and hung them to dry so they would be out of our way.
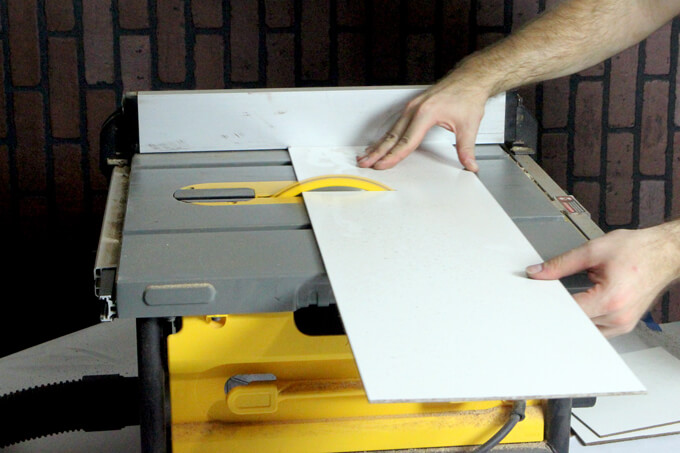
5 Then we cut the piece of hardboard down to the size of the square we needed to fit our clock. The square we cut was an inch and a half wider than the diameter of the clock. That gave us a 3/4 inch border around the clock, which is the same size as the moulding we were going to use.
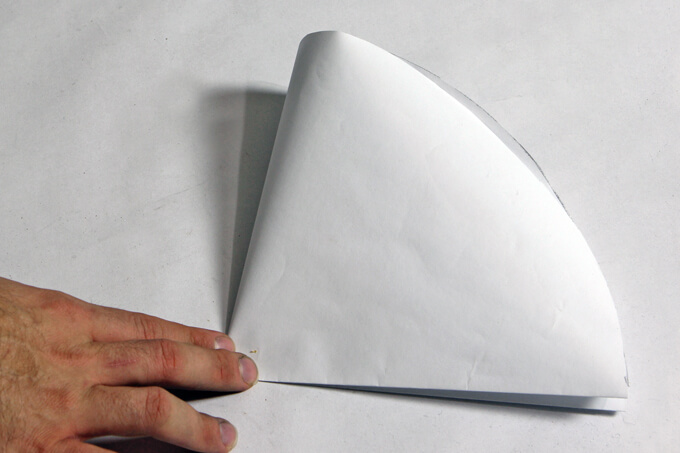
6. We took our paper template of the clock and folded it in quarters to get the radius of the circle, which was the length we needed to set up our router jig.
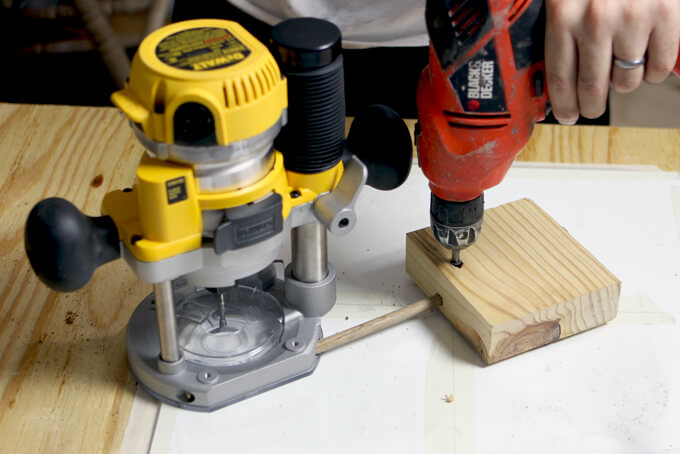
7. We cut a circle out of the square piece of hardboard with a router by attaching a scrap block of wood to the router base so it could rotate around a central point. We used the paper template to measure from the center point where we screwed into the board to the outside of the router bit.
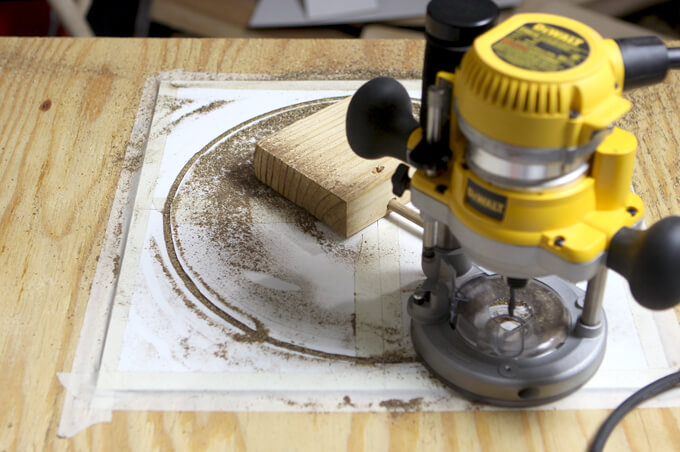
8. Once we had it set up, we turned the router on and plunged it into the board and rotated it until we completed our circle. We made sure we had a scrap board under the actual board we were cutting to protect our work surface and provide thicker material to secure the central screw.
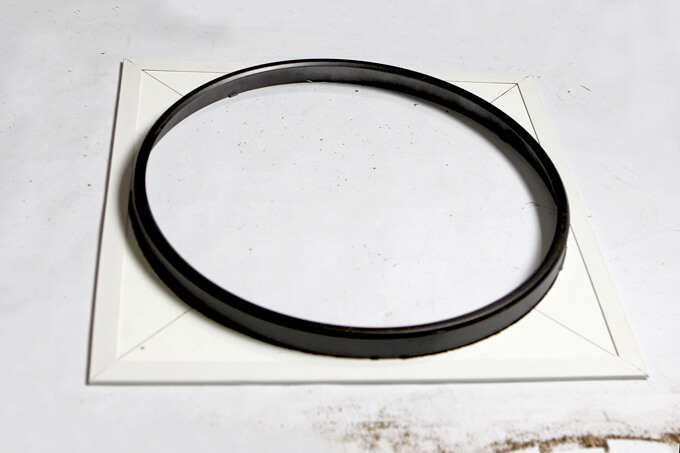
9. Once we were done with our circle we had a nice cutout where our clock would fit.
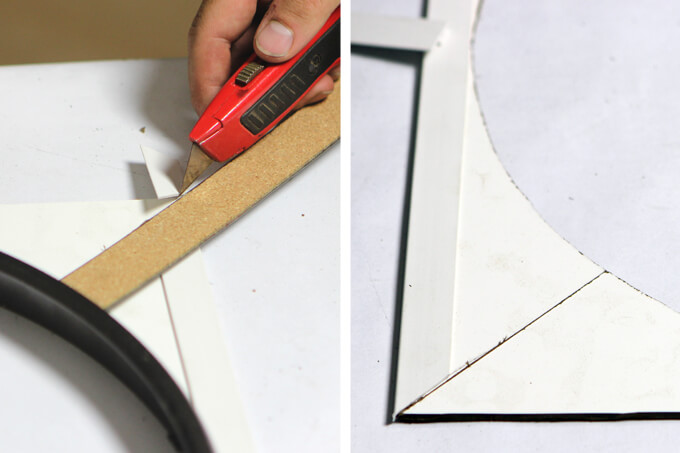
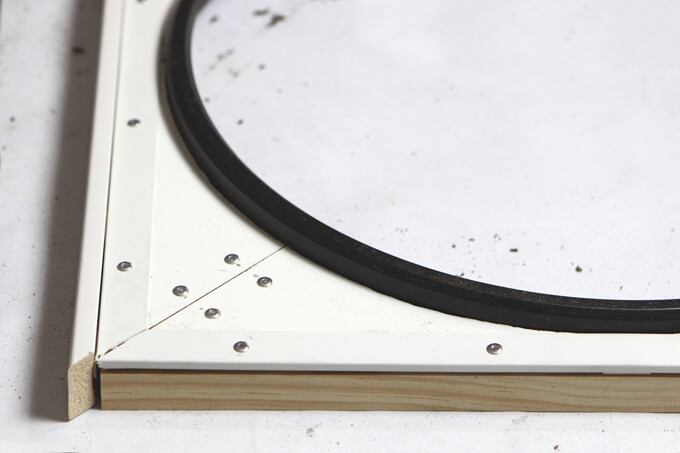
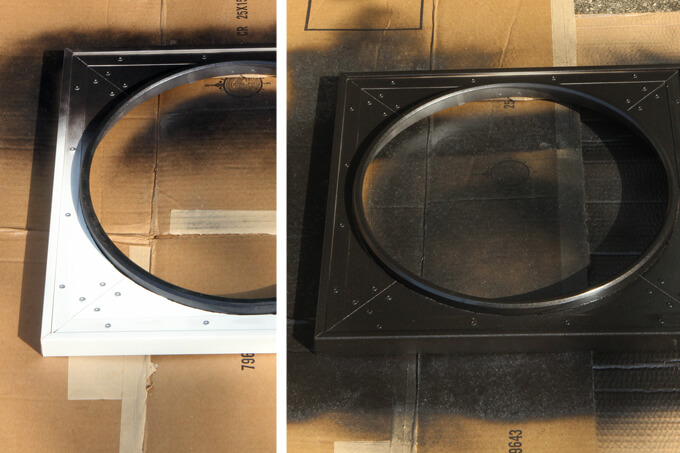
10. After attaching the 3/4 inch wall panel moulding over the rim of the hardboard, we took a straight edge and a box cutter and scored the board and the moulding at a 45-degree angle. We did this for each corner.
11. Once all the moulding was attached and each corner was scored, it looked like this.
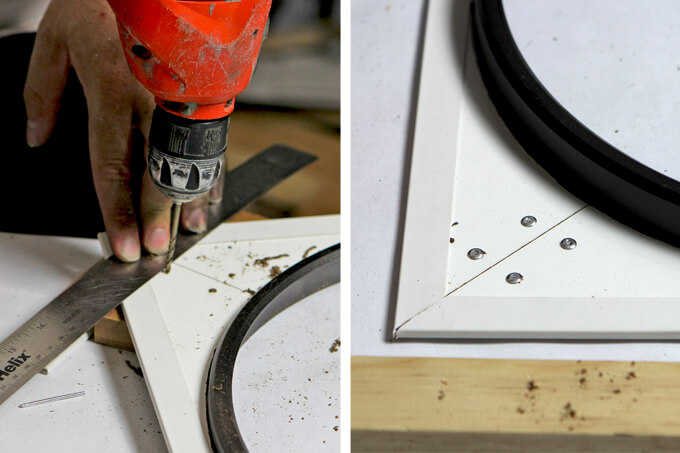
12. We drilled holes where all the rivets would go with a drill bit that matched the size of the rivets. We used 1/8th rivets so we used a 1/8-drill bit. Once we had the holes drilled, we added four rivets to each corner.
13. Then we attached four rivets on each side through our top board into a thicker board behind it to support the outer frame.
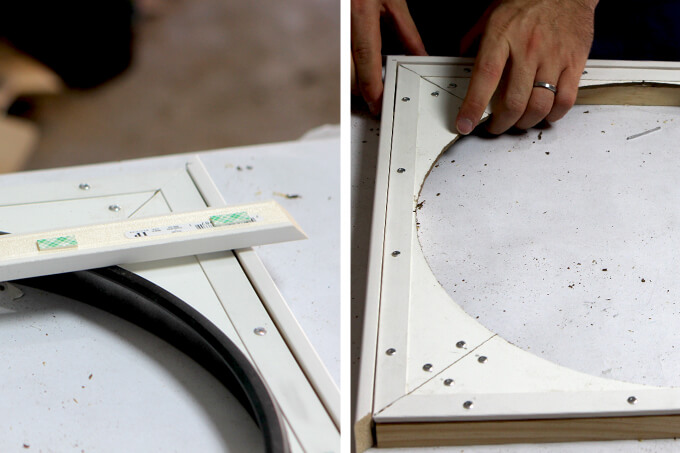
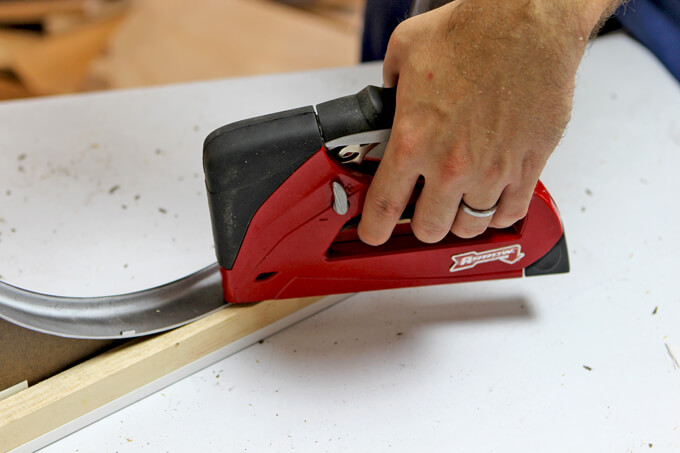
14. We cut the baseboard moulding to frame the outside of the square at 45-degree angles using our miter saw. Then we attached it to the clock frame using mounting tape to hold it in place making it easer to secure it with finishing nails.
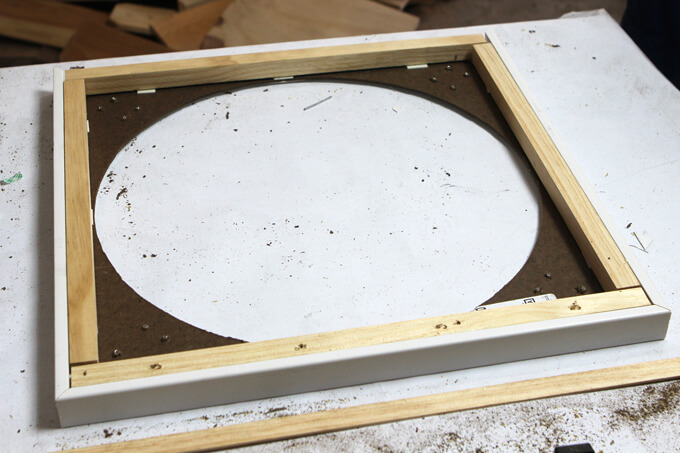
15. This is what the back of our clock frame looked like once we had all the pieces attached.
16. We secured the clock rim that we painted to the new frame we built with finishing nails.
17. After our frame was complete, we spray painted the entire thing with the metallic oil rubbed bronze spray paint. We were pleasantly surprised with how convincing the spray paint made the plastic look like metal.
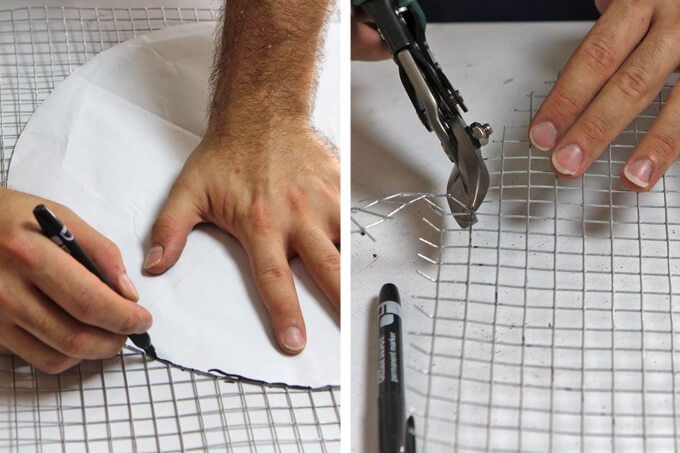
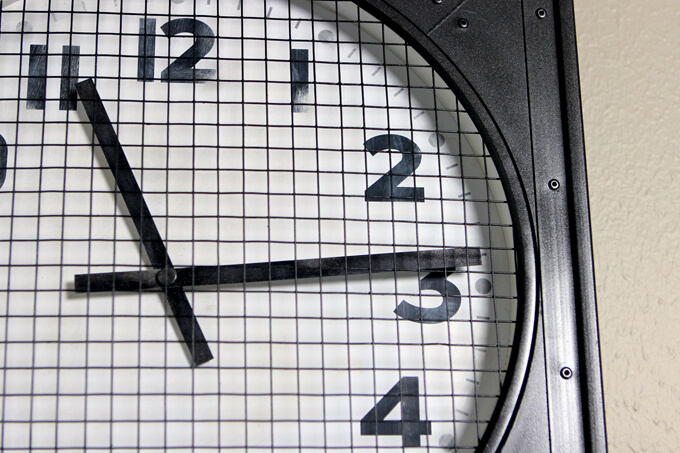
18. We took a piece of galvanized steel hardware cloth and traced an outline of our clock using our paper template and a permanent marker. We used tin snips to cut out the circle.
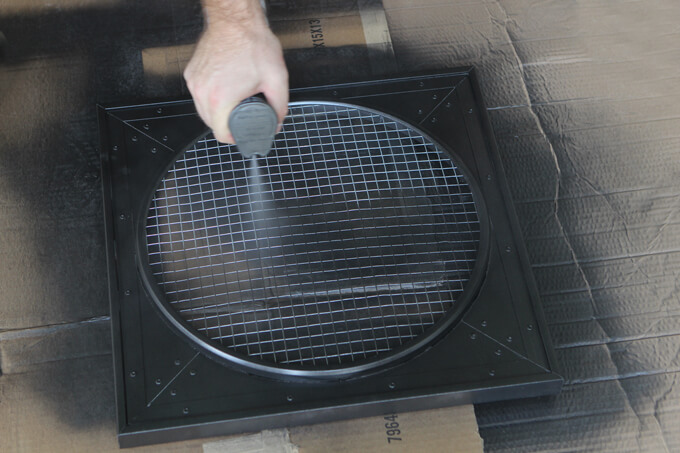
19 We inserted the metal mesh into the clock and spray painted it to match the rest of the frame.
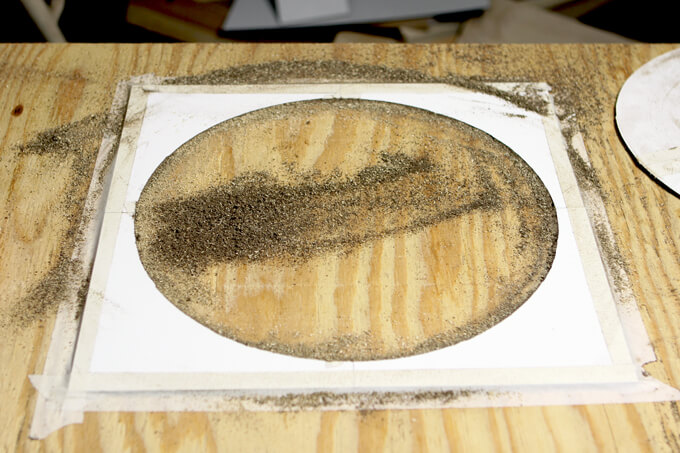
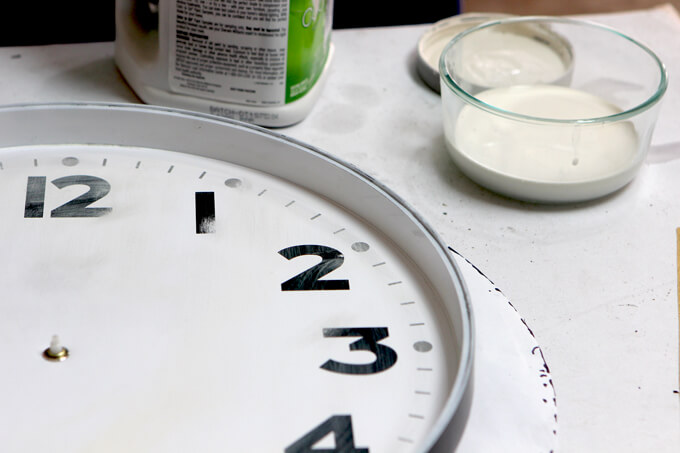
20. We used 220-grit sandpaper to distress areas on the face of the new clock to give it a more vintage aesthetic to match our new frame.
21. We also did a light wash with an off-white paint color to make it look less bright and white and more worn and aged.
22. Then we reassembled the hands on the clock.
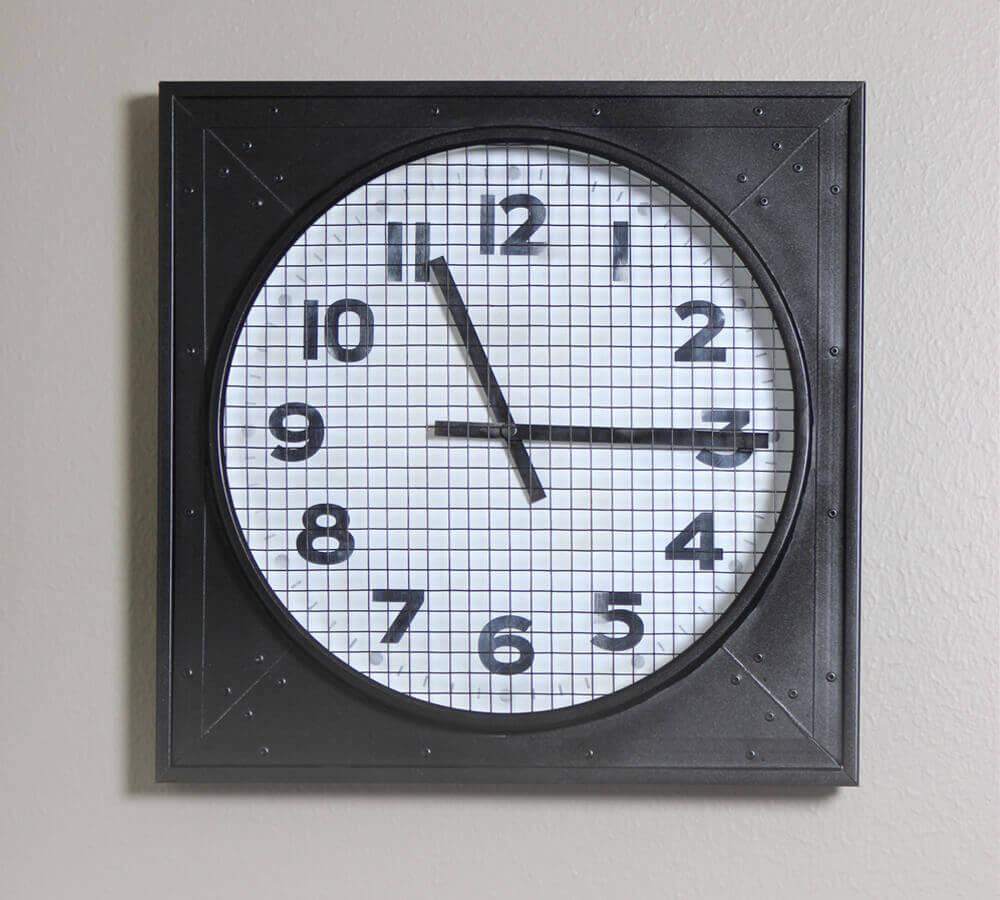
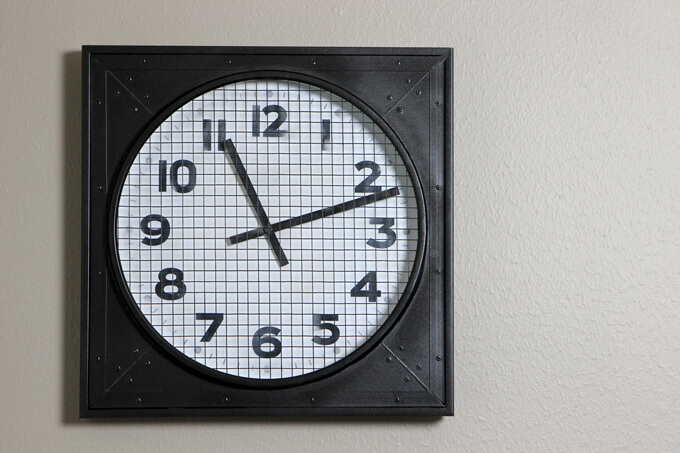
23. Finally we snapped the clock back into the rim. We did not put back the glass because we replaced it with the hardware cloth. Then hung our DIY vintage gymnasium clock up in our gym!
As I am sure you can tell we decided not to go full rust on the outer appearance of the frame of the DIY vintage gymnasium clock. We had intended on adding more colors to make it have a similar color but we ended up being happy with how the spray paint made the plastic look like metal and how it matched everything else in the room by being the darker oil rubbed bronze color.
What a difference, right? It was so much fun to take this modern clock back in time. Pun intended.
I feel like every project we complete for this room transforms the space into an old warehouse just a little more. It is so much fun to work on this room because it is different. The DIY vintage gymnasium clock adds a special touch and has easily become one of my favorite decor projects we have done.
I know I have said it a million times but Brent really does rock at being able to figure out how to make things look exactly like I want just by looking at them AND he can figure out all the supplies we need in one trip to the hardware store just off the top of his head. We always end up with just the right amount of materials and stay on budget. He’s got skills.
This project is actually not a new one. I did this one before we started the blog but it is sitting in my office and it caught my eye today and I realized I haven’t shared it yet and since I love it so much and it was super simple to put together I thought I would take the opportunity to show you this easy succulent display I made for our home office.
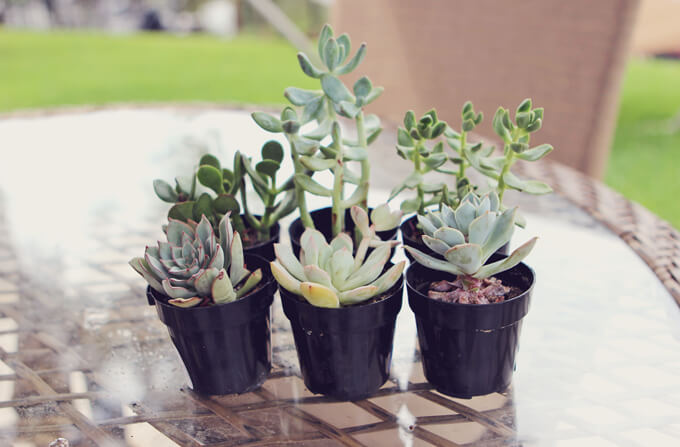
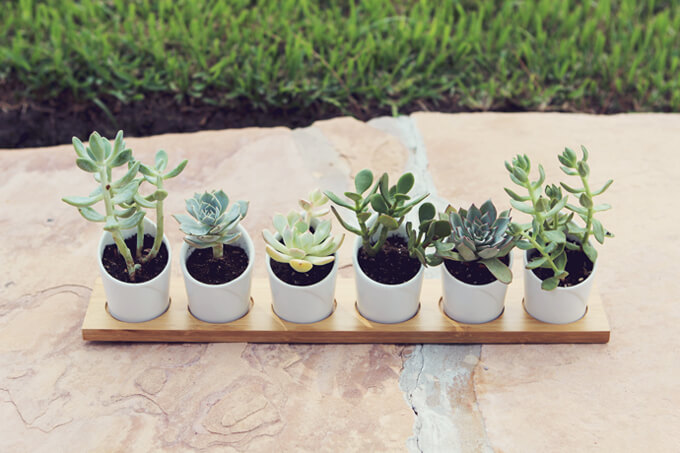
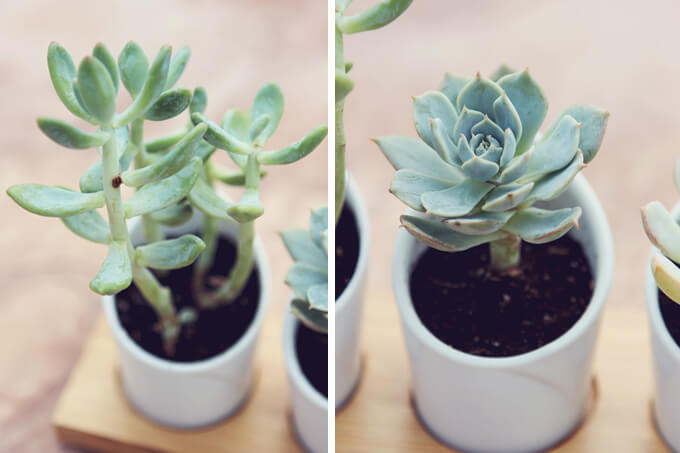
I’m sure I am in the majority when I say I am kind of obsessed with succulents. I love the colors, interesting shapes, uniqueness and simplicity. It is kind of impossible to have just one succulent. I wanted to create a display that highlighted how succulents come in a variety of shapes and sizes.
It was around this time last year I mentioned to my mom that I wanted to create a succulent display but I wasn’t sure what I wanted it to look like so we had a mother/daughter shopping day and brainstormed ideas along the way. We hit up the clearance section of Lowe’s and found they had all their cute little succulents half off. It was hard to pick my favorites but I finally narrowed it down to six that each had their own interesting appearance.
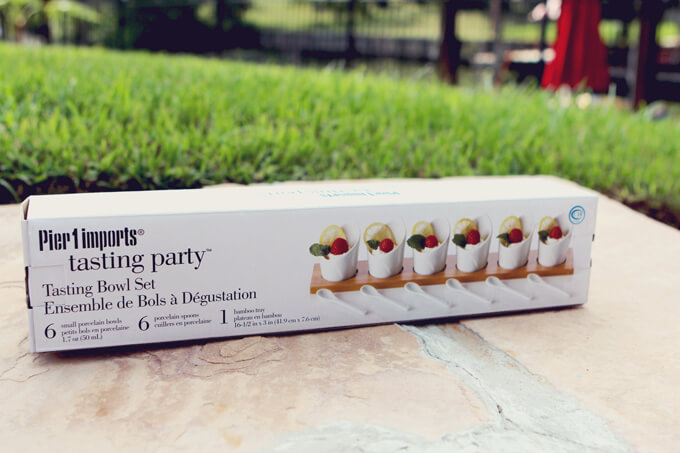
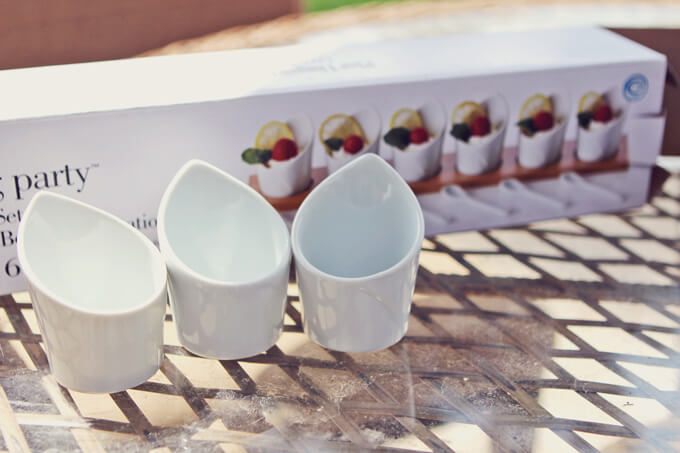
I still had no idea what I wanted to put them in or how to arrange them but our next stop was Pier 1. I figured they might have a cute bowl or mug fairly cheap that might make an interesting display. Then we found a tasting party set that had little unique shaped cups sitting on a bamboo tray that was perfect!
Even though we weren’t sure if they were going to fit, it was too good of an idea not to try and MAKE them fit. And when I went to check out, the set was on sale too! $11 for the cups, tray and as an added bonus, mini spoons! I obviously didn’t need the mini spoons for this project but I was pretty excited to have some mini spoons to eat with should the occasion arise. Who doesn’t love mini spoons?
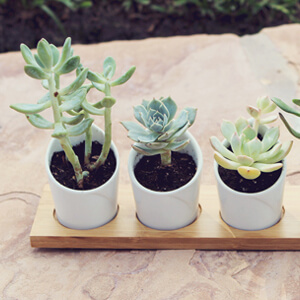
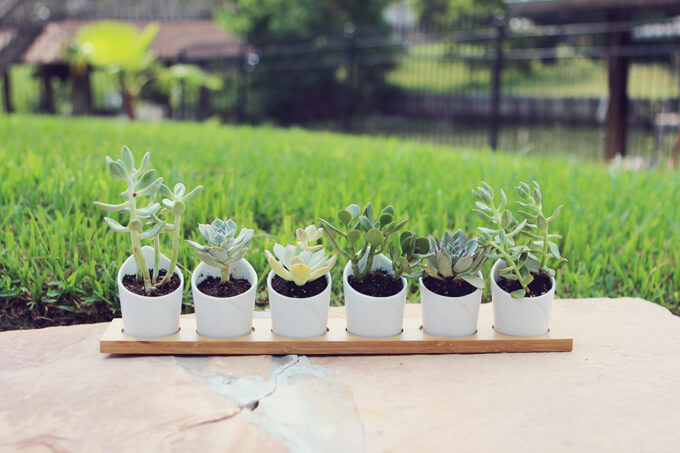
They were just the right size! I planted each succulent in a cup and arranged them on the tray based on height.
This was extremely easy to put together but I just love the results. I have been enjoying it for a year now and it makes the perfect desk decor for our office. It’s such a simple and cute way to show off my succulents collection.
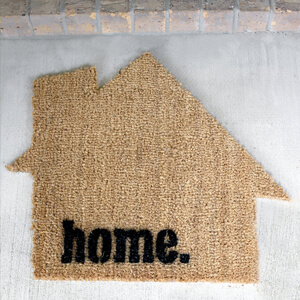
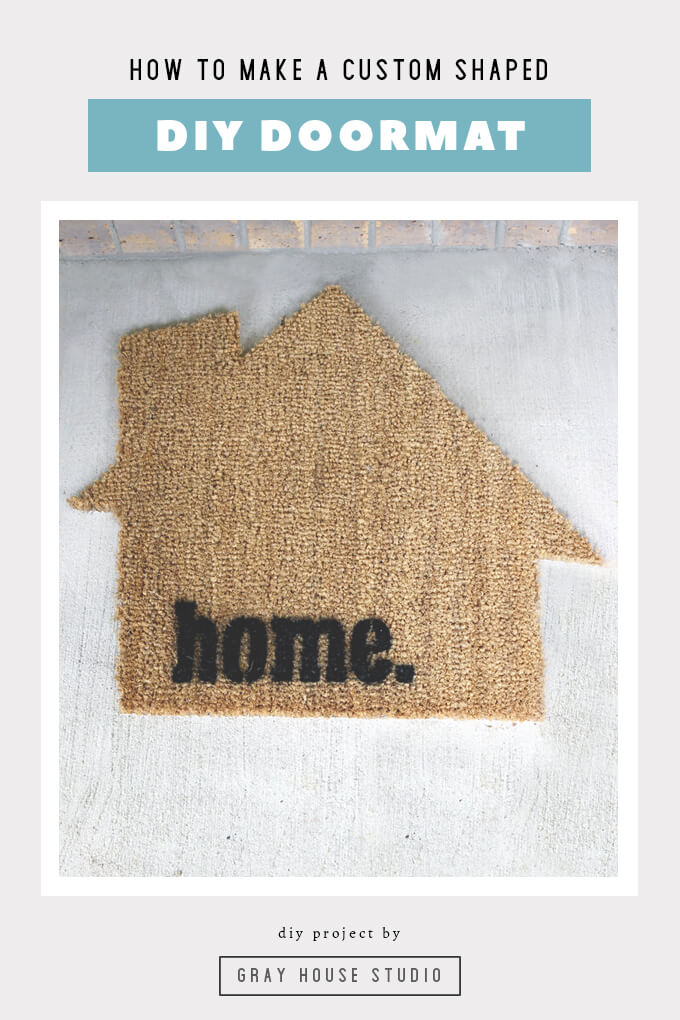
Making your own DIY doormat is an easy and fun way to bring a little personality to your doorstep! The options are endless with what shapes you can create.
Today we sharing a quick, easy and inexpensive do it yourself project that will bring a punch of personality to your doorstep! We are walking through how we made a DIY doormat.
It is just me or does it seem as though doormats have a lot of pressure on them lately? Gone are the days where they only had two jobs, to give a friendly welcome and to subtly remind people to wipe their feet so they didn’t track dirt into your home.
Now doormats have the added expectation to be funny, clever, relevant or stylish. The more personality and quirkiness the better!
I’m not judging this trend. In fact I am all about jumping on the bandwagon. I saw a few doormats in stores that caught my eye because they were different shapes then the typical rectangle mat and thought that would be a fun touch for our front porch but the price tag was a little high for a mat that is going to get walked all over.
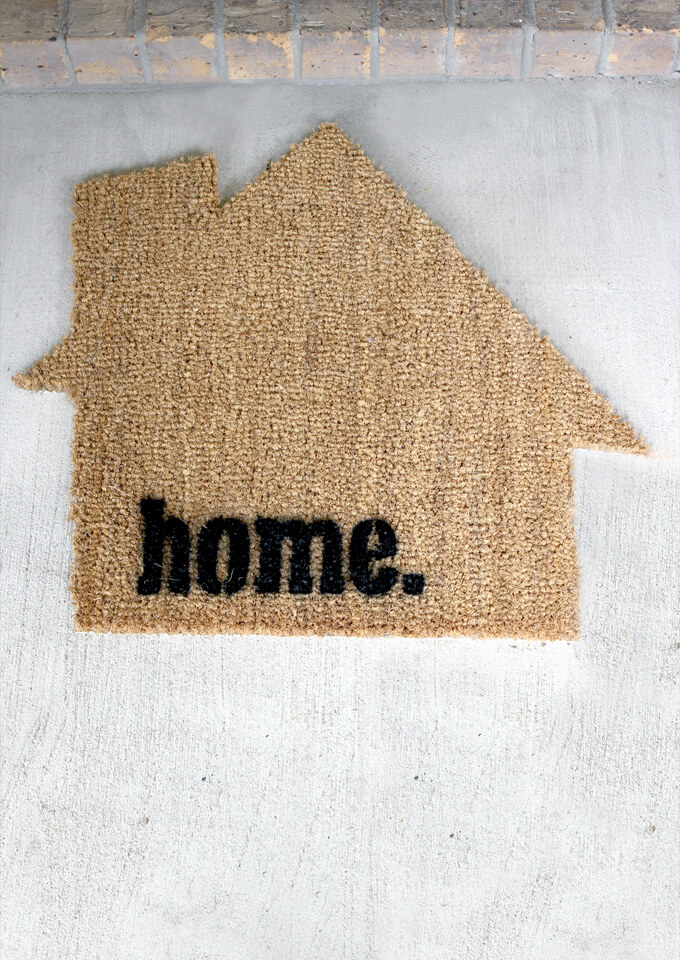
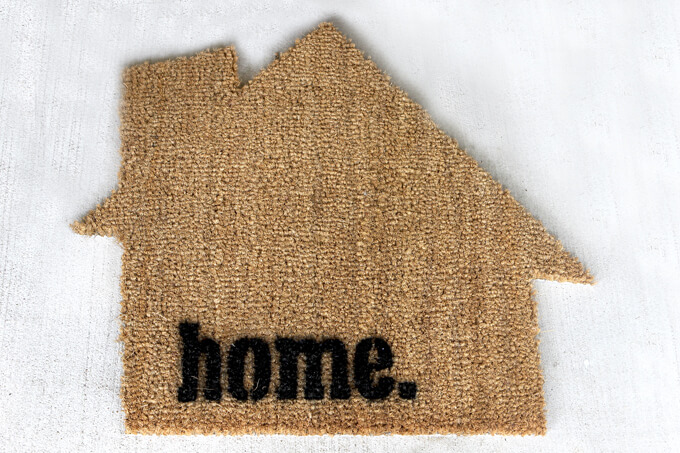
So we decided to make our own custom shaped doormat. We kept it simple and created a Gray House logo shaped welcome mat for our front porch.
Interested in creating your own DIY doormat? Watch the video or follow along with the steps below to see how easy they are to make.
How to Make a DIY Doormat in a Custom Shape
SUPPLIES
Plain doormat (We bought a TRAMPA doormat from IKEA)
FYI: This post contains affiliate links to the supplies and tools we used to make our DIY ball pit. As an Amazon Associate Gray House Studio earns from qualifying purchases. This is at no extra cost to you. We appreciate you supporting this site. Read our privacy and disclosure policy.
Like our video? Subscribe and help us reach our goal of 100k subscribers.
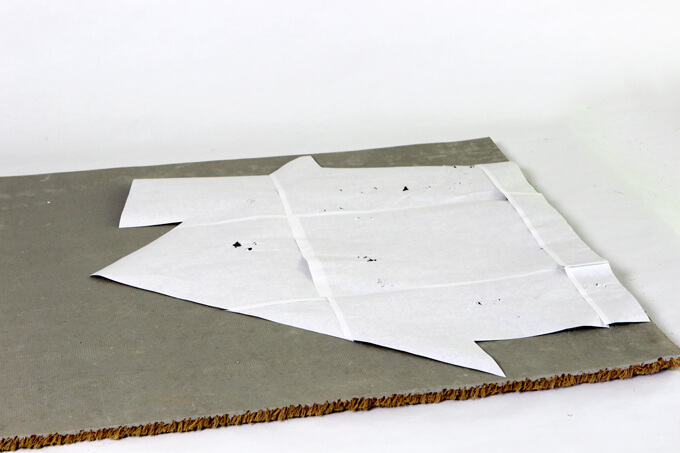
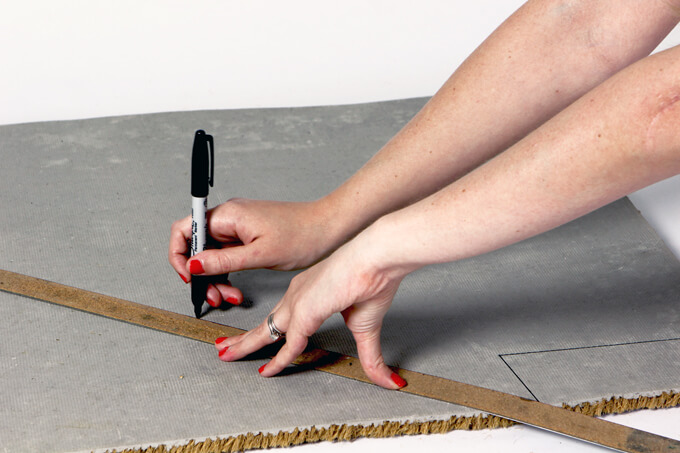
1. The first thing I did was to flip the doormat over so the rubber back was face up. Then I took our large template and also placed it face down on the back of the mat.
I made our custom template by printing off our Gray House logo onto multiple sheets of paper and cutting and taping the pieces together
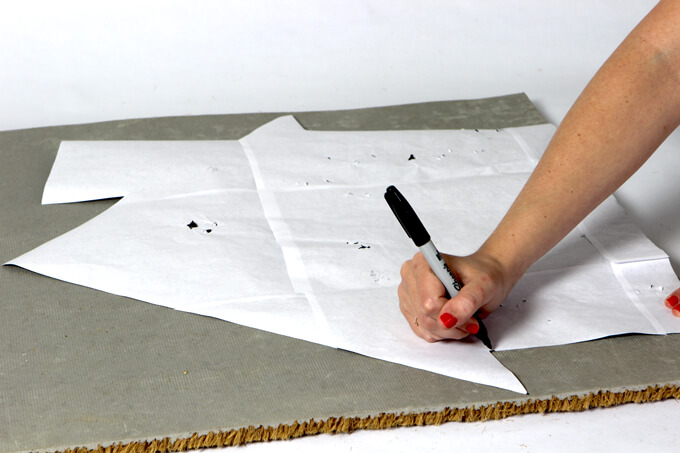
2. Next, I used a permanent marker to mark all the corners of my template. The trick was to trace my shape on the back of the mat in reverse so when I flip the mat back over the shape looks correct and none of the lines I traced are visible .
3. I used a large ruler to connect all the corners I marked so that the lines would be nice and straight.
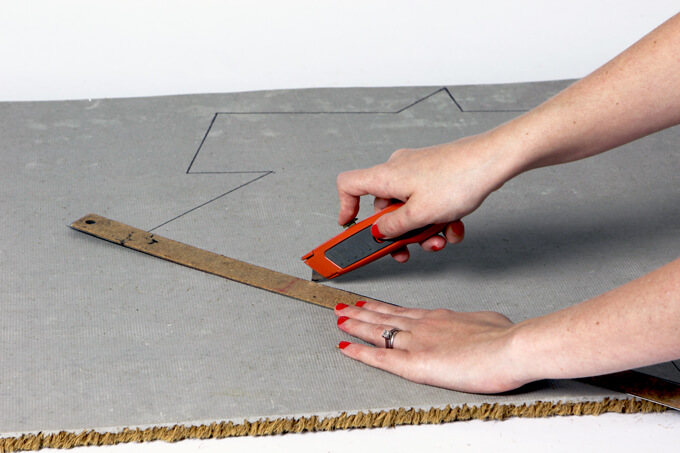
4. Once I was finished tracing I had a reverse image of my shape. This particular mat worked really well because the latex back was a light gray and it made it easy to see the shape.
Next, I took a box cutter with a fresh blade and used a ruler to cut along the lines I traced.
The blade cut through the rubber easily and I was able to pull away all the excess pieces of the mat.
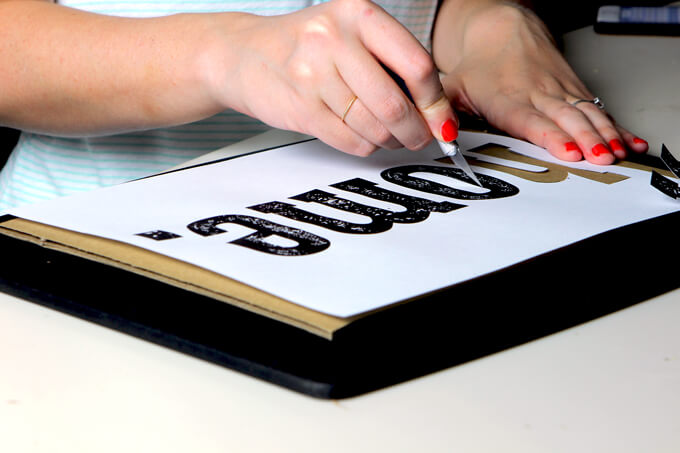
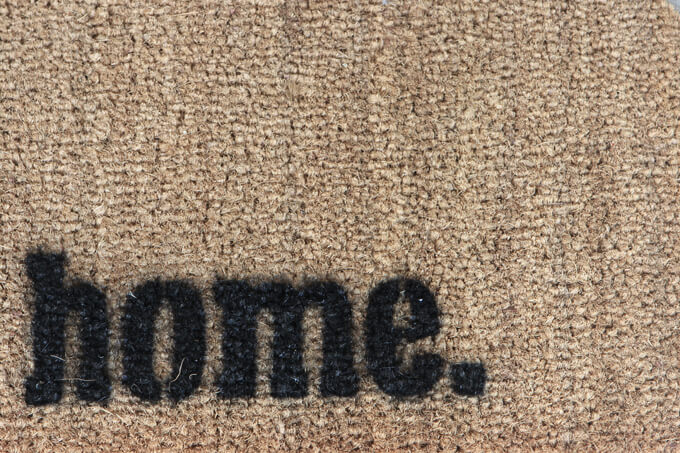
5. To add an extra touch, I created a stencil with the word “home” out of cardboard.
I printed out the word in the font I wanted and then used an X-Acto Precision Knife to cut through the paper template and cardboard.
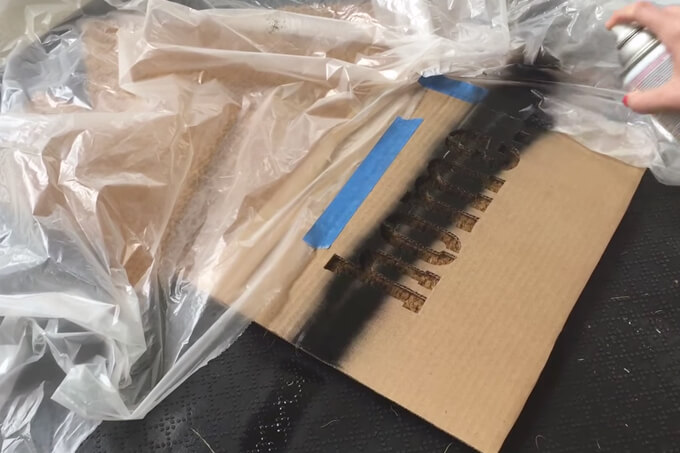
6. Finally, using a piece of plastic sheeting and painters tape I covered the entire mat except where I placed my stencil.
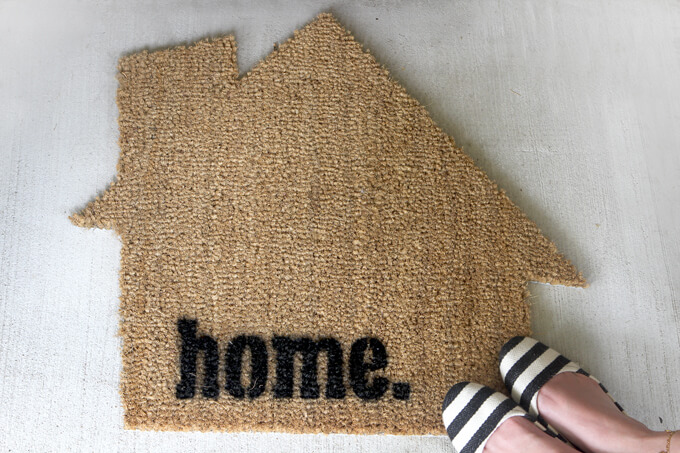
We hope you find this quick and easy welcome mat project is a fun way to bring personality to your doorstep. This project was an enjoyable and affordable DIY project that I was able to complete in under an hour and for under $25. I like that the doormat is unique and we didn’t have to spend a lot of money on it.
I see us making more custom shaped mats in the future so we can change them in and out depending on season or even mood.